Anycubic Kossel E3D V6 Upgrade
I have prepared this article for anyone willing to spend some time upgrading their Anycubic Kossel printer to E3D V6 hotend from original V5 J-Head.
Main reason for this upgrade was to use all metal heat break for printing Nylon, ASA and achieve better printing results.
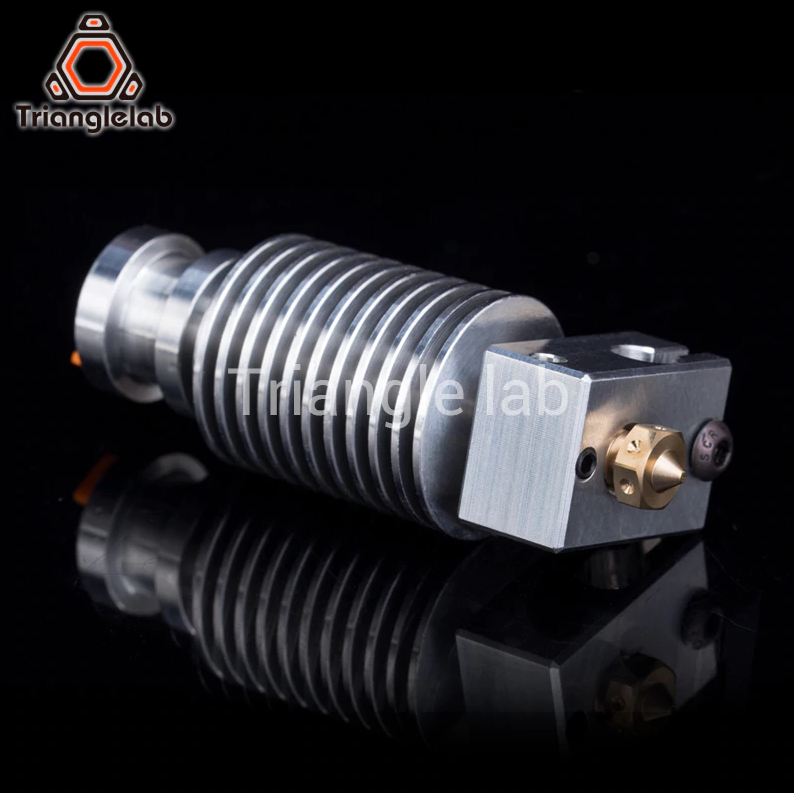
Choosing the right E3D V6 version
I have chosen this awesome Trianglelab E3D V6 kit because Trianglelab makes excellent quality products for a decent price.
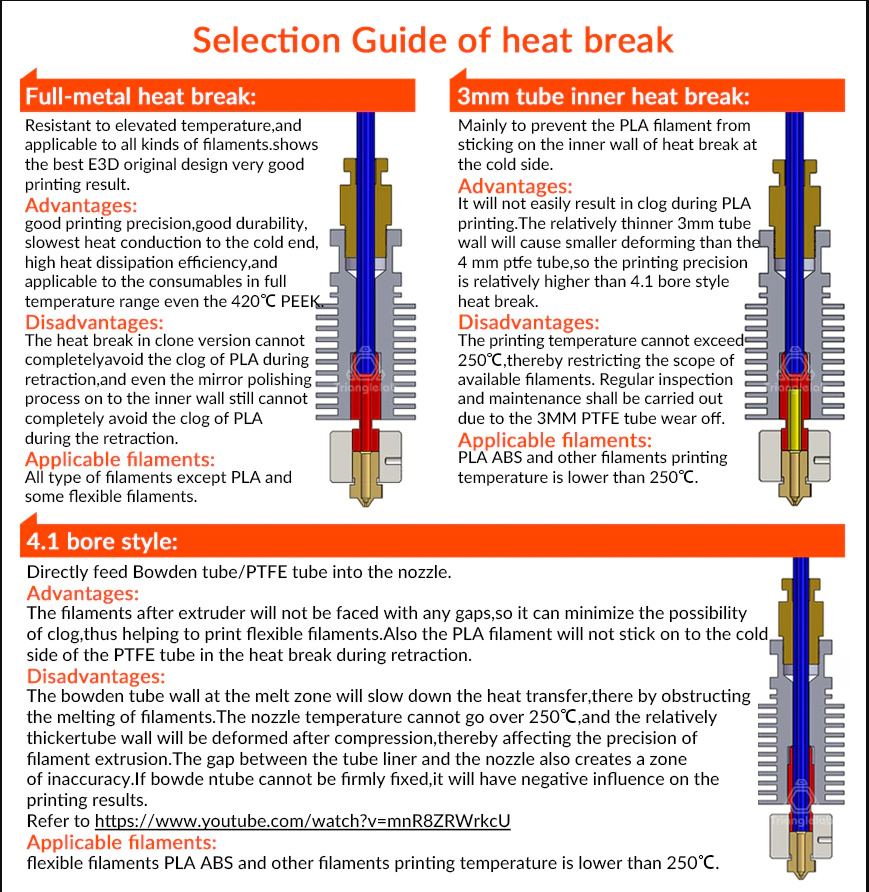
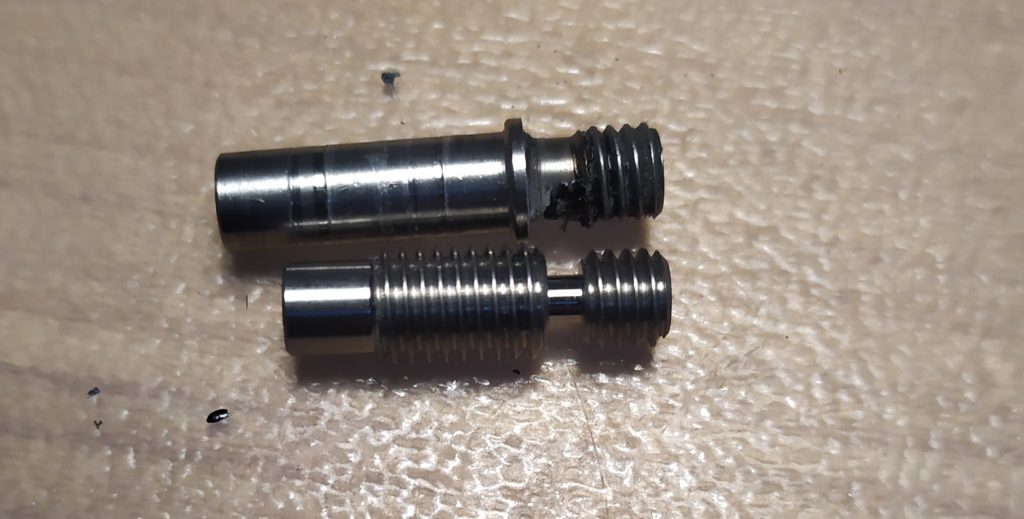
Choose your heat break
Trianglelab has prepared an awesome guide how to choose the best heat break for your demands
I have choosen full metal.
If your goal is to print materials such as PLA, PETG, order 3mm tube inner heat break.
Default heat break on your Kossel is bore style.
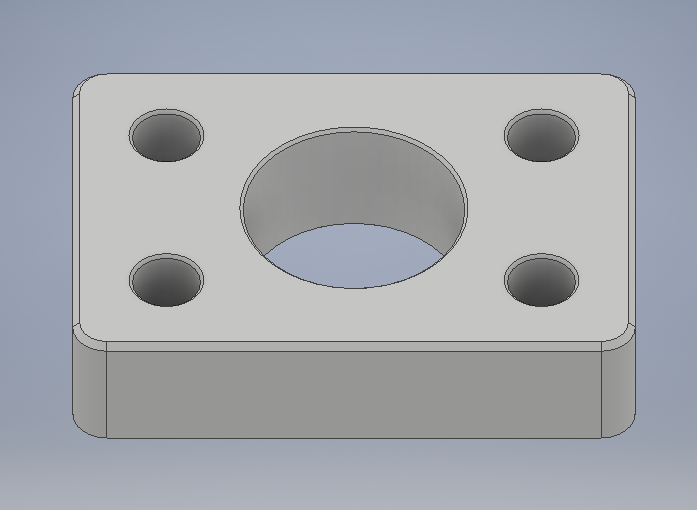
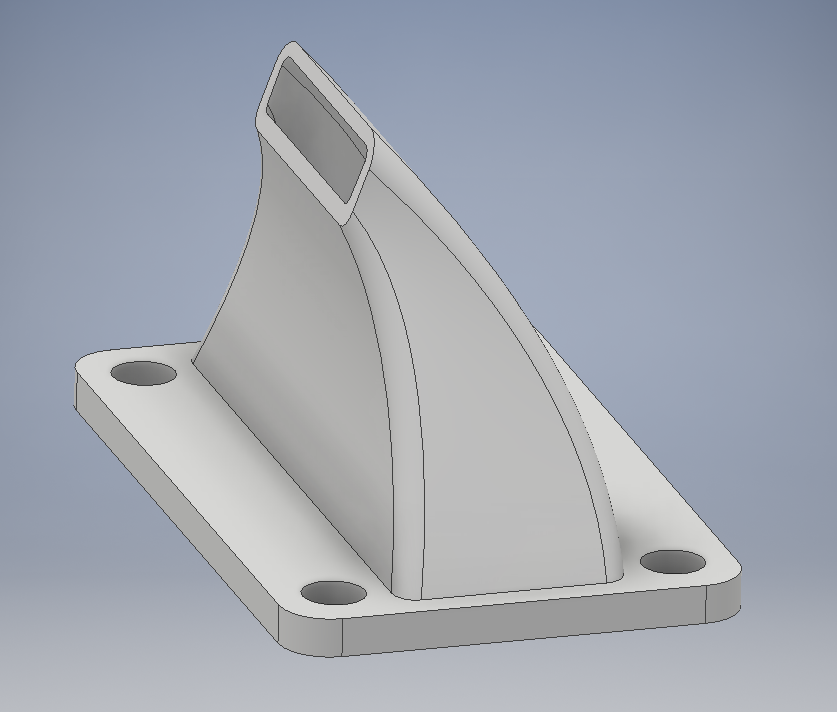
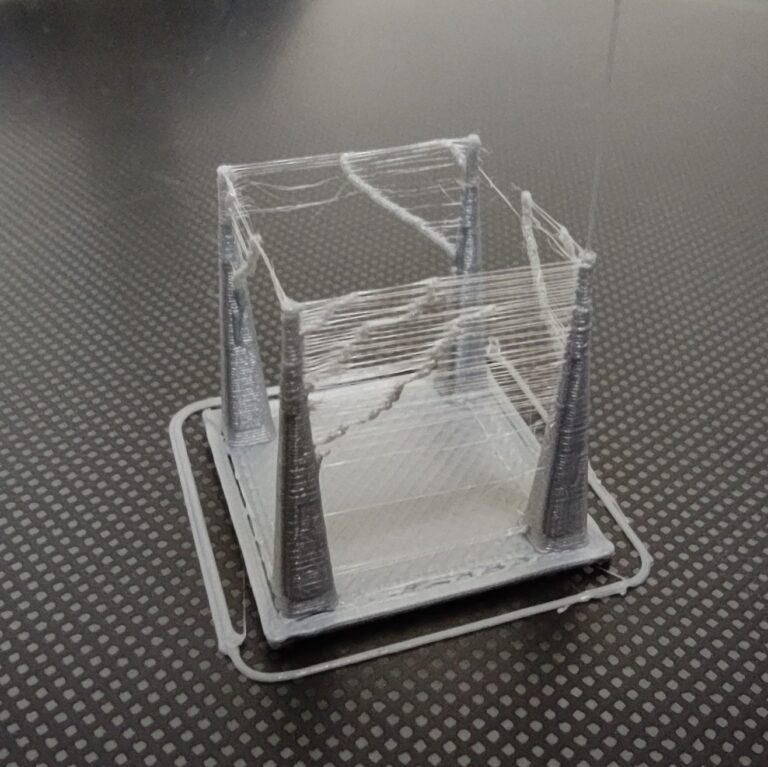
Print these parts before taking your printer apart
Make sure you have printed these parts before disassembling your printer.
It is not possible to go from V5 to V6 without these modifications.
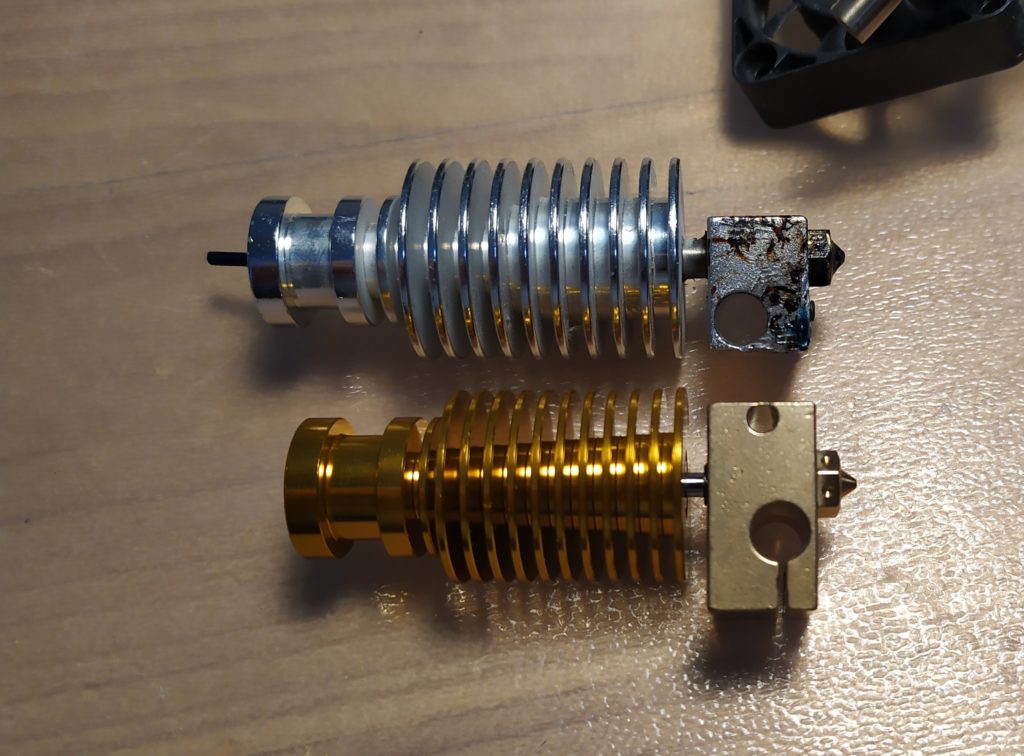
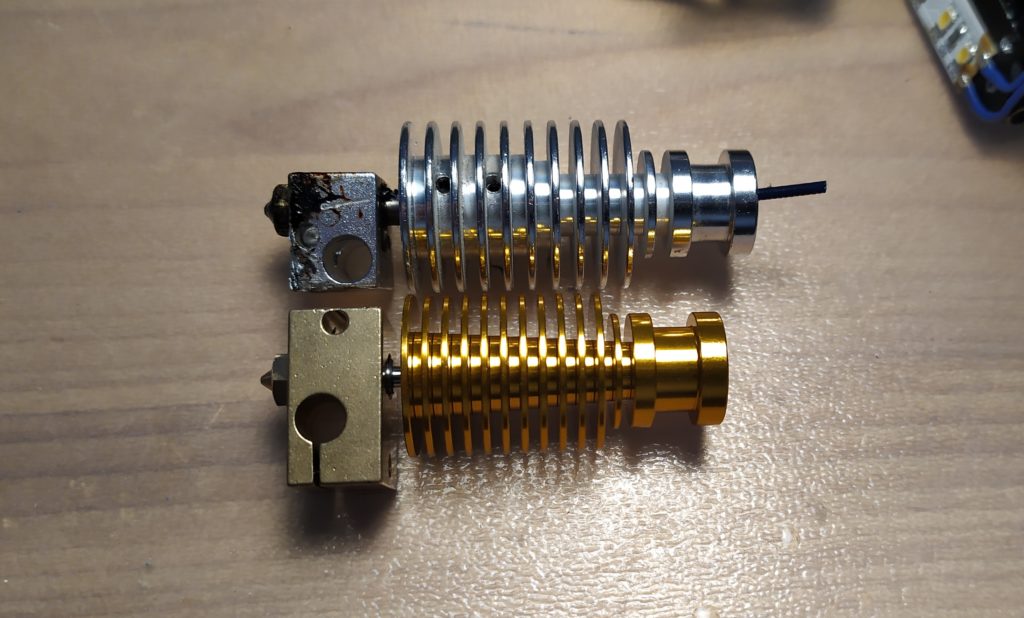
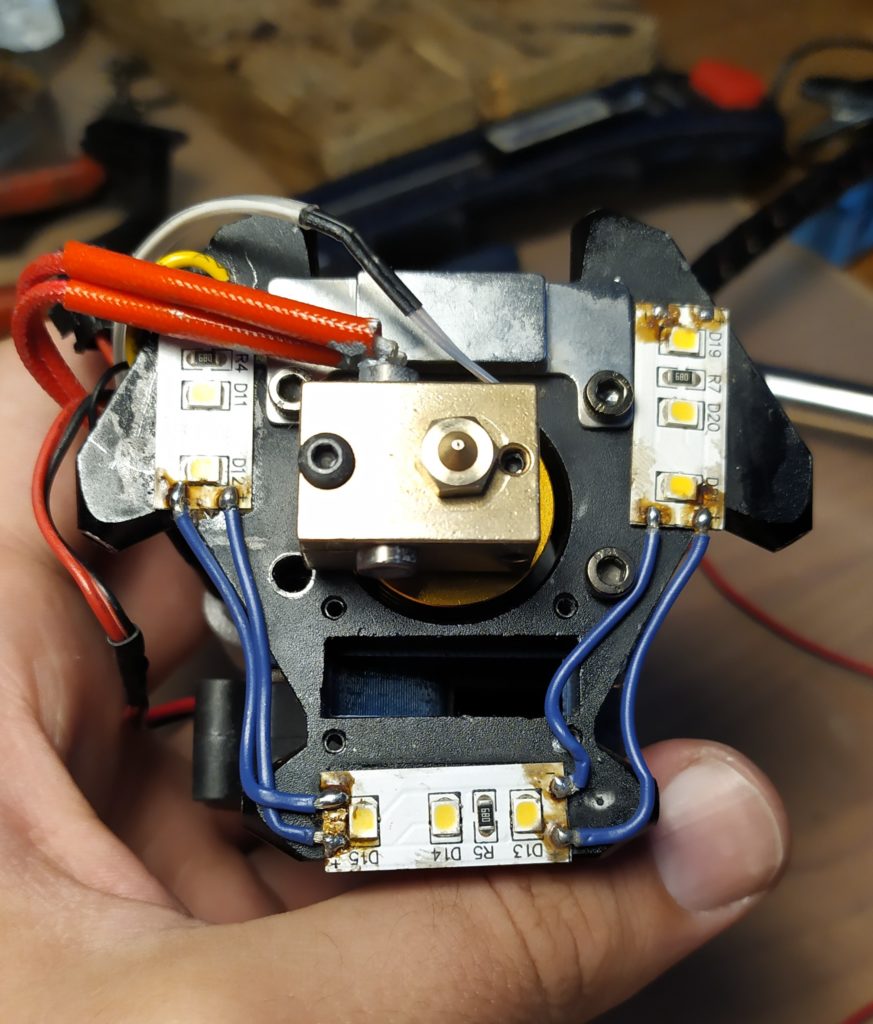
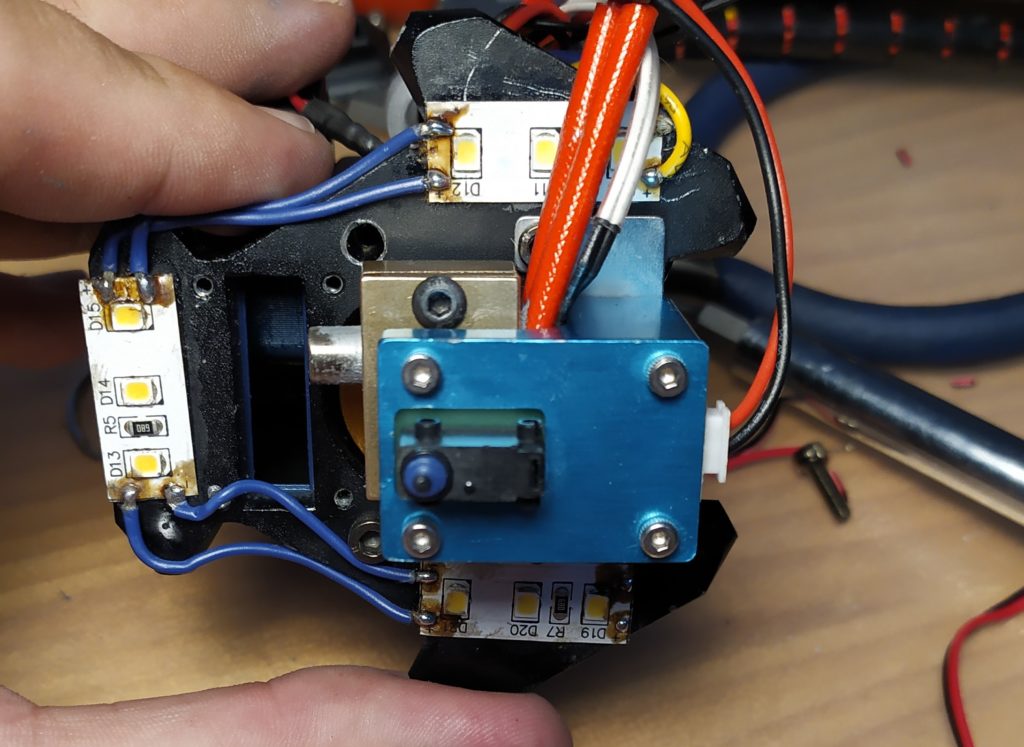
E3D V6 vs V5 J-Head
As you can see in the pictures there are many differences between the original V5 J-Head and your new E3D V6.
Top – Anycubic V5 J-Head
Bottom – Trianglelab E3D V6
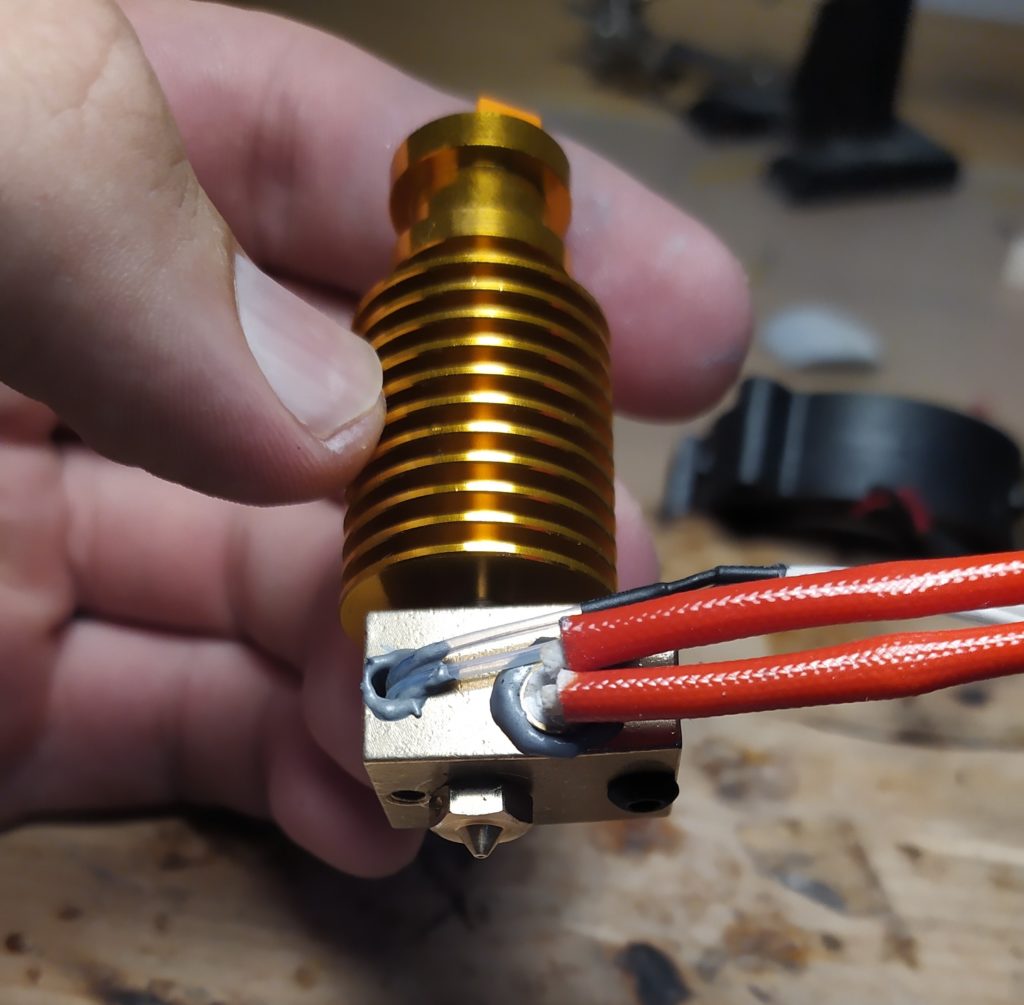
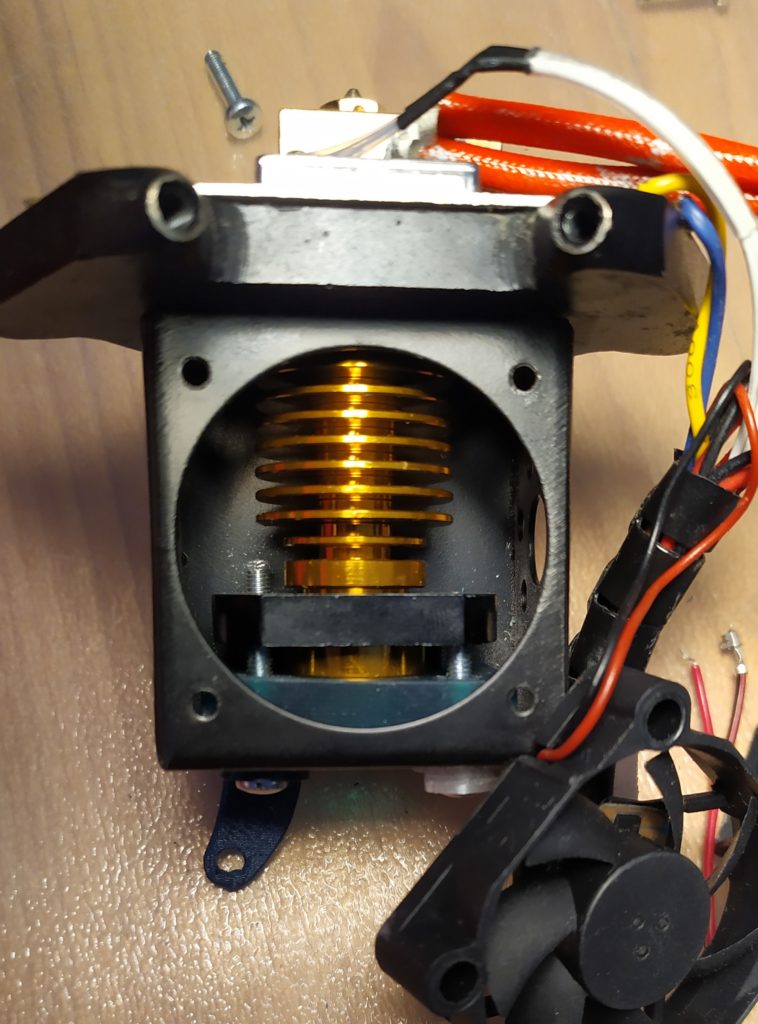
E3D V6 assembly
I recommend using cooling paste or a high temperature Loctite threadlocker on all of the hotend threads.
V6 heatsink does not have any screws for locking heat break, material thermal expansion solves this.
1) Mount nozzle into hot end as far as you can and tighten, use 10mm key or bit
2) Apply cooling paste on the heat break thread
3) Screw heat break into hot end
4) Apply Cooling paste the heat break thread
5) Screw heat break with hot end and nozzle into heatsink
6) Apply thermal paste in the thermistor and heater hotend holes
7) Insert heating element and thermistor into your hot end
8) Tighten all screws
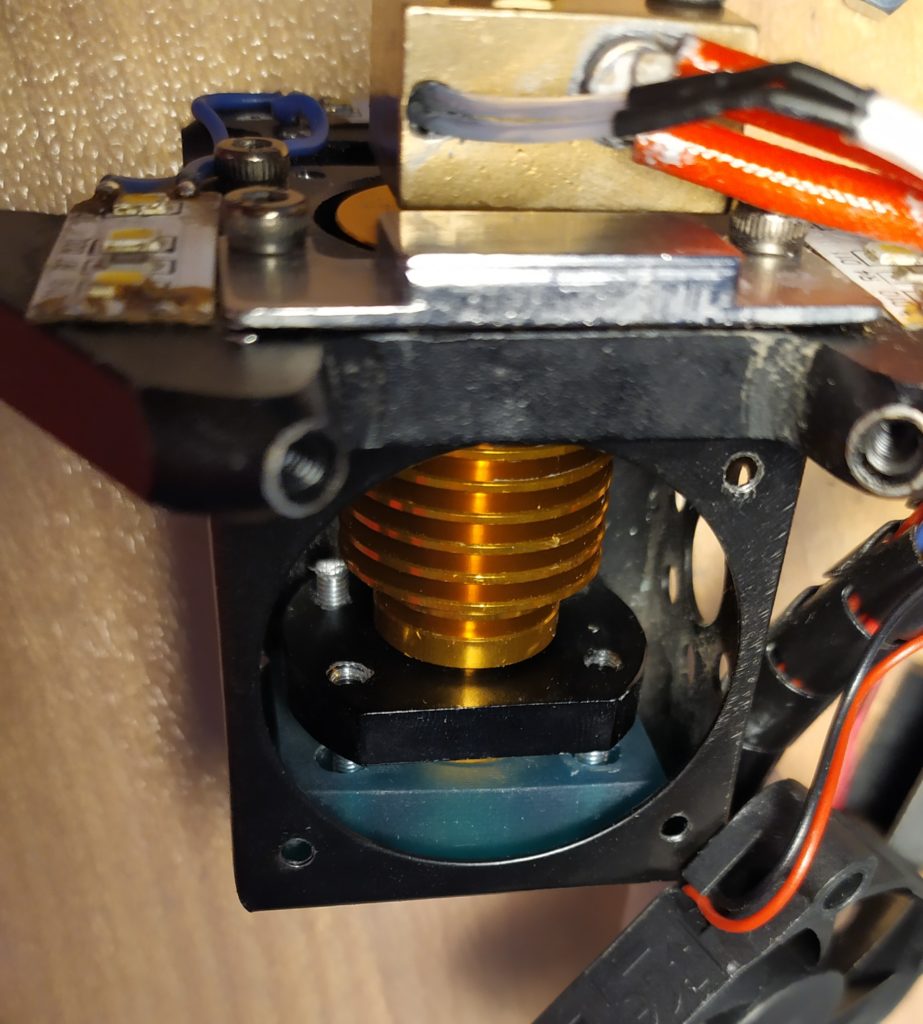
Assembly
1) Insert spacer
2) Insert E3D V6 setup
3) Mount holder on heatsink
4) Use longer than stock M3 bolts
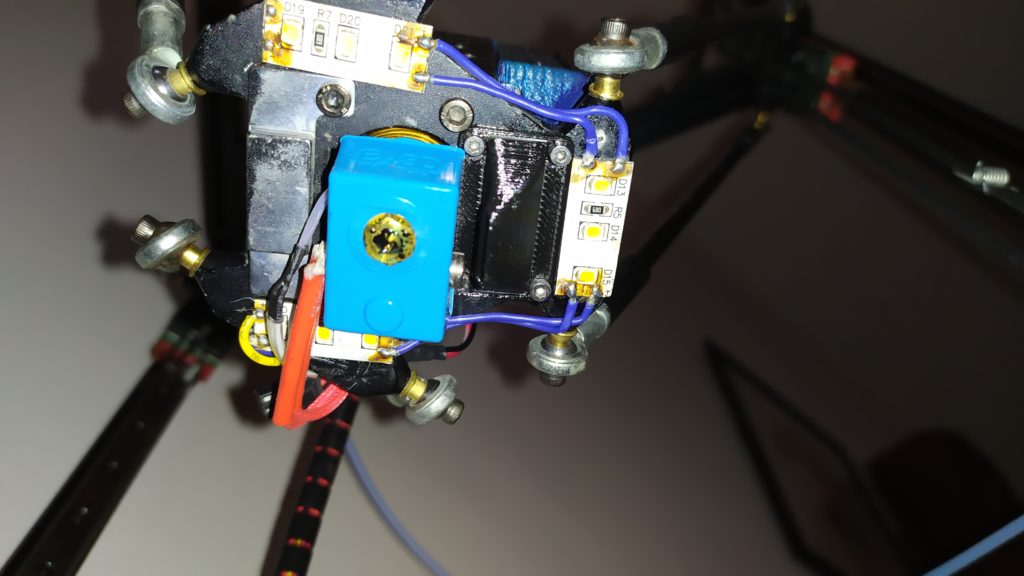
Adjusting
V6 heatsink has smaller diameter than original V5.
There are two things you have to check before tightening all bolts:
1) Make sure that there is the same space all around between the heatsink and the printer head body
2) Heatsink axle has to be in the middle of the top hole of your printer head body
3) Hot end has to be parallel to autolevel sensor base
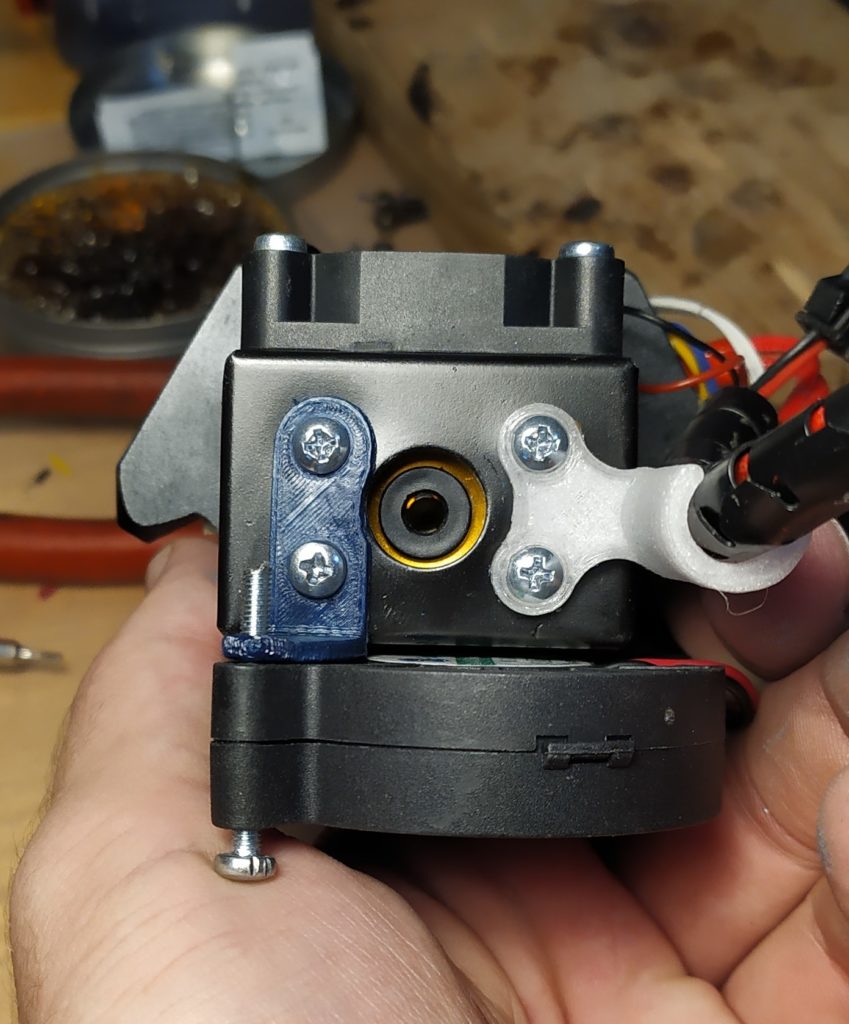
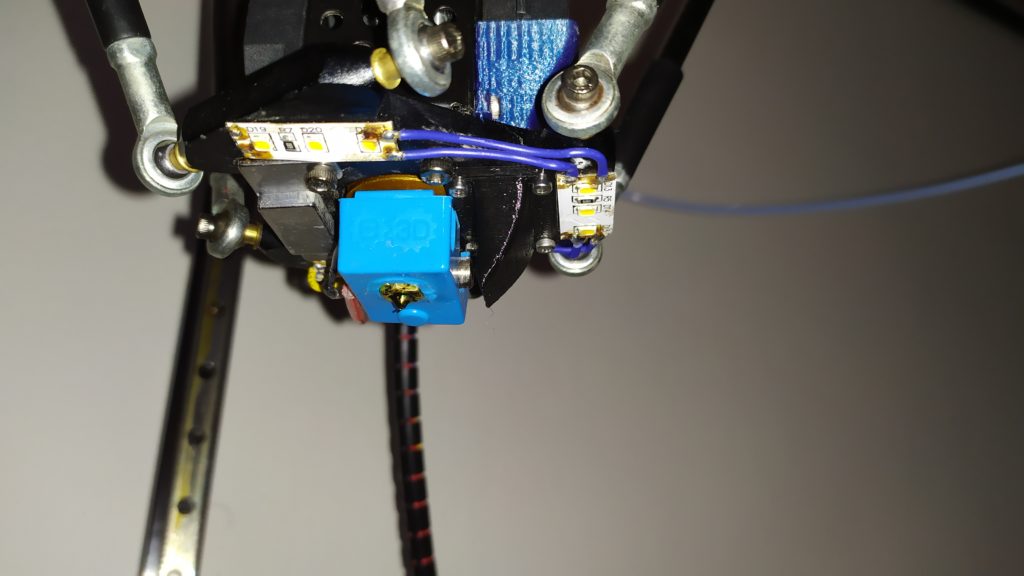
Z height sensor check
Check if you can still mount you autolevel sensor.
Loose heating element bolt, push the element gently to the sensor and tighten the bolt again.
It is necessary to have some space for a cooling duct.
Cooling duct

PID Calibration
Do not forget to perform PID calibration.
You have changed the entire hot end and it’s thermal charasteristics.
Recommendation
As you can see in the pictures above, V6 hot end is much larger than V5 and this fact causes many problems.
I would recommend you to buy V5 hot end or use your old one.
By doing so you won’t have to bend heating element and thermistor cables almost 90° and also you won’t have to use another cooling duct.
Aliexpress link for V5 hot end – click on the picture below.


Hi Lukas, I’m following your excellent guide to upgrade from the V5 to V6 including using the V5 hot end but the diameter of the hole for the thermocouple is too small. Can I use the thermocouple that came with the V5 with the same results?
Just be sure to use the correct thermistor type in the firmware.
Hi Lukas,
Thank you for great tips for upgrades. I would like to print Nylon on my anycubic Kossel. What hot end you would recommend. I do understand that it will not be a cheap option.
Thank you.
Hi,
Enclosure
V6 hotend with titanium heat-brek
https://www.lpomykal.cz/anycubic-kossel-e3d-v6-upgrade/
PEI/Powder coated flexplate
https://www.lpomykal.cz/anycubic-kossel-bed-upgrade/
hi Lukas,
thanks for the awesome guide. I planning to get for my printing needs. but just curious on some points and wish to clarify with you.
– Can i print PETG with all metal hotend? because i plan to get the all metal one so later on i print other material which require higher print temperature. Such as ABS/ ASA.
– Which version should i choose ? 12 v or 24 v?
– in your last verdict, you advise to choose v5 instead of v6. do you have a link to go to v5 version ?
Hi, get a titanium one.
Standard all metal heatbreak is not a good option for PLA, but PETG could work quite well.
If you have a standard PSU, choose 12V.
Yeah, because using only a 3D printed spacer is not a very good option, but it works.
Get this V6 upgrade instead:
https://www.lpomykal.cz/anycubic-kossel-e3d-v6-upgrade/
Triangle lab make this extruder with the bore or the 3mm inner tube heat break? I couldn’t find anyone. Cause I print only pla
Hi, they do!
I use the bore type.
Just click on the “WHERE TO BUY BUTTON” and choose a bore type.
Nice! Could you do an articel about the led light setup? Did you use the 3D prinder Mega board as a power supply?
Thanks
Hi, I will in some time.
Those are just 3 LED strips soldered together + switch from an old PSU and it is connected to Power IN terminal.
Hi Lukas,
First of all, thanks for all the good work !
I have kind of a problem with my E3D v6 upgrade. I bought a genuine E3D V6 12v to put on my Kossel Linear but when I try to tune the PID or set the temperature to hot tighten my assembled E3D hotend, the printer kind of freeze and start to make a continuous beep. On the screen, I get the message “E1 HEATING FAILED, PRINTER HALTED” and I have to reset my printer.
I measured a resistance of 5 ohms on the heating cartridge and I tried with two brand new thermistors form E3D so Idon’t think that the stuff I got from e3d is the problem.
After trying for hours with the E3D, I plugged back the old extruder ans did a PID tune with it, which went perfectly fine.
Thanks again and I hope you can help me …
-Louis-Philippe
Hi, it is possible that E3D thermistor is different type, than the original Anycubic.
Look for a thermistor type in Marlin configuration files and try to look for the type you have from E3D.