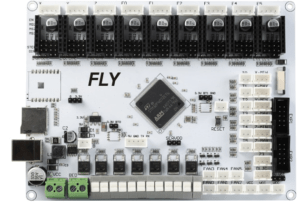
This Mellow 9 independent motor motherboard is suitable for anyone using high number of stepper motors or sensors. I have chosen this board for my LP Delta project, which is also my Bachelor’s thesis and hopefully a Master’s thesis.
For example: I need so many PWM outputs so I can use many independent fans and so many termistor inputs to measure hotend, bed, environment, drivers and motors temperature
It is also possible to expand this board via external drive interface, EXP1 and EXP2 connectors
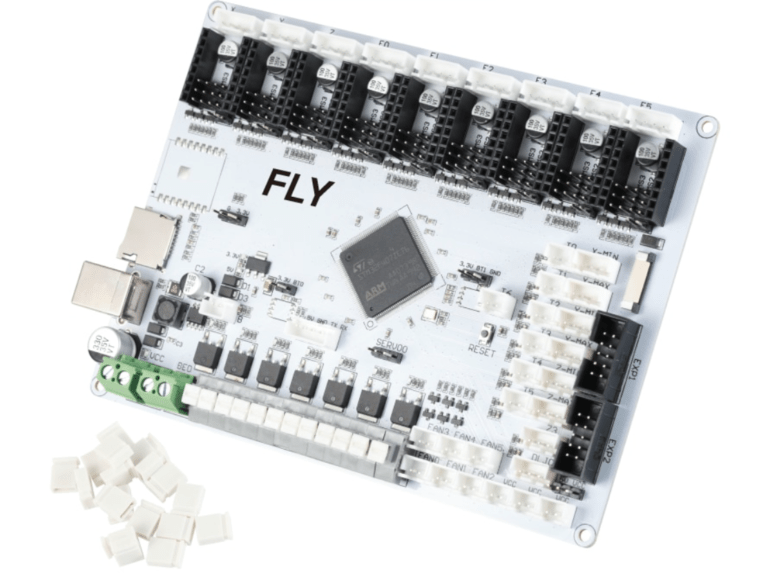
7 PWM controlled high power outputs
6 PWM controlled fan outputs
7 Thermistor inputs
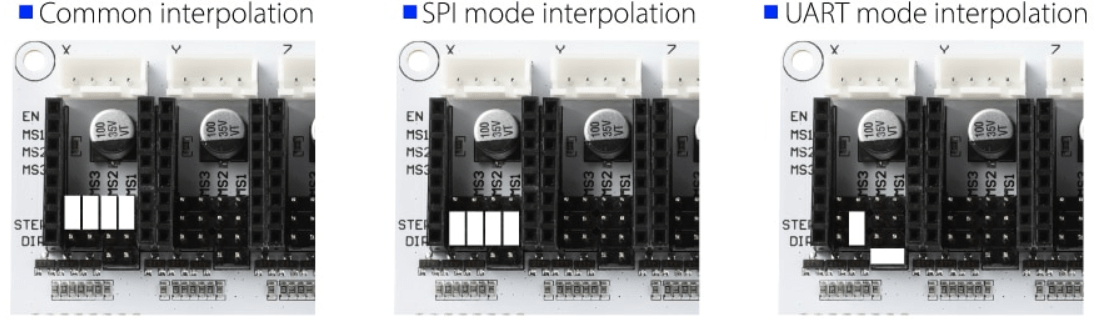
9 Driver slots with SPI/UART/Standalone modes
BL Touch port
Servo port
Wi-Fi option
Visit the official Mellow GitHub that contains more informations, pictures and manuals about this board:

Or visit the official Mellow Aliexpress store with informations about Flyboard:
Do not worry, most of the pins are already predefined in the Klipper configuration file.
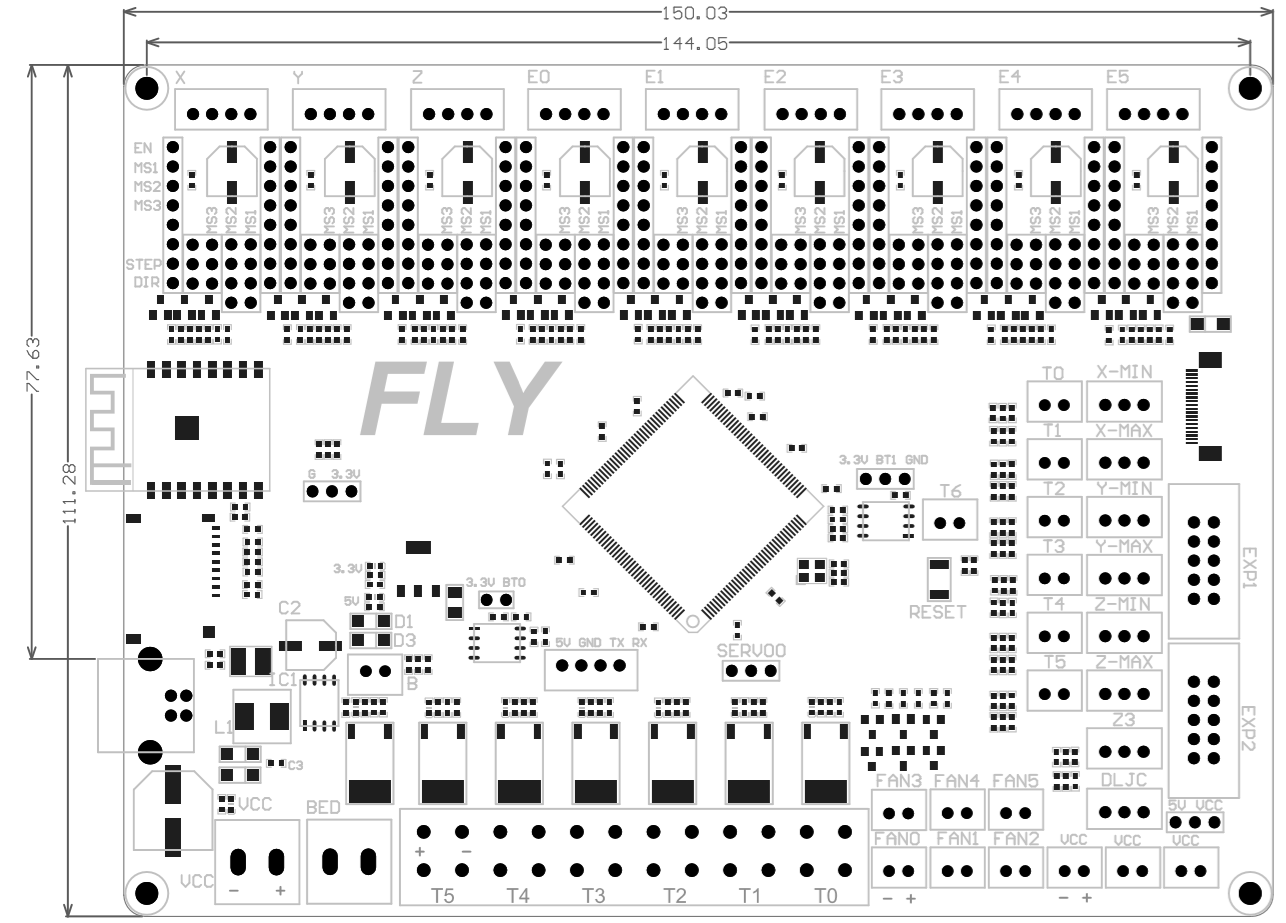
This picture will help you with board installation.
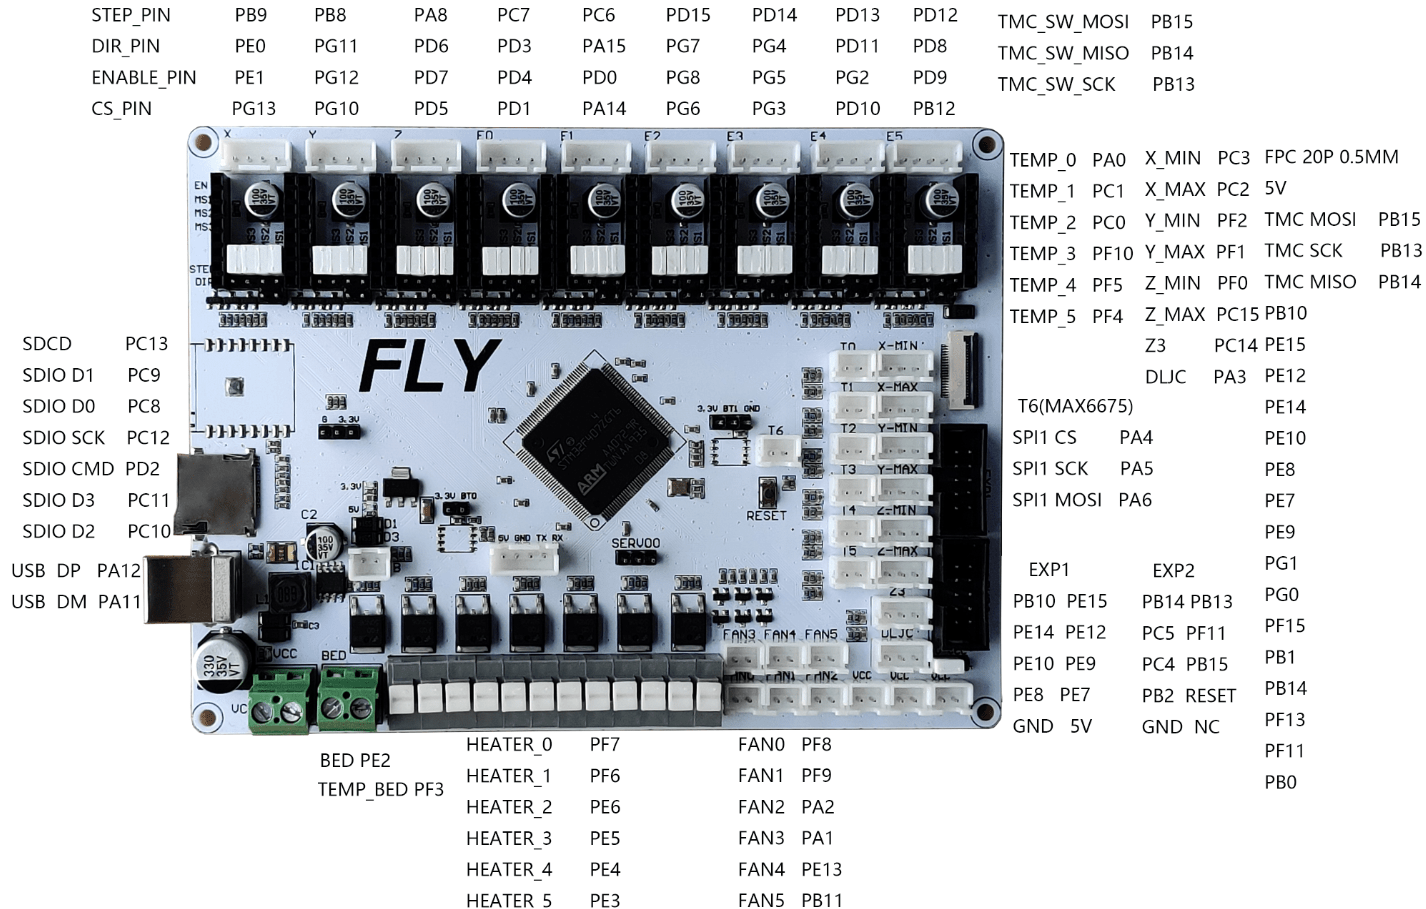
This picture can be better for wiring and driver/sensor installation.
This picture will help you with correct wiring and polarity.
Please note that if you want to use optical endstop or another active type (power demanding), you must use a jumper between 5V and + or + and VCC in the Optional limit voltage switch.
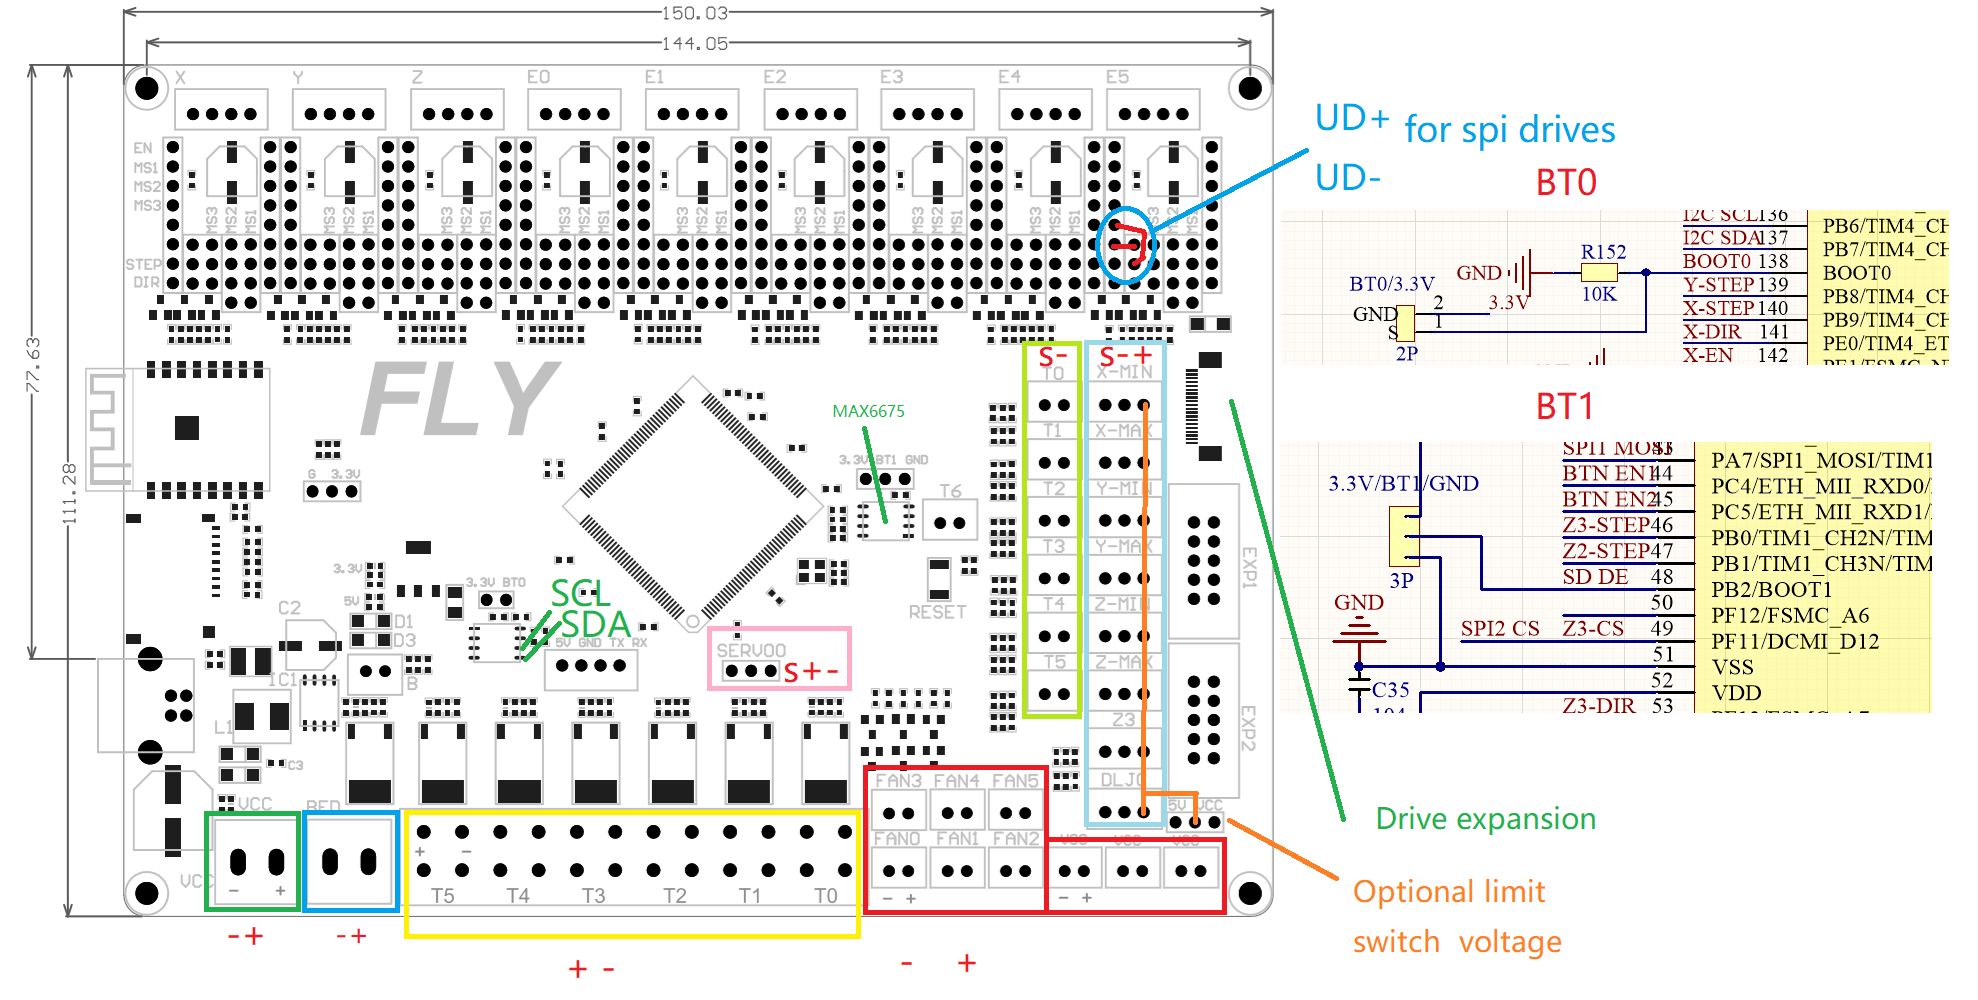
You can simply switch between standalone, SPI and UART driver modes with included jumpers.
Turn off the power supply, remove drivers, reorder jumpers and modify Klipper configuration file.
Choose what Interface you want to Install and complete one of these installation guides.
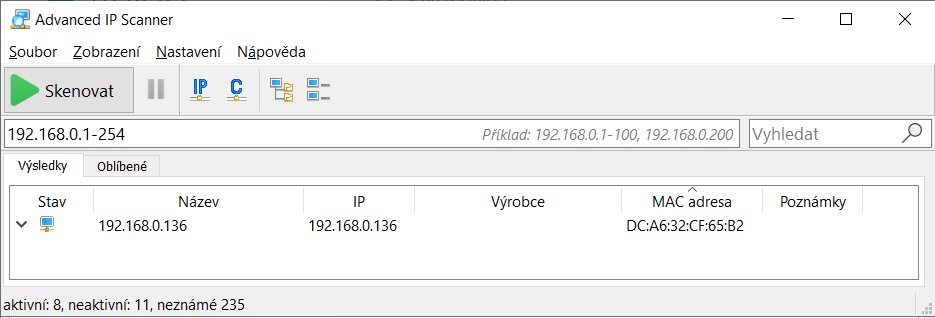
Start with locating Raspberry in your local network.
I highly recommend installing Advanced IP Scanner CLICK HERE.
Default IP range is usually 192.168.0.1-254 or 192.168.1.1-254.
Locate the Raspberry’s IP address and copy it.
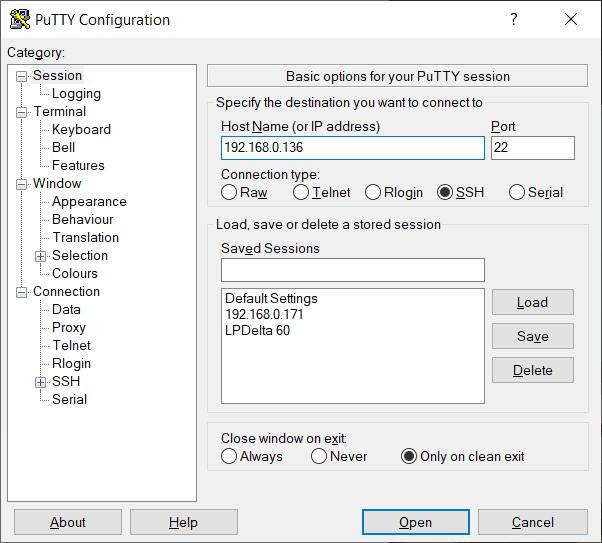
Open PuTTY and paste the copied IP address.
Click on Open.
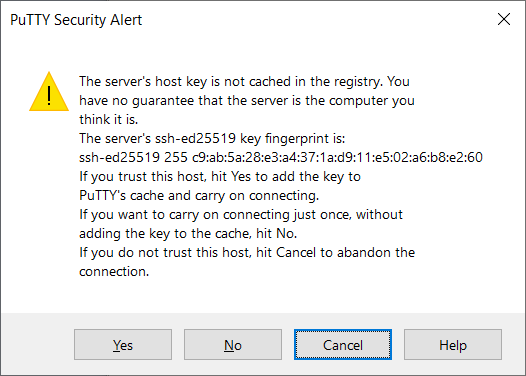
You will see this window the first time you connect to the Raspberry from your computer.
Click on Yes.
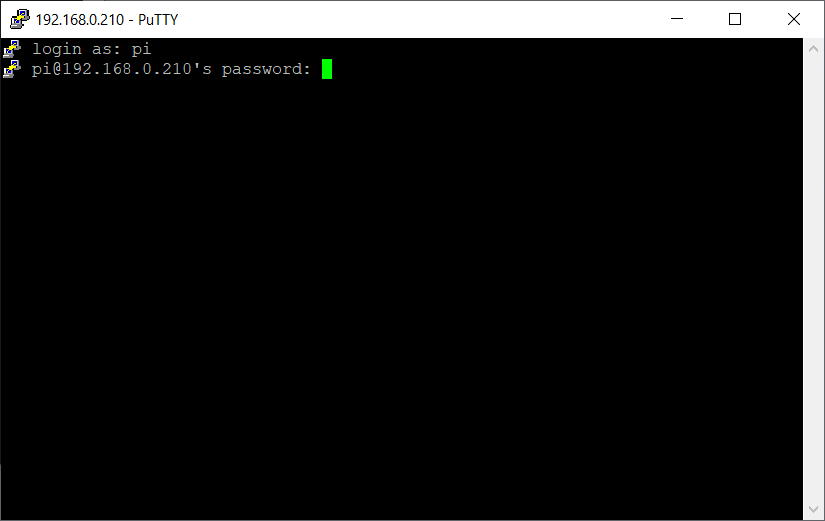
Use your Raspberry login, default is pi
Hit Enter.
Enter password for pi account.
Default value is raspberry
If you are not familiar with Linux systems, do not be scared that you will not see the password, not even * characters.
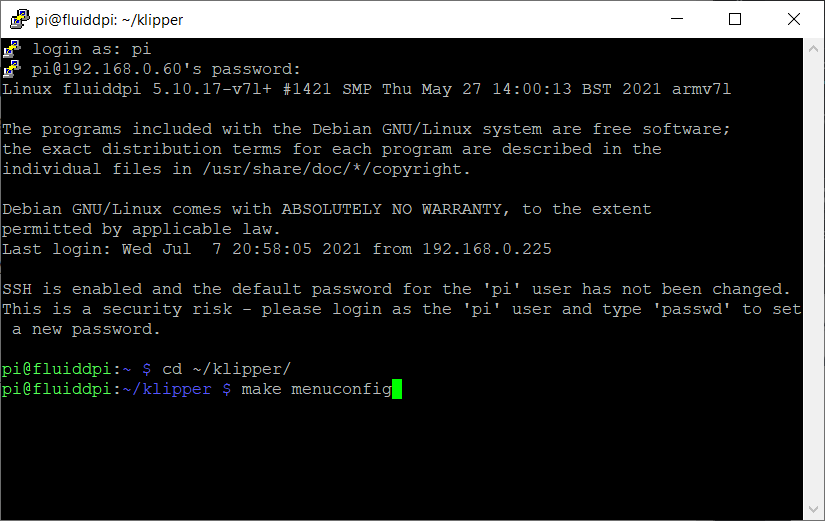
You should see these informations after a successful login

Send this cd ~/klipper/ command and hit Enter.

Send this make menuconfig command and hit Enter.
A weird looking menu will pop up.
A weird looking menu will pop up.
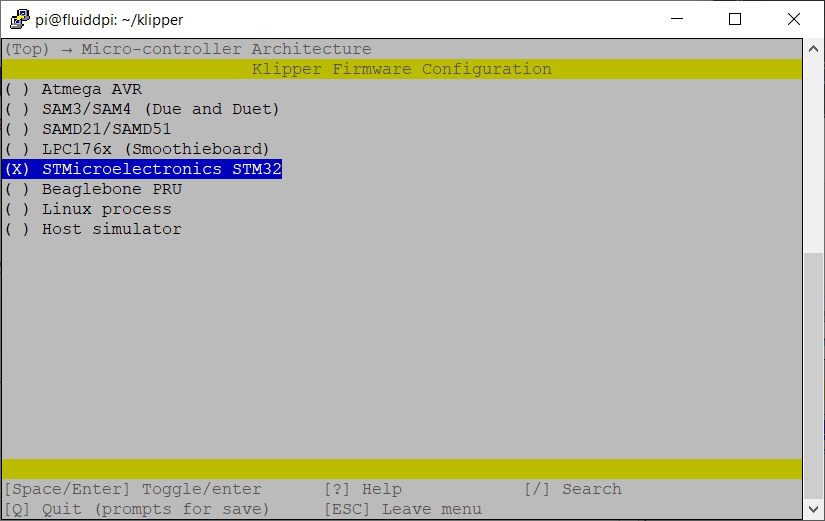
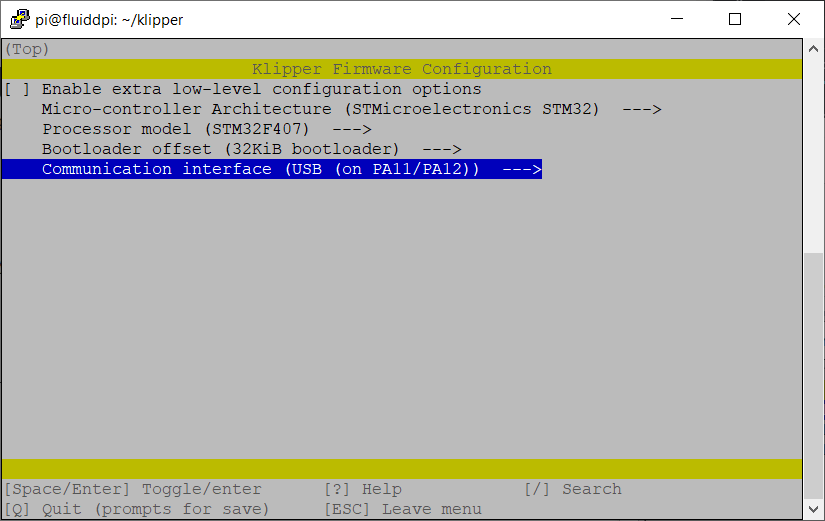
Navigate with keyboard arrows to Micro-Controller Architecture and hit Enter.
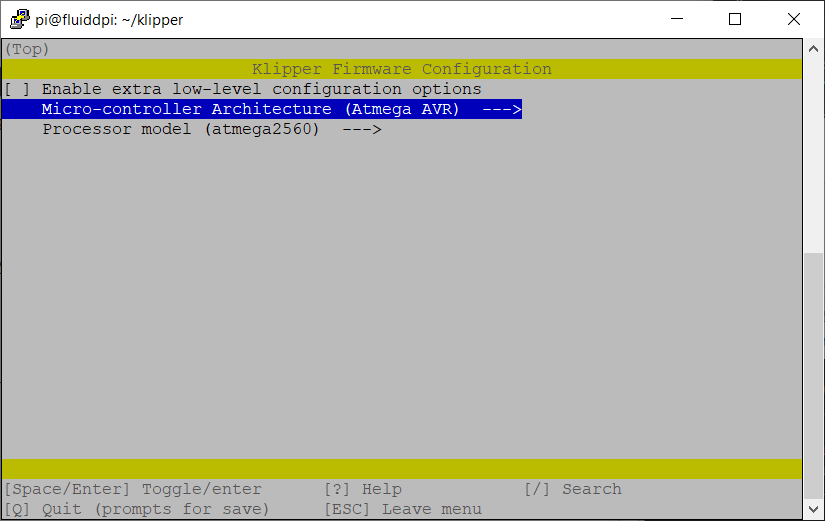
Choose STMicroelectronics STM32 and hit Enter.
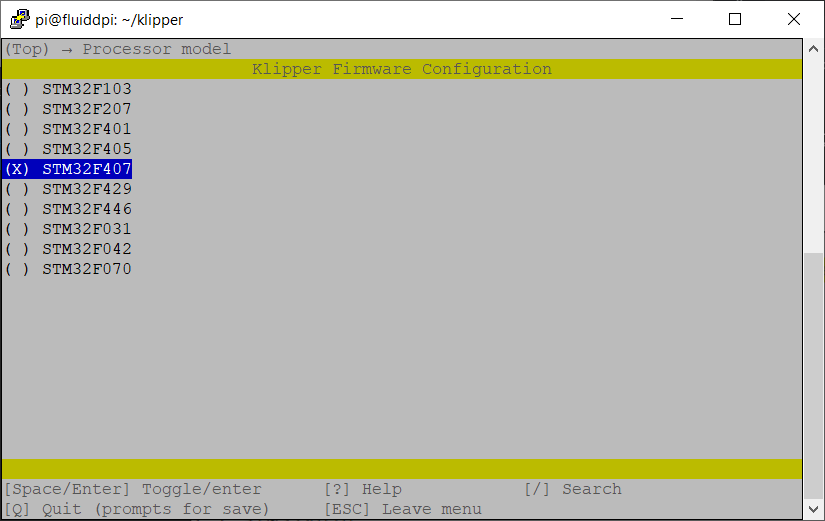
Use keyboard arrows, go down to Processor model and hit Enter.

Use keyboard arrows, go down to STM32F407 and hit Enter.
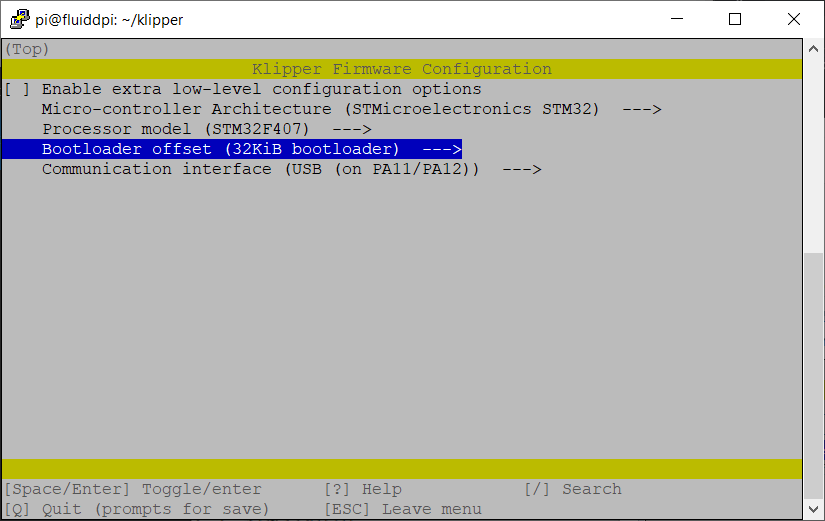
Use keyboard arrows, go down to Bootloader offset and hit Enter.
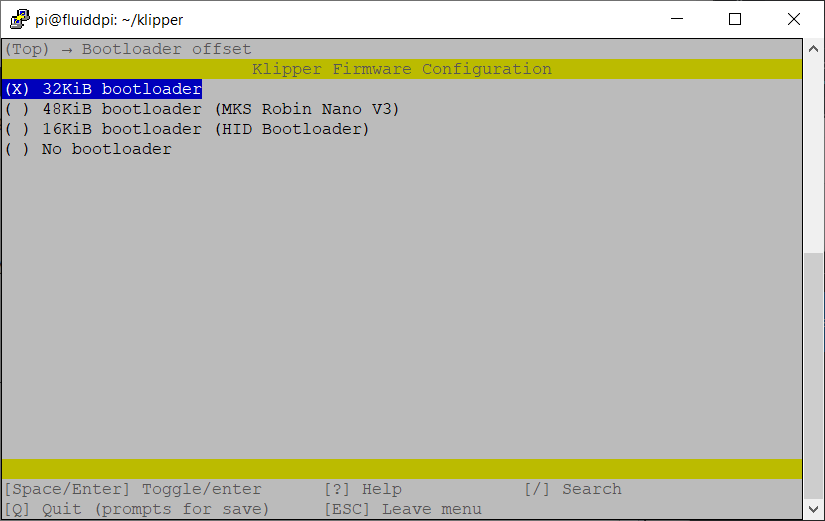
Choose 32KiB bootloader and hit Enter.
Leave default settings on PA11/12
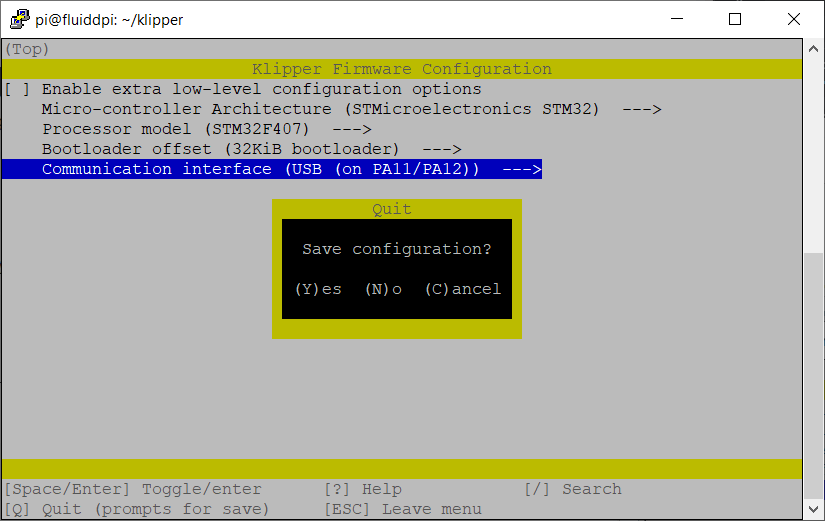
Hit Q to finish setup and Y in the confirmation window.
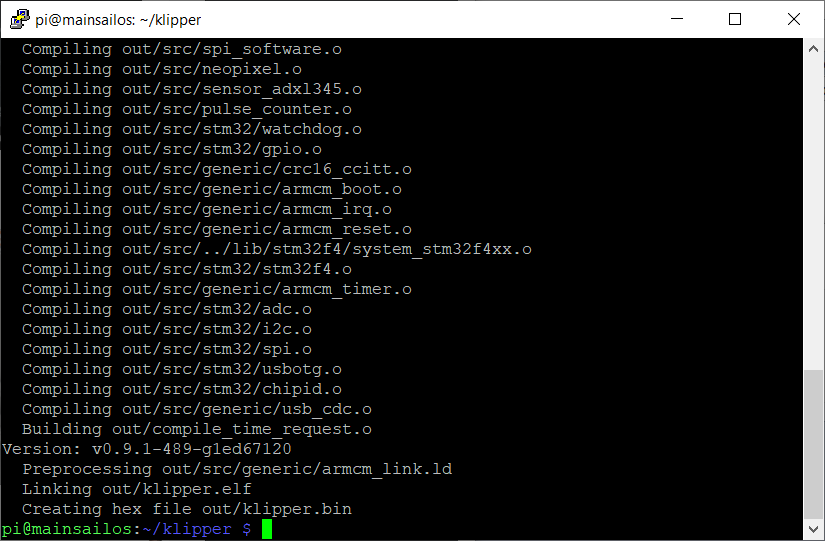
Send this make command and hit Enter.

When creating firmware file is finished, you will see where it was exported.
Default path is out/klipper.bin in the Klipper directory.
Read and finish this guide below to be able to use SFTP to copy files to Raspberry.
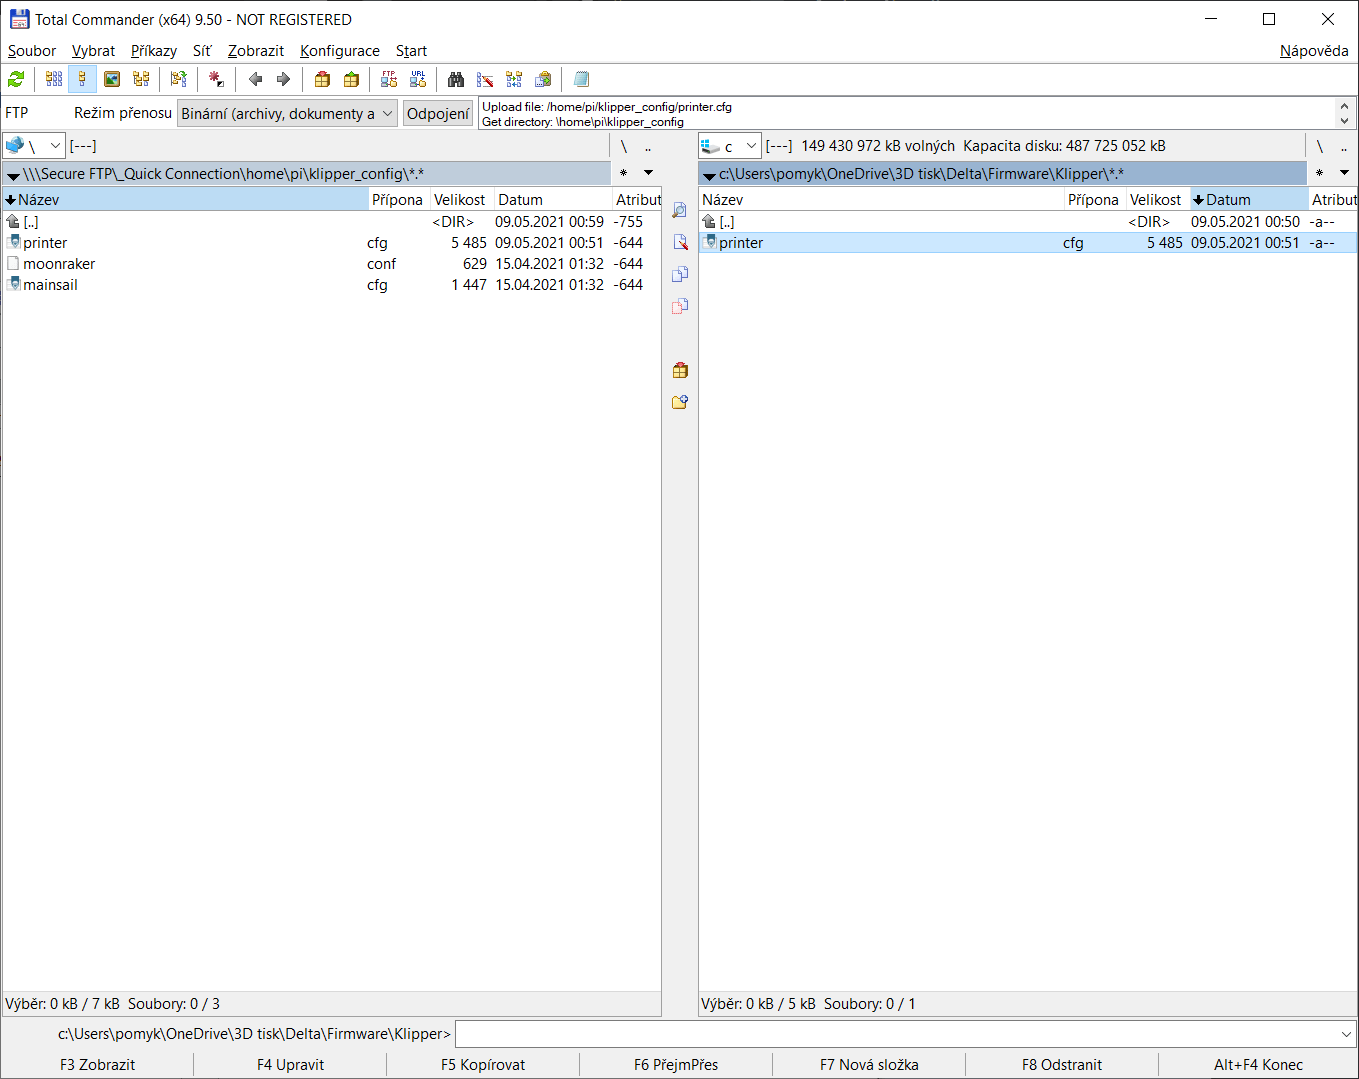
Use Total Commander or a similar file manager.
Connect to your Raspberry in one window and navigate to home\pi\klipper\out
Use the second window to open the micro SD card.
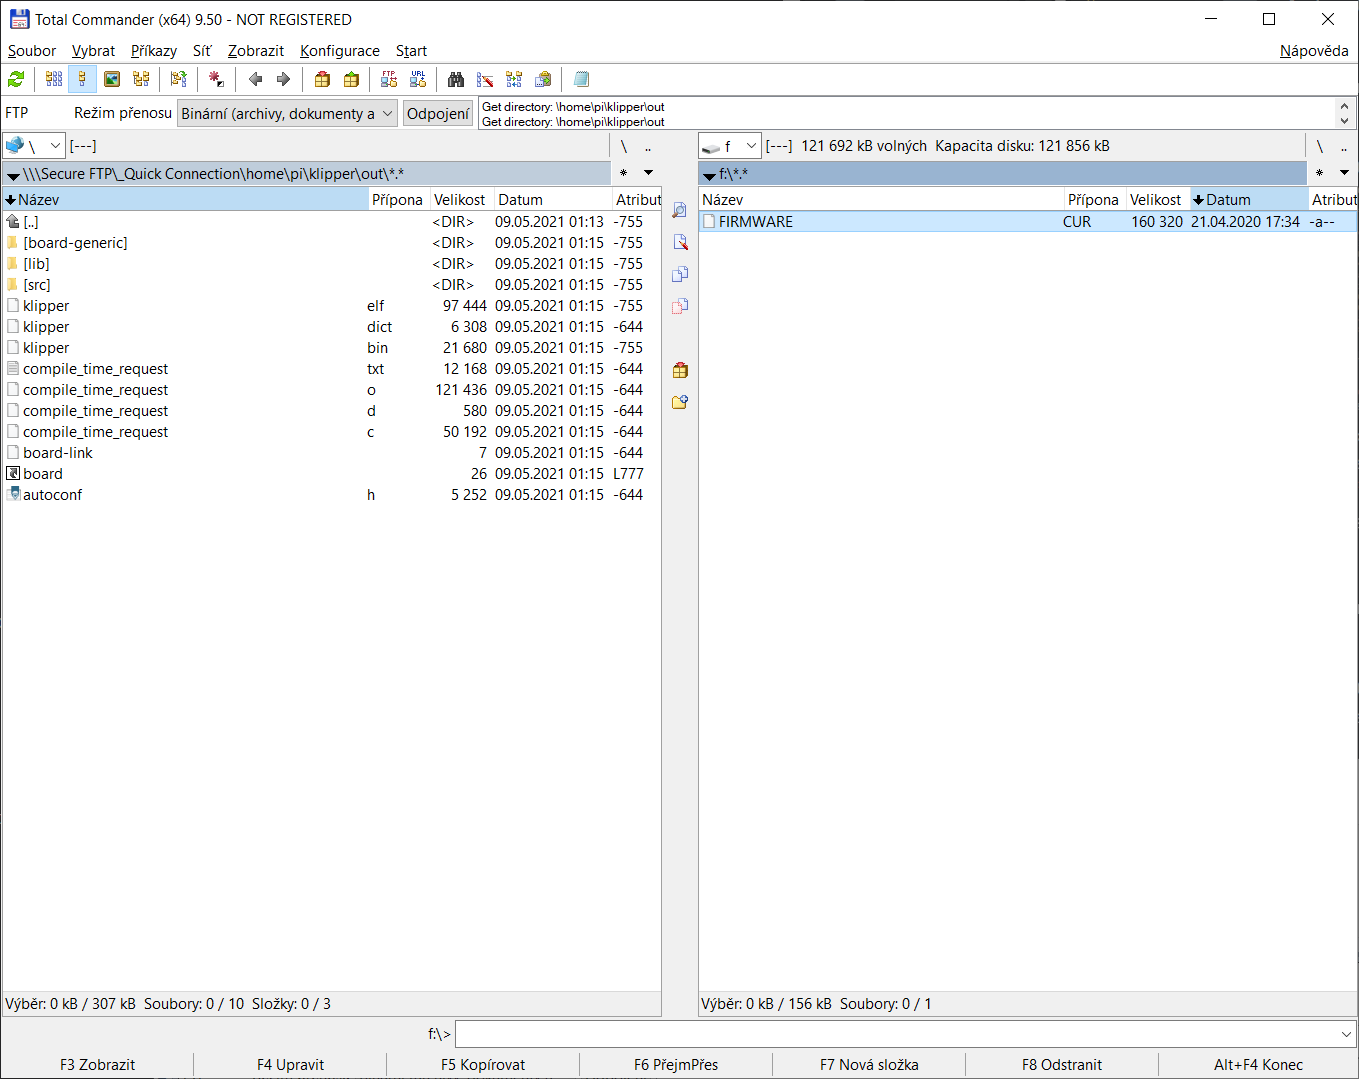
Delete the firmware.cur file on the micro SD card and copy klipper.bin.

Rename Klipper.bin to firmware.bin.

The power must be off!
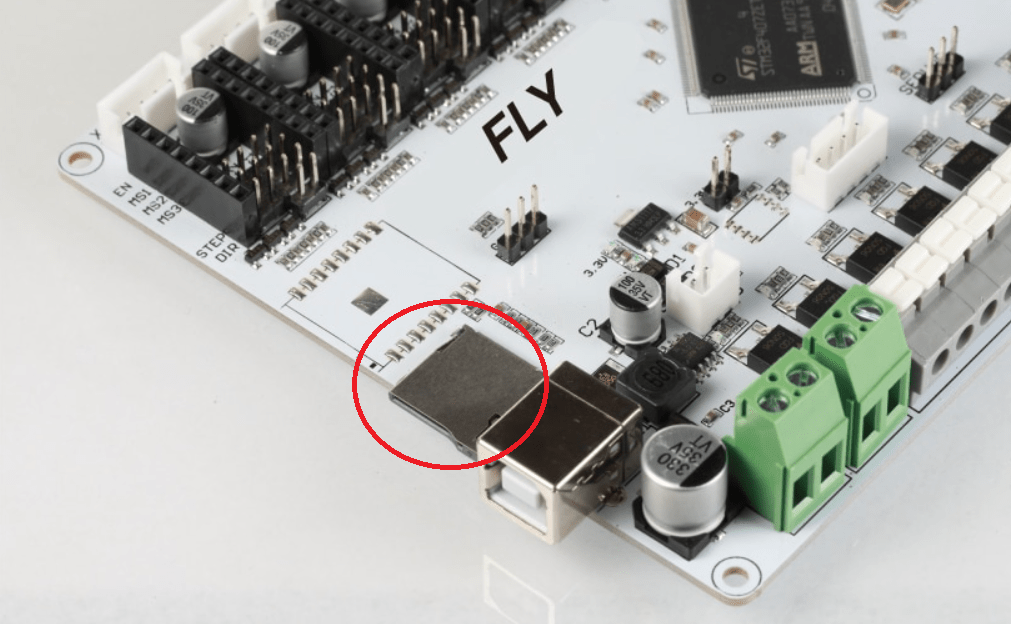
Insert micro SD card into the card reader on the Flyboard and turn the power on.
You can remove the card after a few minutes.
To make sure that the flash was succesful, you can check that the firmware.bin was renamed to firmware.cur.
You can download generic-flyboard.cfg from official Klipper GitHub repository.
Or use the generic-flyboard.cfg file that is already on your Raspberry after the Klipper installation.

Open the configuration file.
Please note that the Flyboard must be connected to your Raspberry via USB cable at this point.
Insert this ls /dev/serial/by-id/* command and hit Enter.
Copy the device name in a notepad or another text editor.

Navigate to [mcu] section in your configuration file and insert the copied serial device id.
Save the file.

Copy the configuration file to Raspberry and replace the original file.
You can do that in the web interface.
And you are done.

Now is the time to configure your printer.cfg configuration file to your needs.


Hi, do you have schematic of this board FLYF407ZG? Would you mind to share it with me?
I’m working in a project for a robot and I need the schematic, but I’m not finding it.
Thanks in advance.