I highly recommend using this plugin with Klipper.
It provides Macro functions and other awesome features.
Open your browser and insert Raspberry’s IP address or use octopi.local/
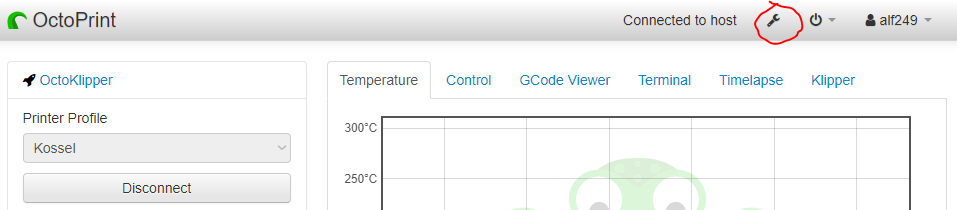
Login into Octoprint.
Click on settings.
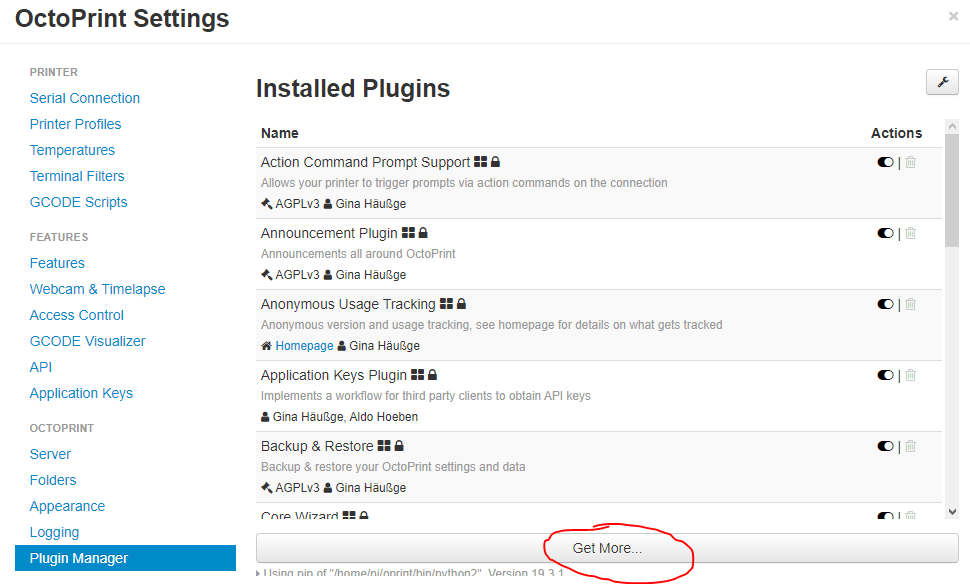
Navigate to Plugin Manager.
Click on Get More…
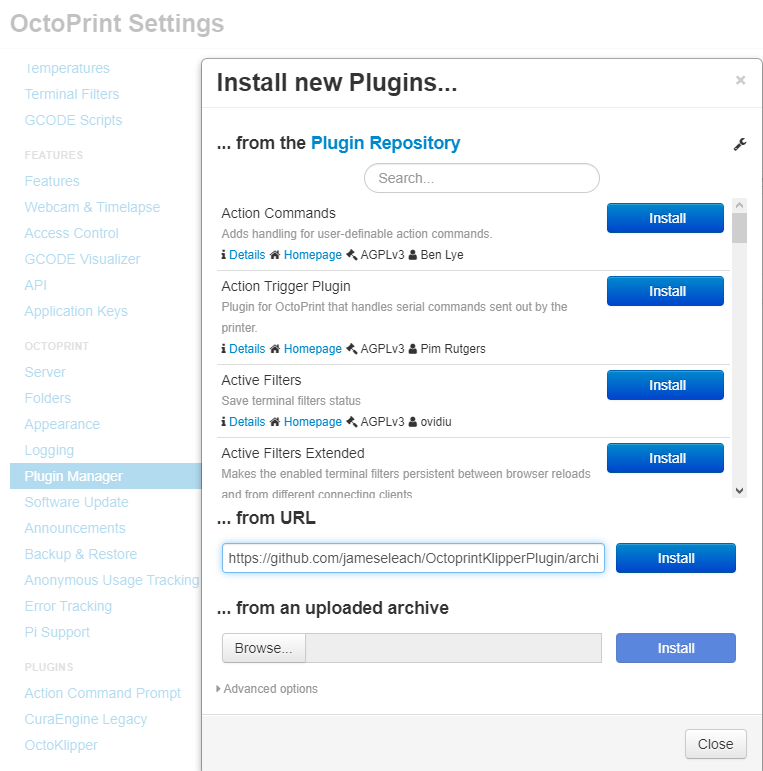
Copy this installation link:
https://github.com/jameseleach/OctoprintKlipperPlugin/archive/JEL-0.1.zip
You can find more informations here:
https://github.com/jameseleach/OctoprintKlipperPlugin
And insert that link in Install new Plugins … from URL
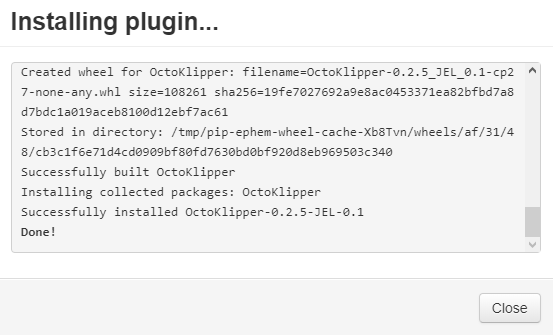
Wait until the installation will be done.
Click on Close.
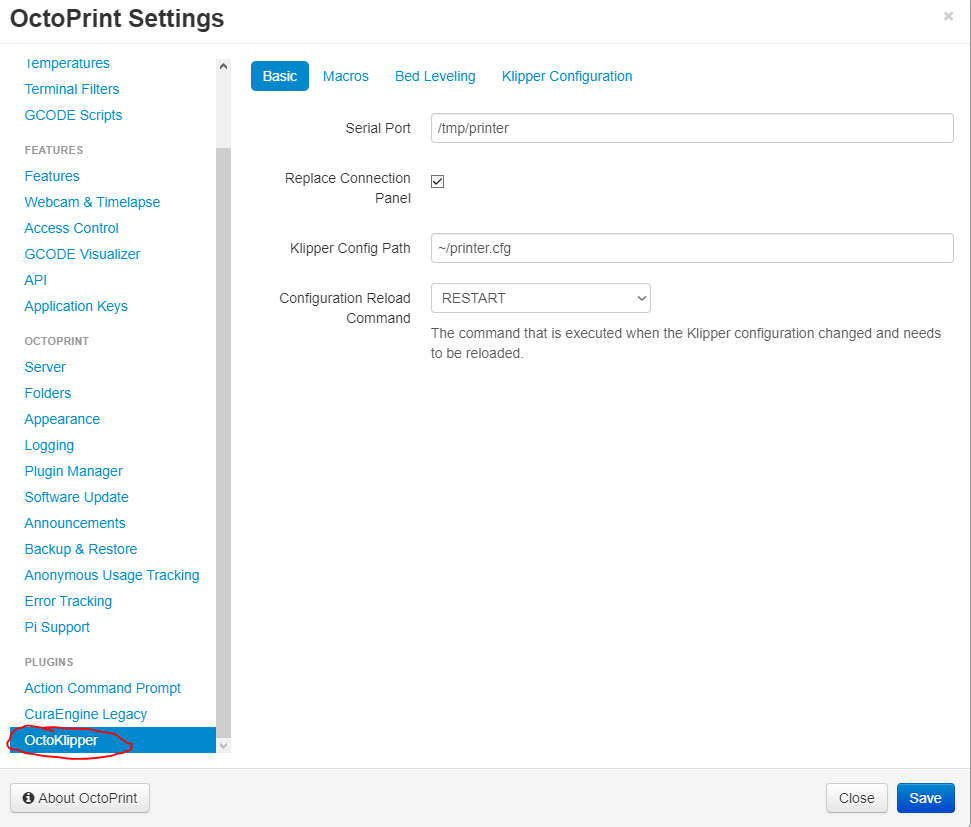
Go to settings
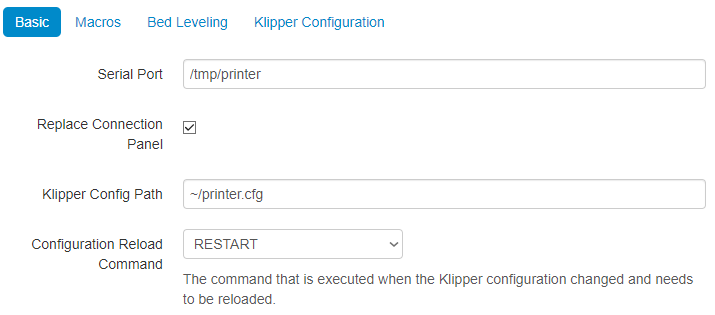
You can keep the Basic settings stock.
You can keep the Basic settings default.
You can find more about macros in this article:
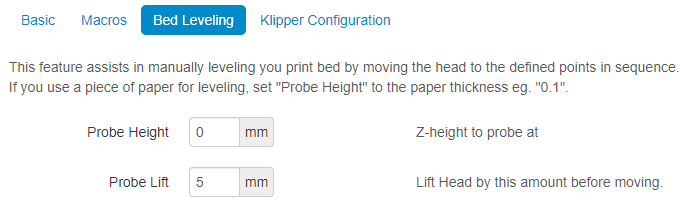
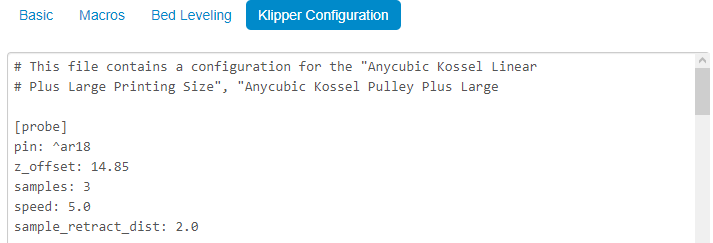
Bed leveling
Klipper configuration and macros are the best thing in this plugin.
You can simply modify your printer.cfg configuration file via this plugin.
No need to edit this file via SFTP and text editor.
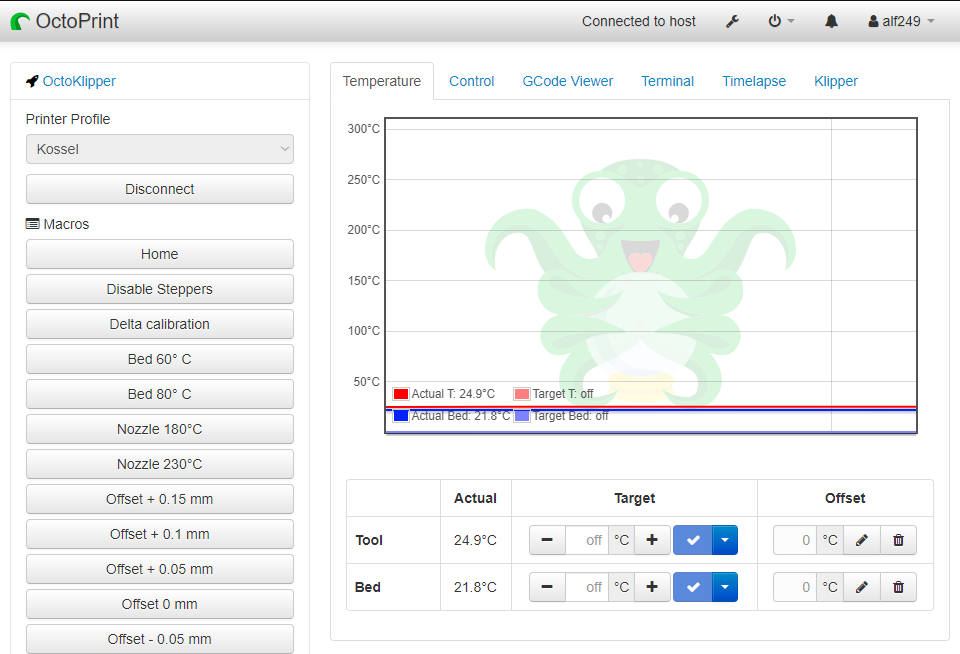
As you can see on the left side in Macros, I already use some of them.
I prefer one mouse click on the macro button over sending a command from Terminal window.
Also on the right side you can see more tool, you will use Firmware the most for sending new printer.cfg to your printer.


I can’t see the plugin where you have it shown even though I have it enabled.
I’ve installed the plugin but it remains always in ‘off’ state when I check the plugin manager
Any hint?
Hi, what do you mean by off state?
Do you have a screenshot?
Once you’ve installed Klipper I found I had to restart my Pi and my printer to get them to communicate. Unplugging the USB and the Pi restarts didn’t seem to do it. I spent quite a long time trying to diagnose connections issues, but powering it all off and on again got it working 🙂