Anycubic Kossel Klipper Pressure Advance
Calibration | Klipper | Kossel
Klipper pressure advance is a feature that helps with corner overshots.
It uses extra extruder retractions while moving to eliminate problems with over extruding at corners.

Let me say thank you to all Klipper developers for this awesome feature and great faq pages on their GIT. Those graphs below were downloaded from official Klipper GIT.
Extruder retraction while moving helps with any overshots and over extruding at corners / edges.
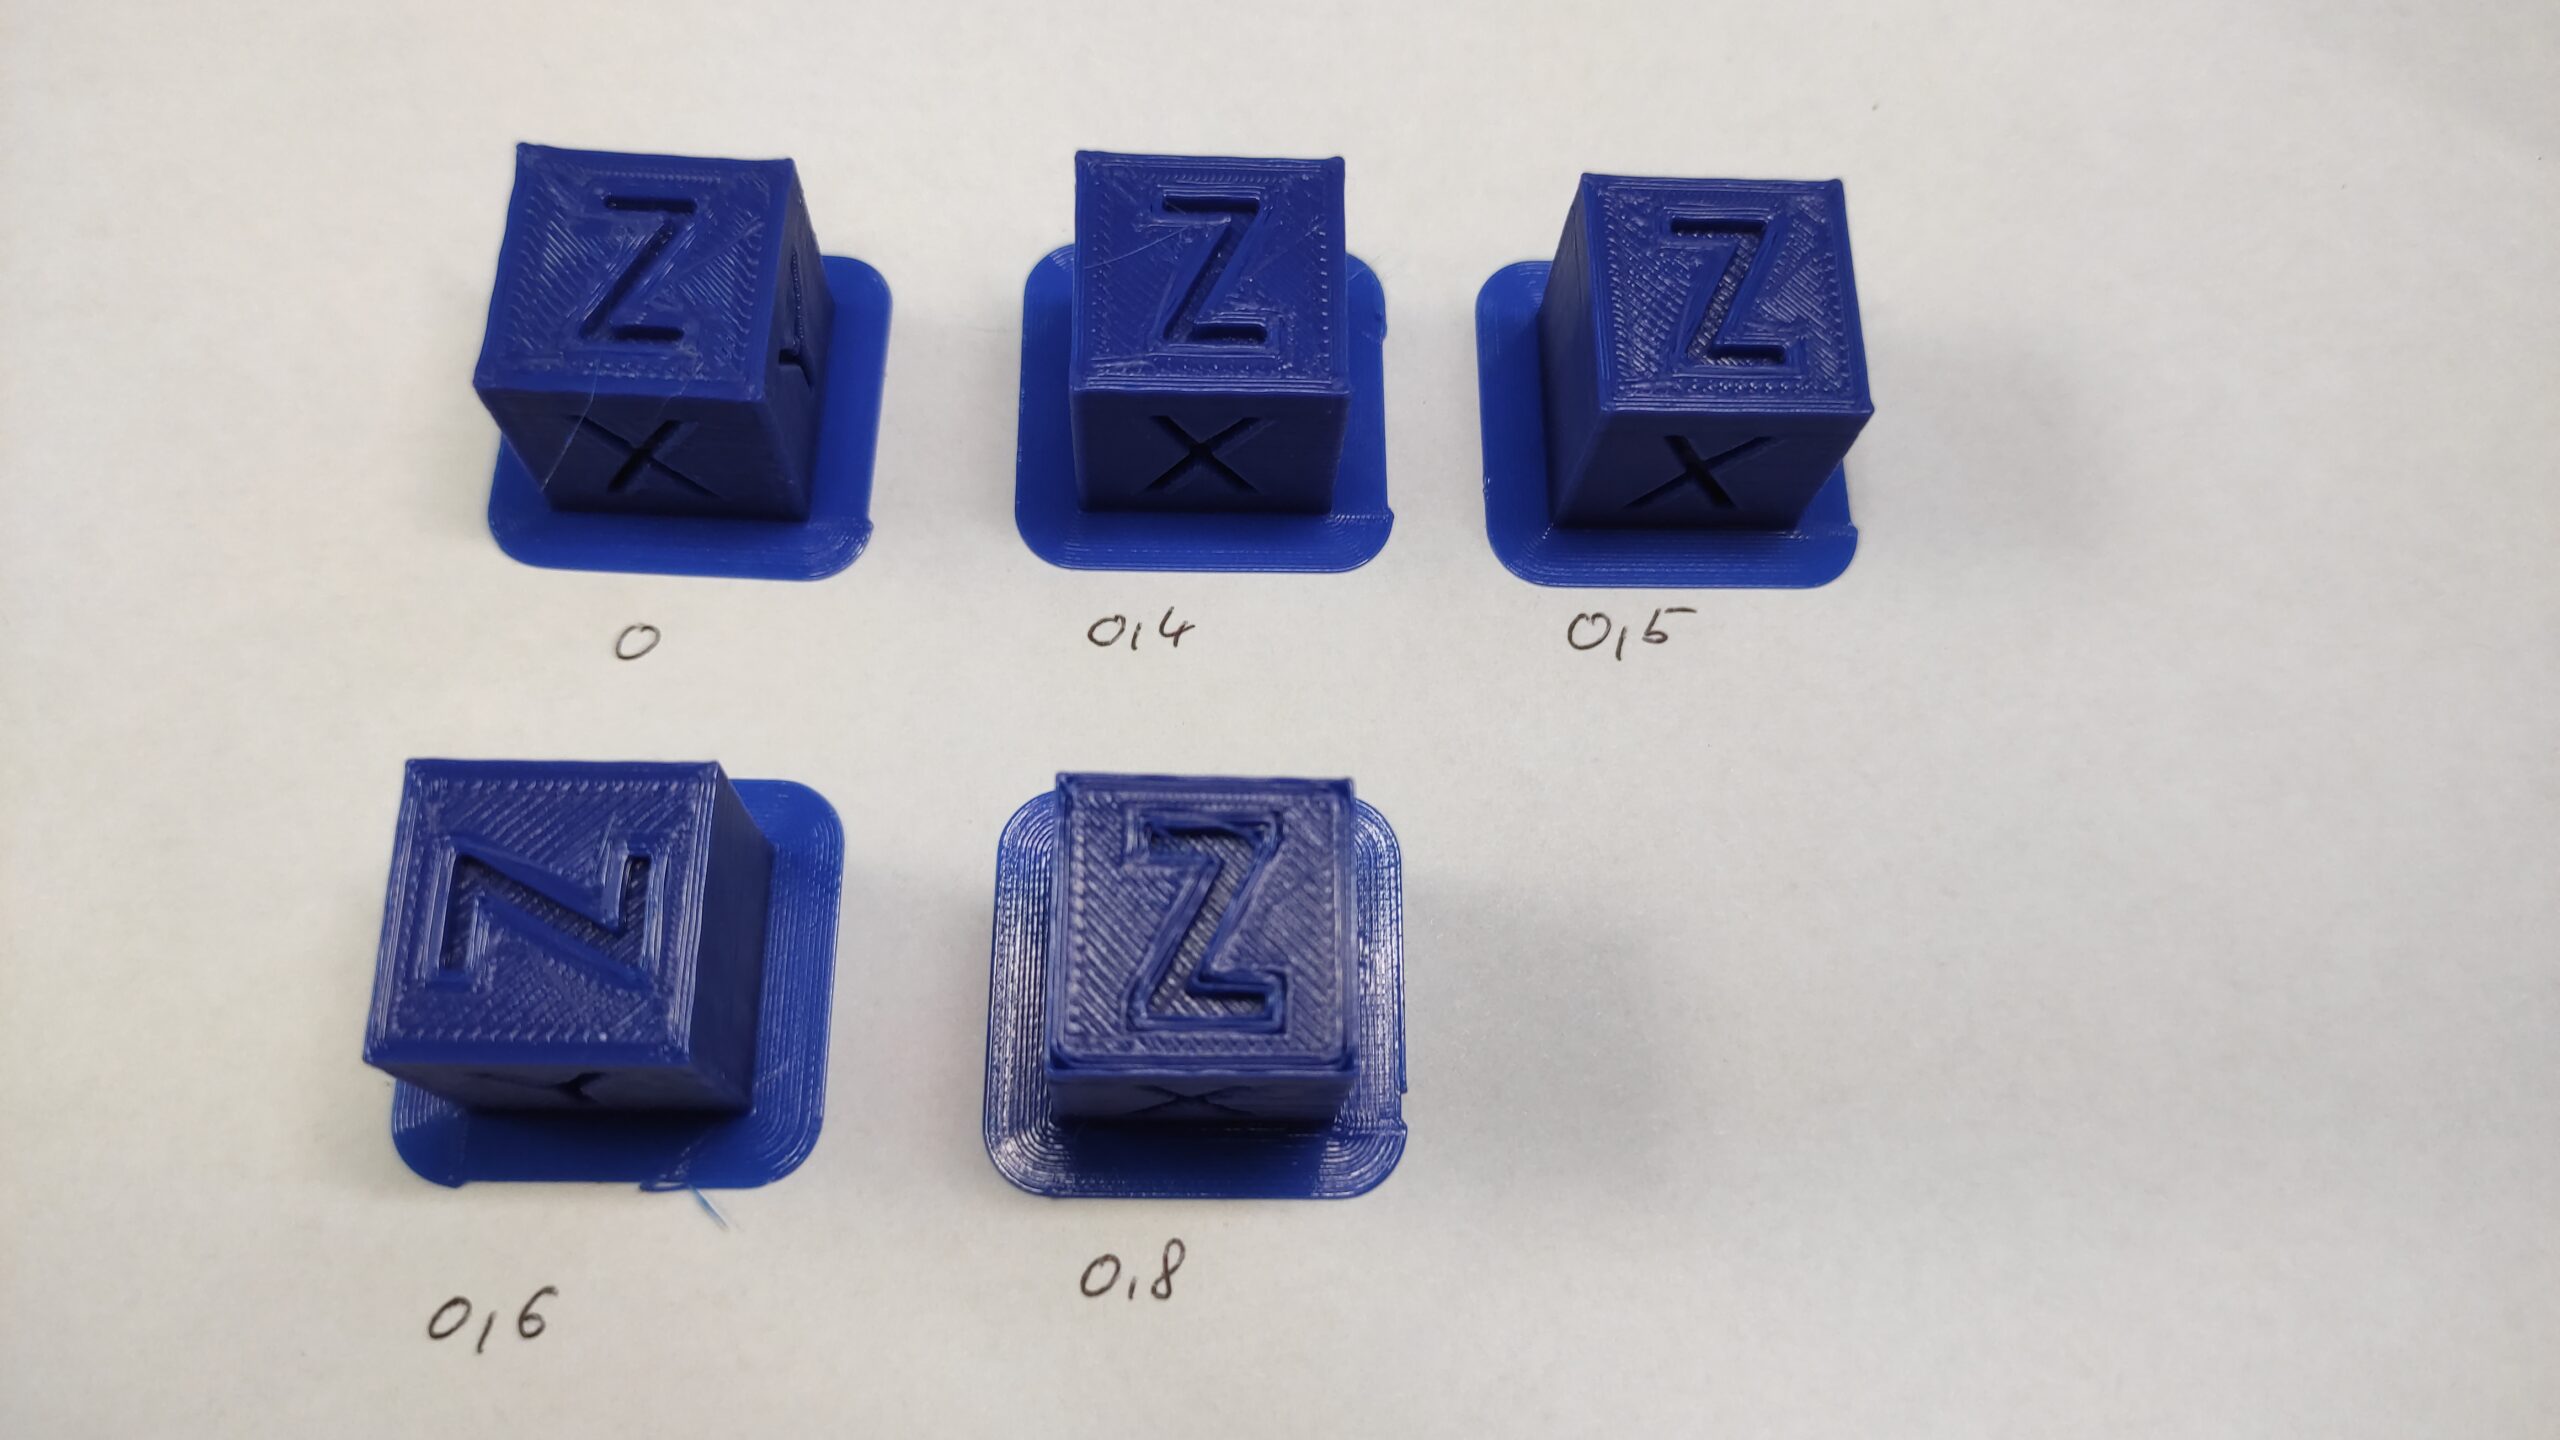
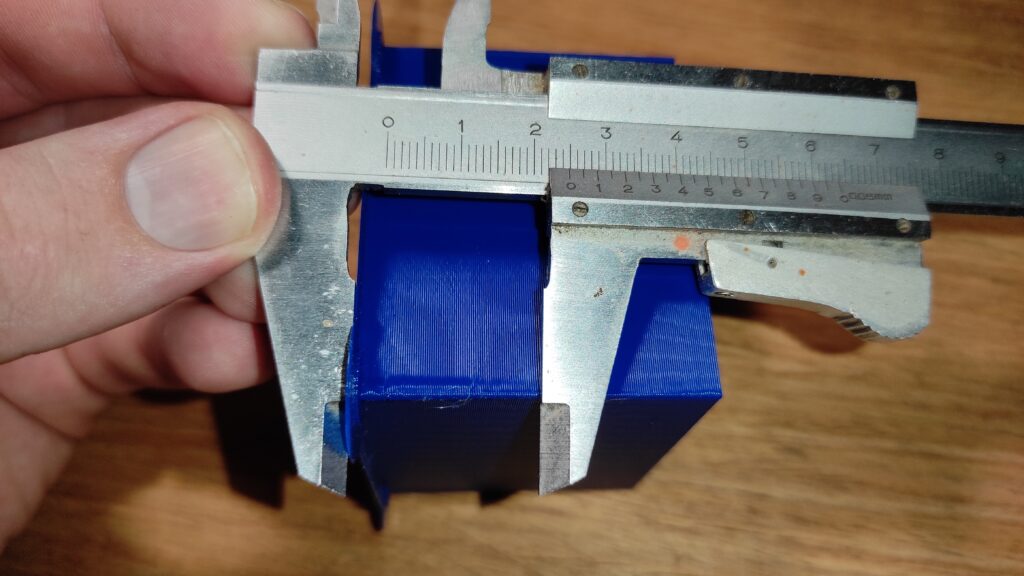
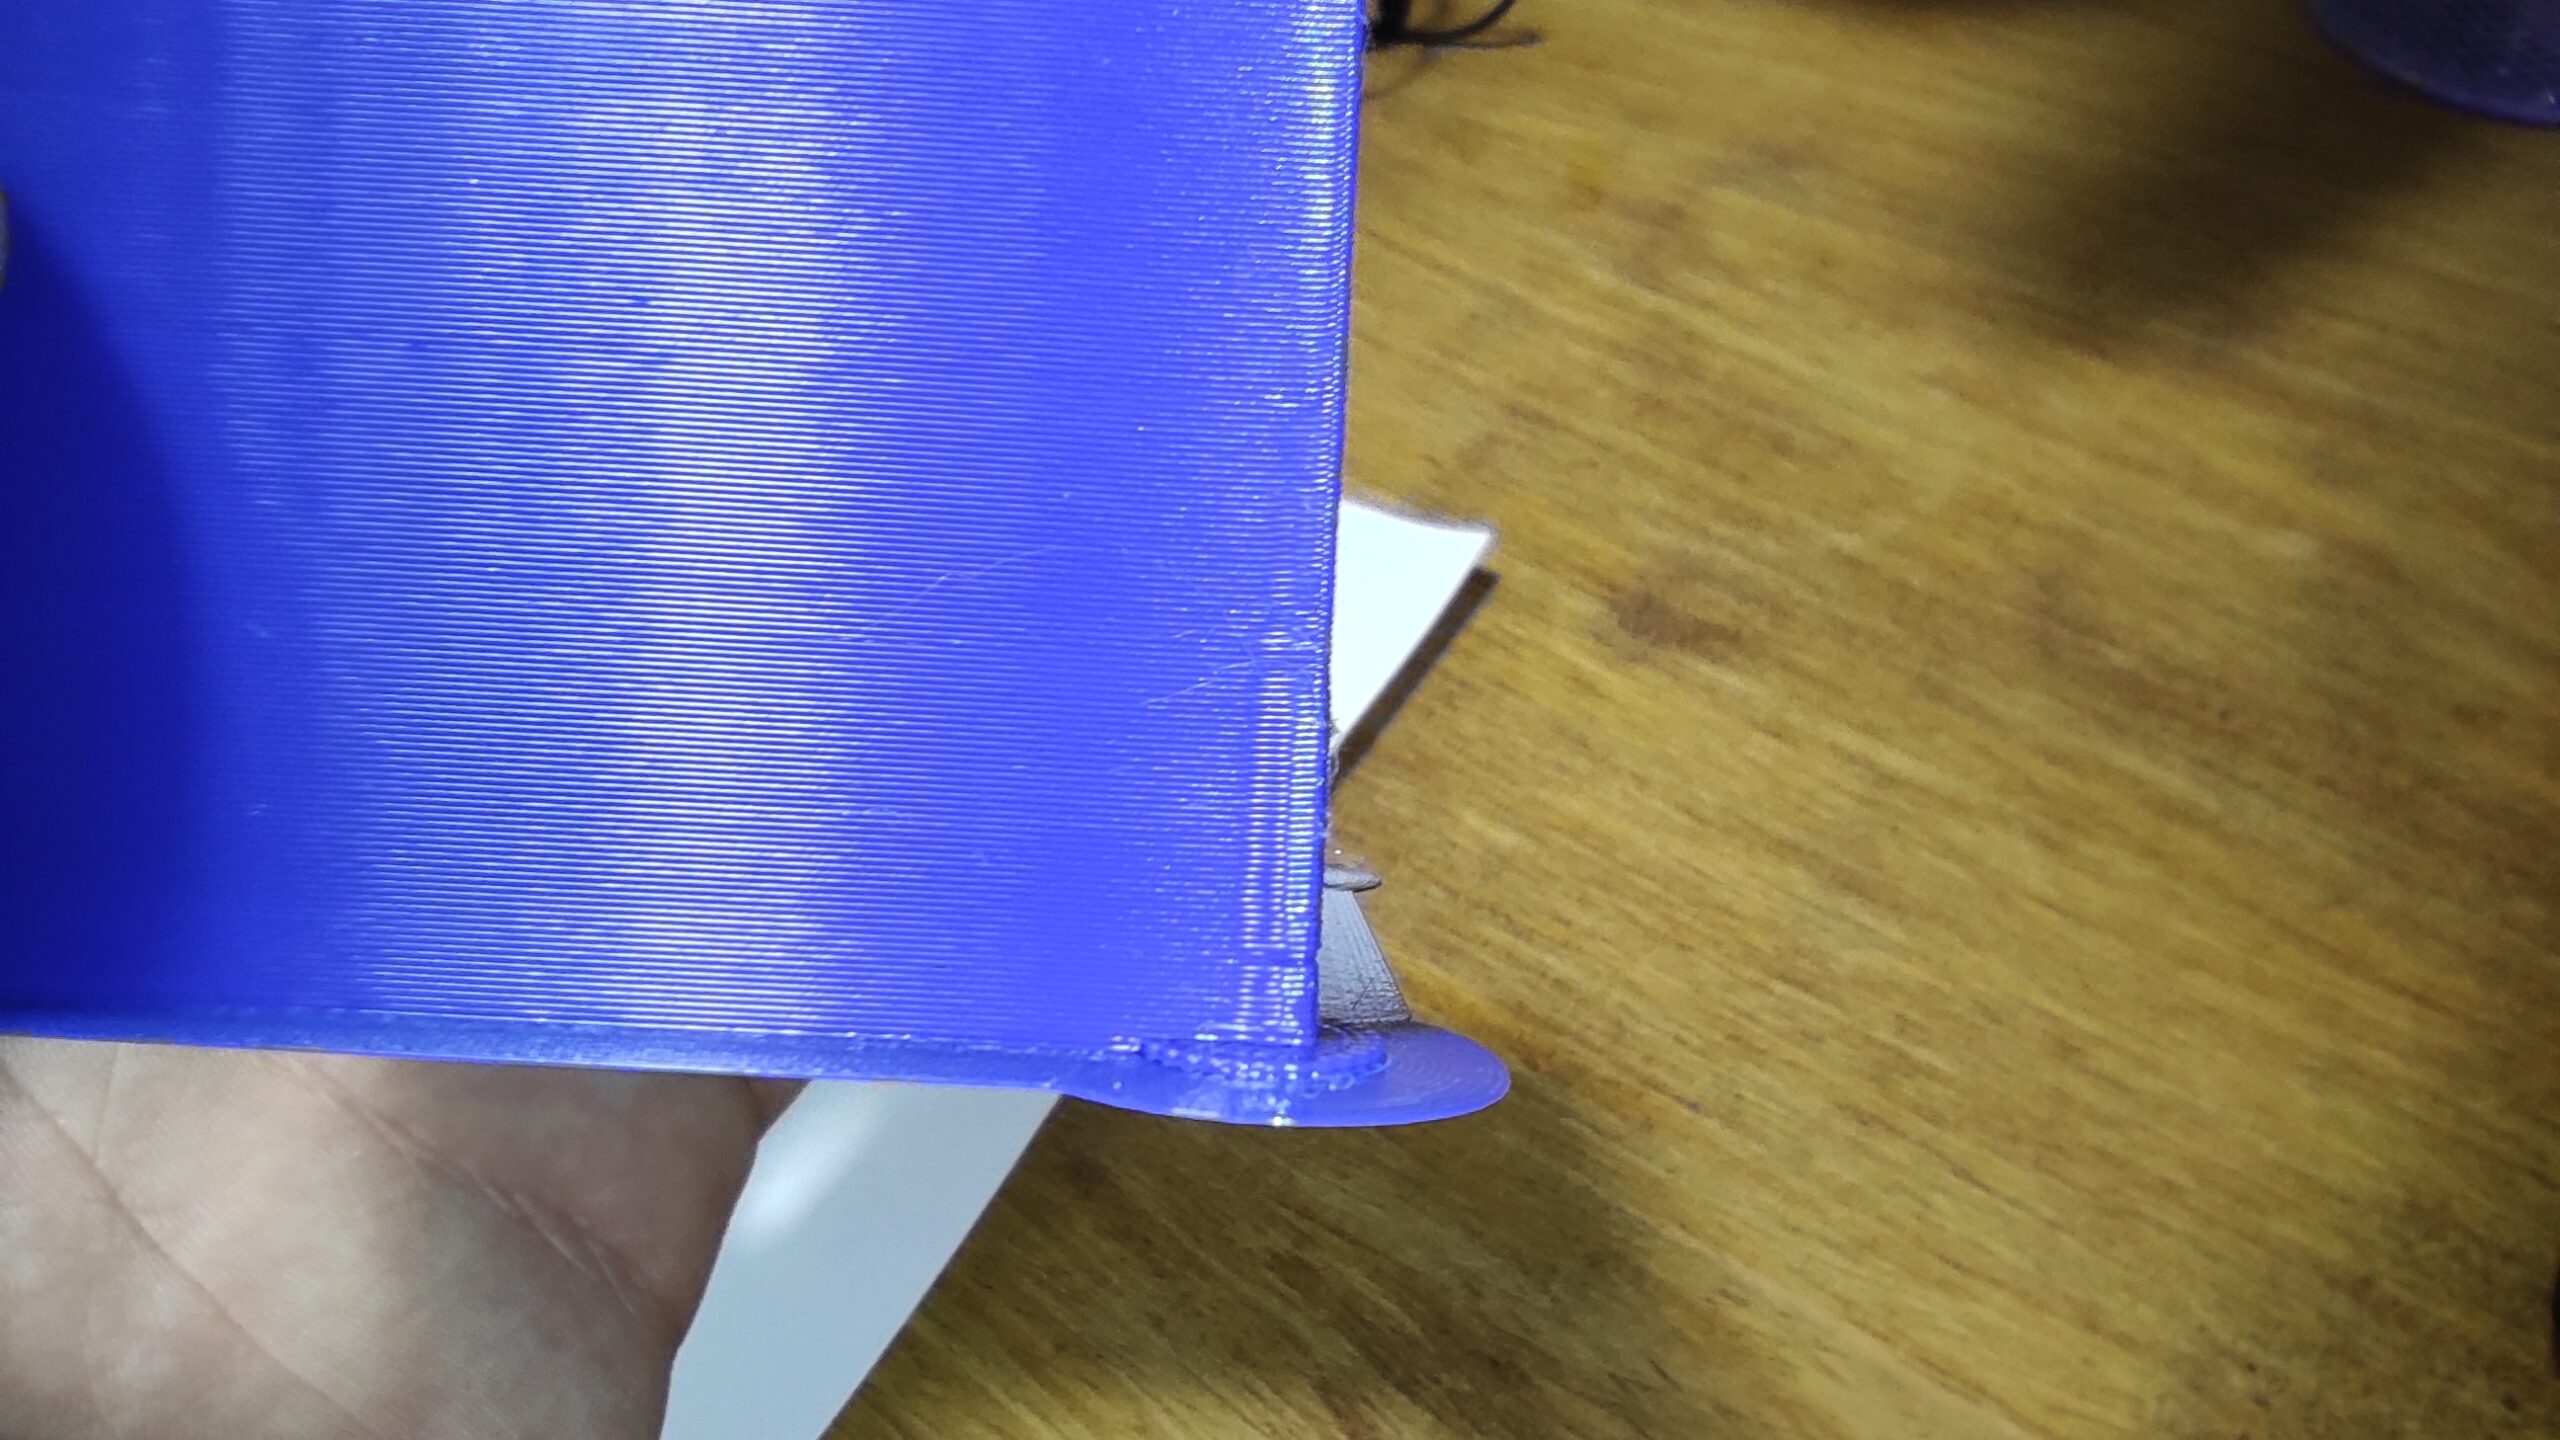
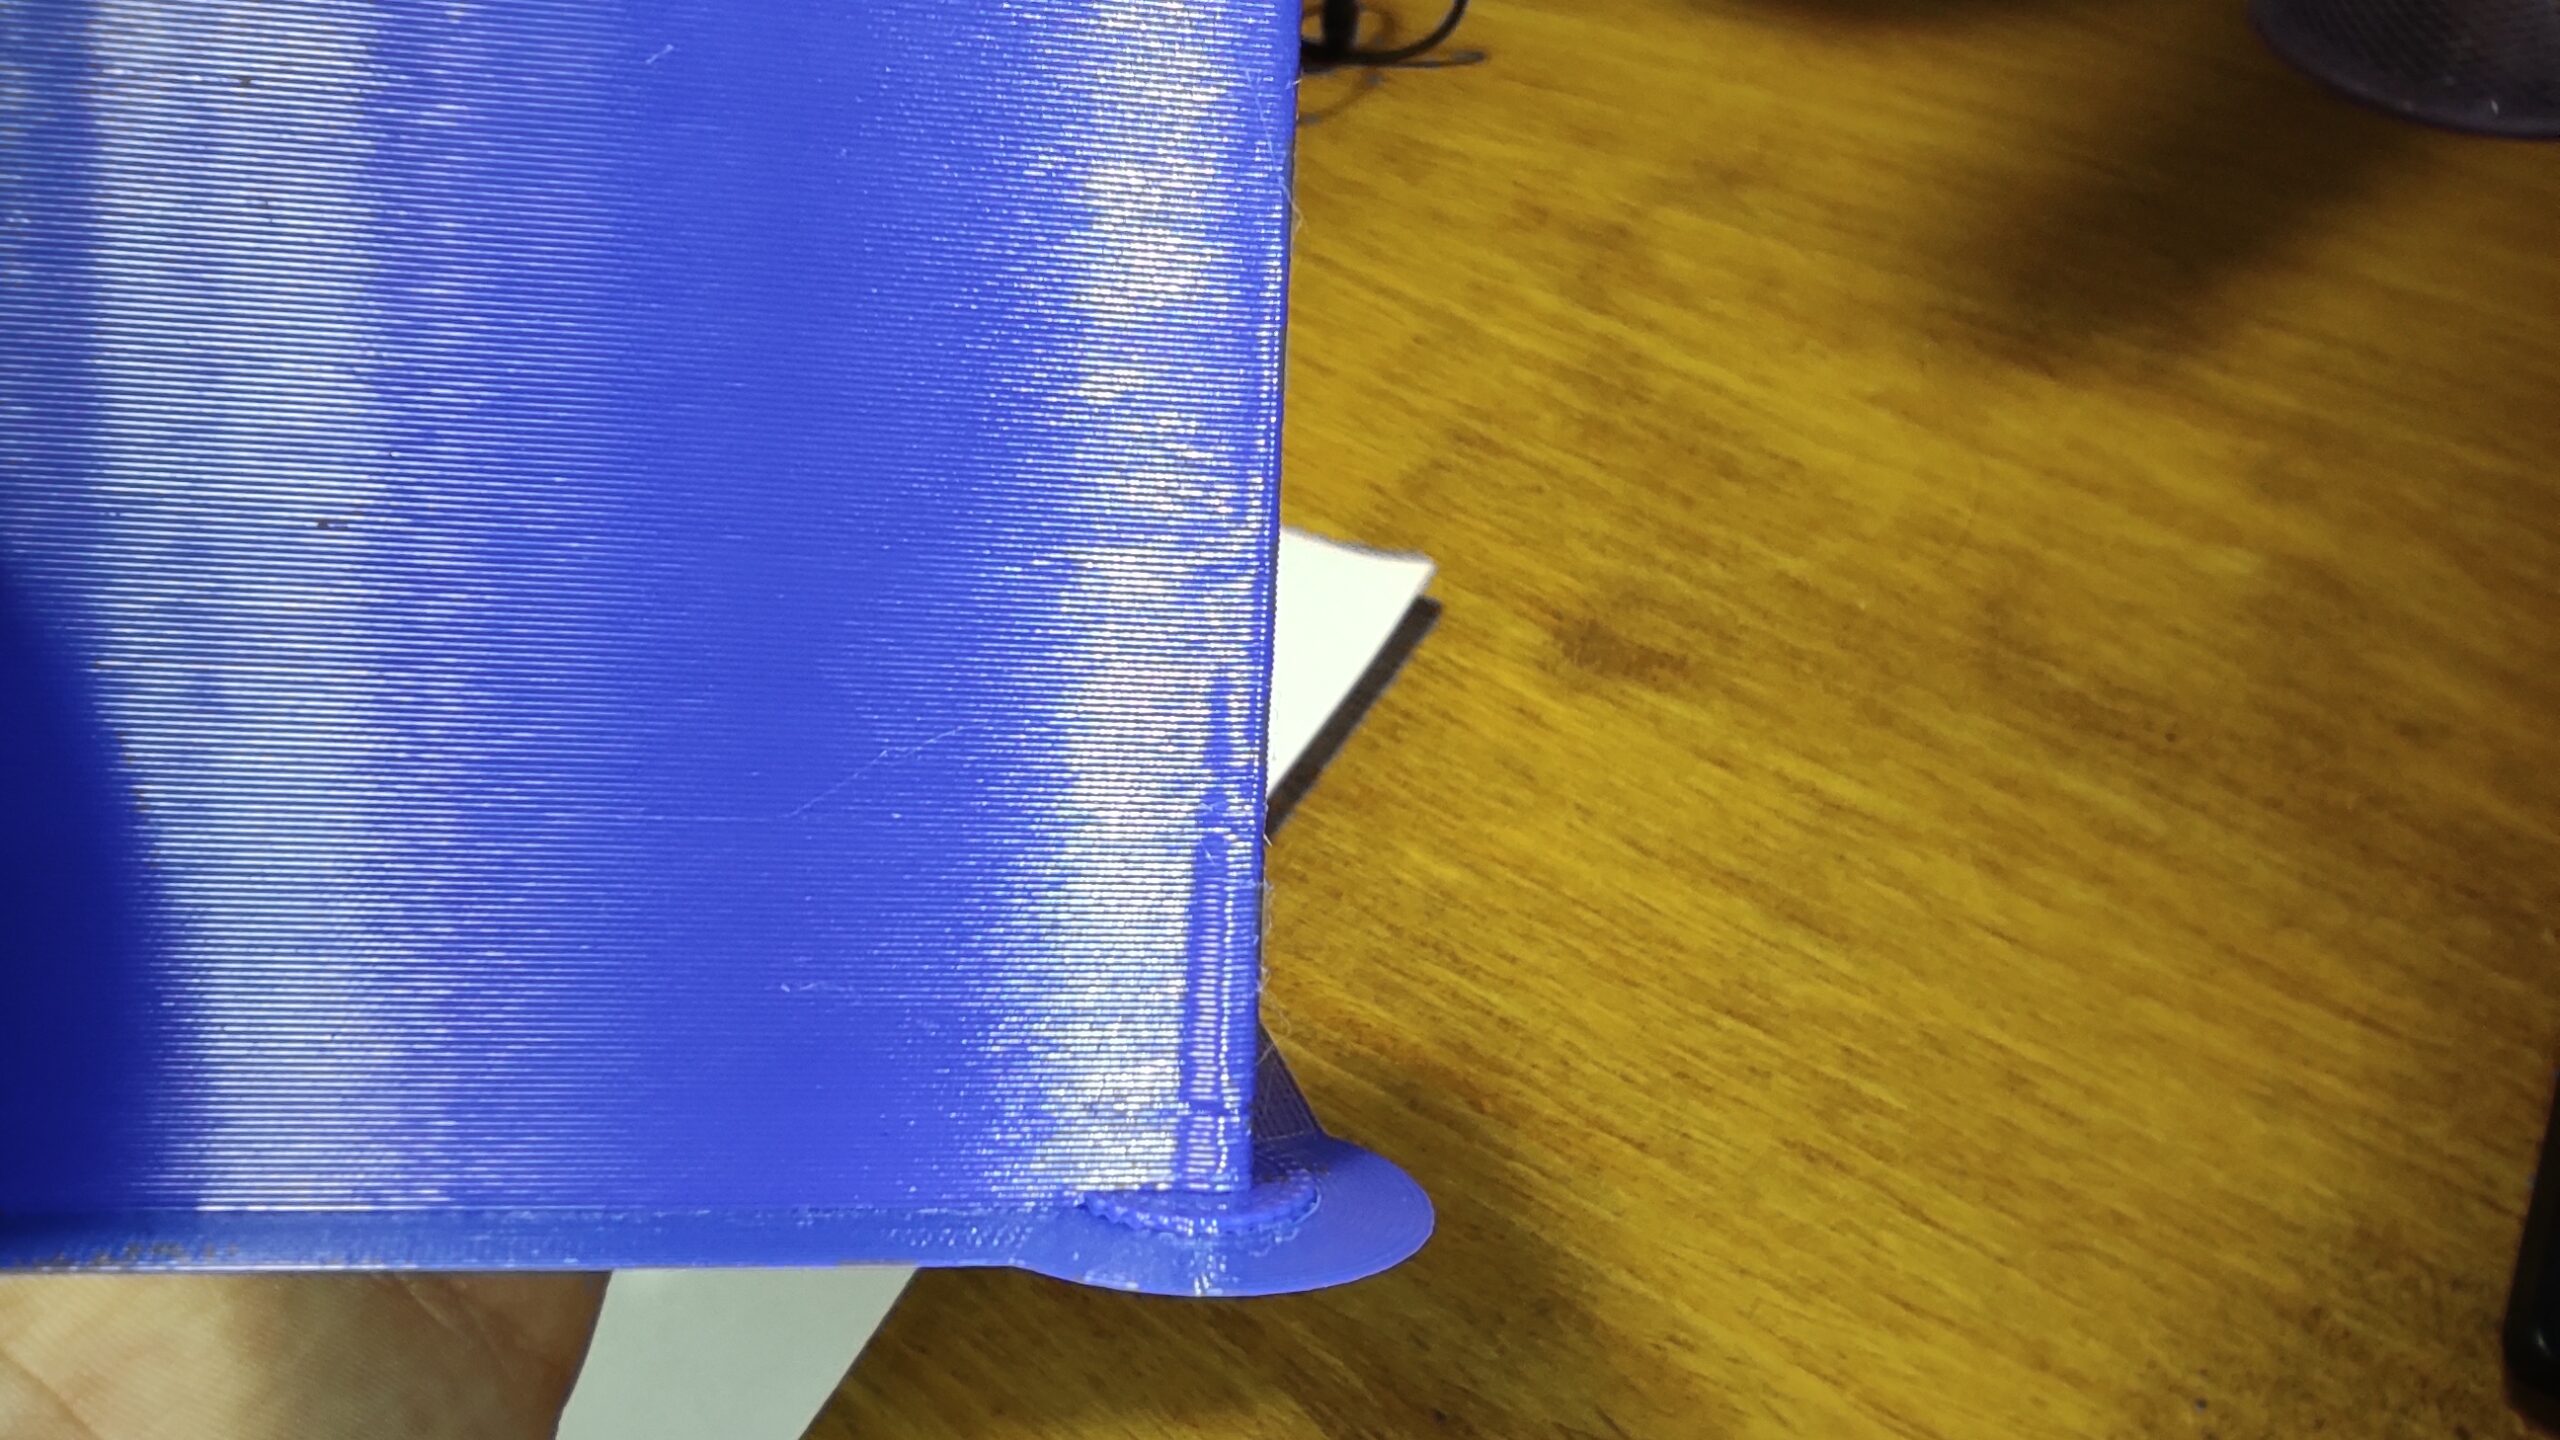
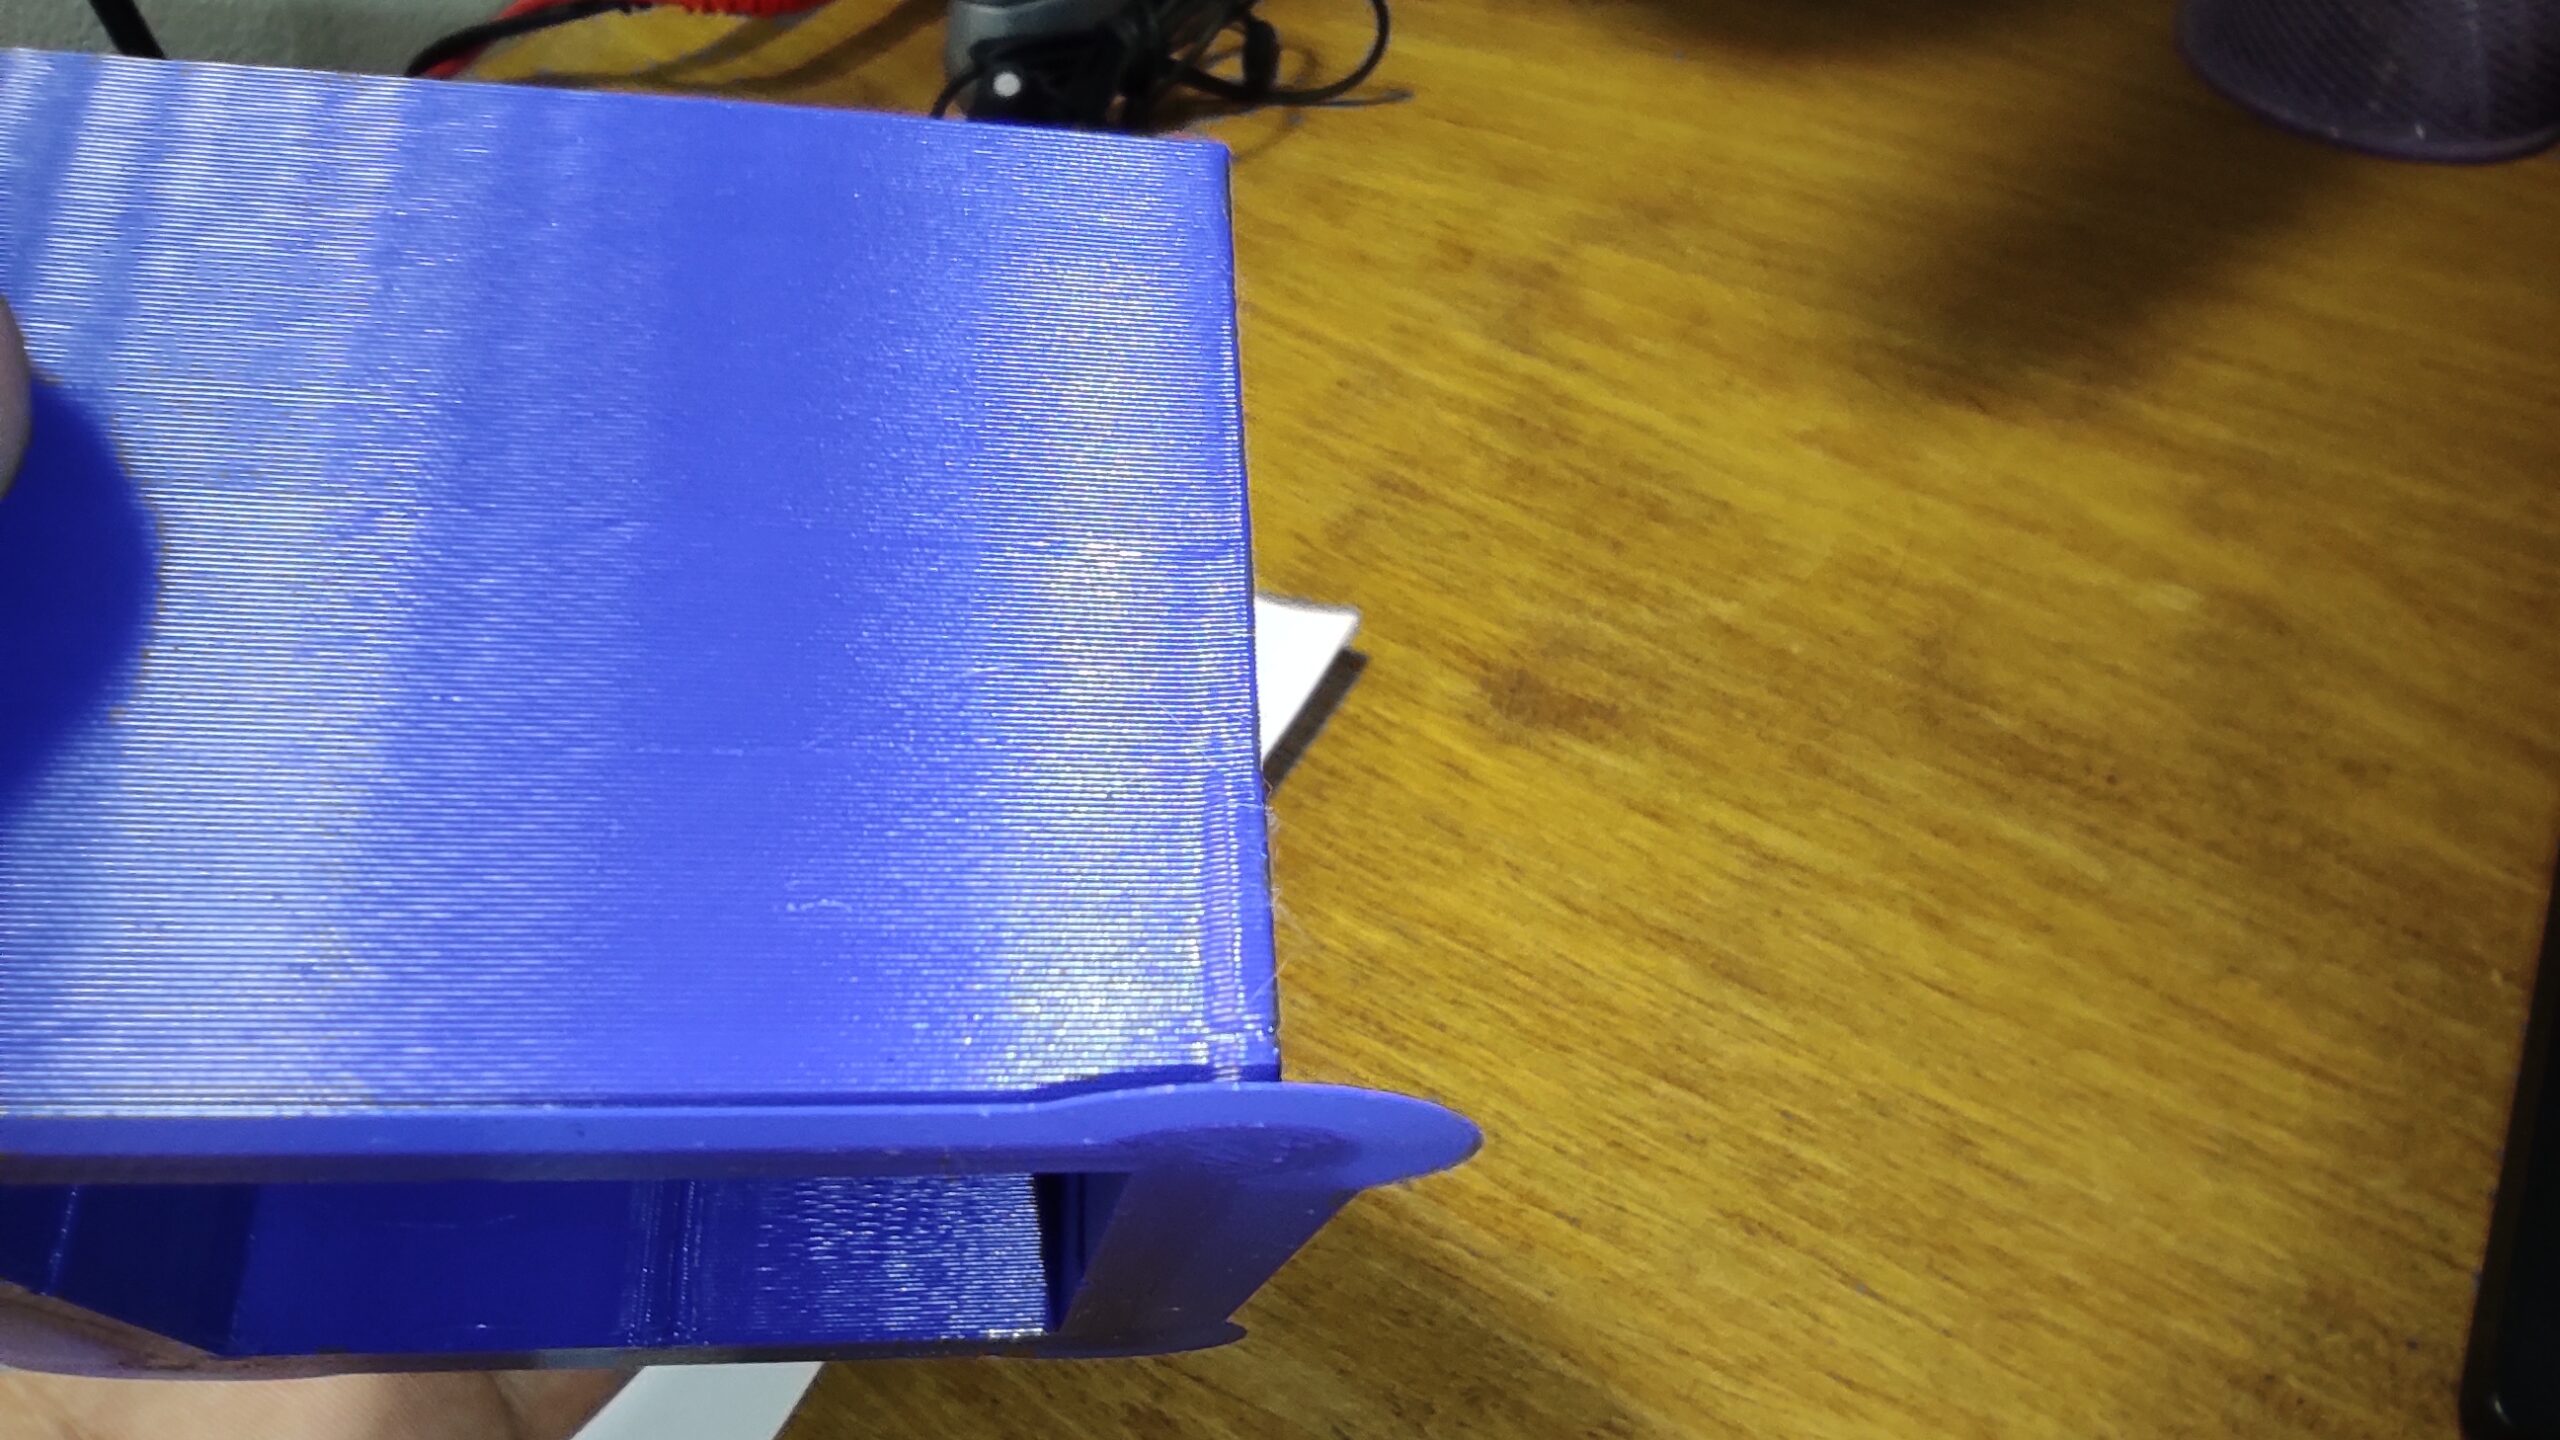
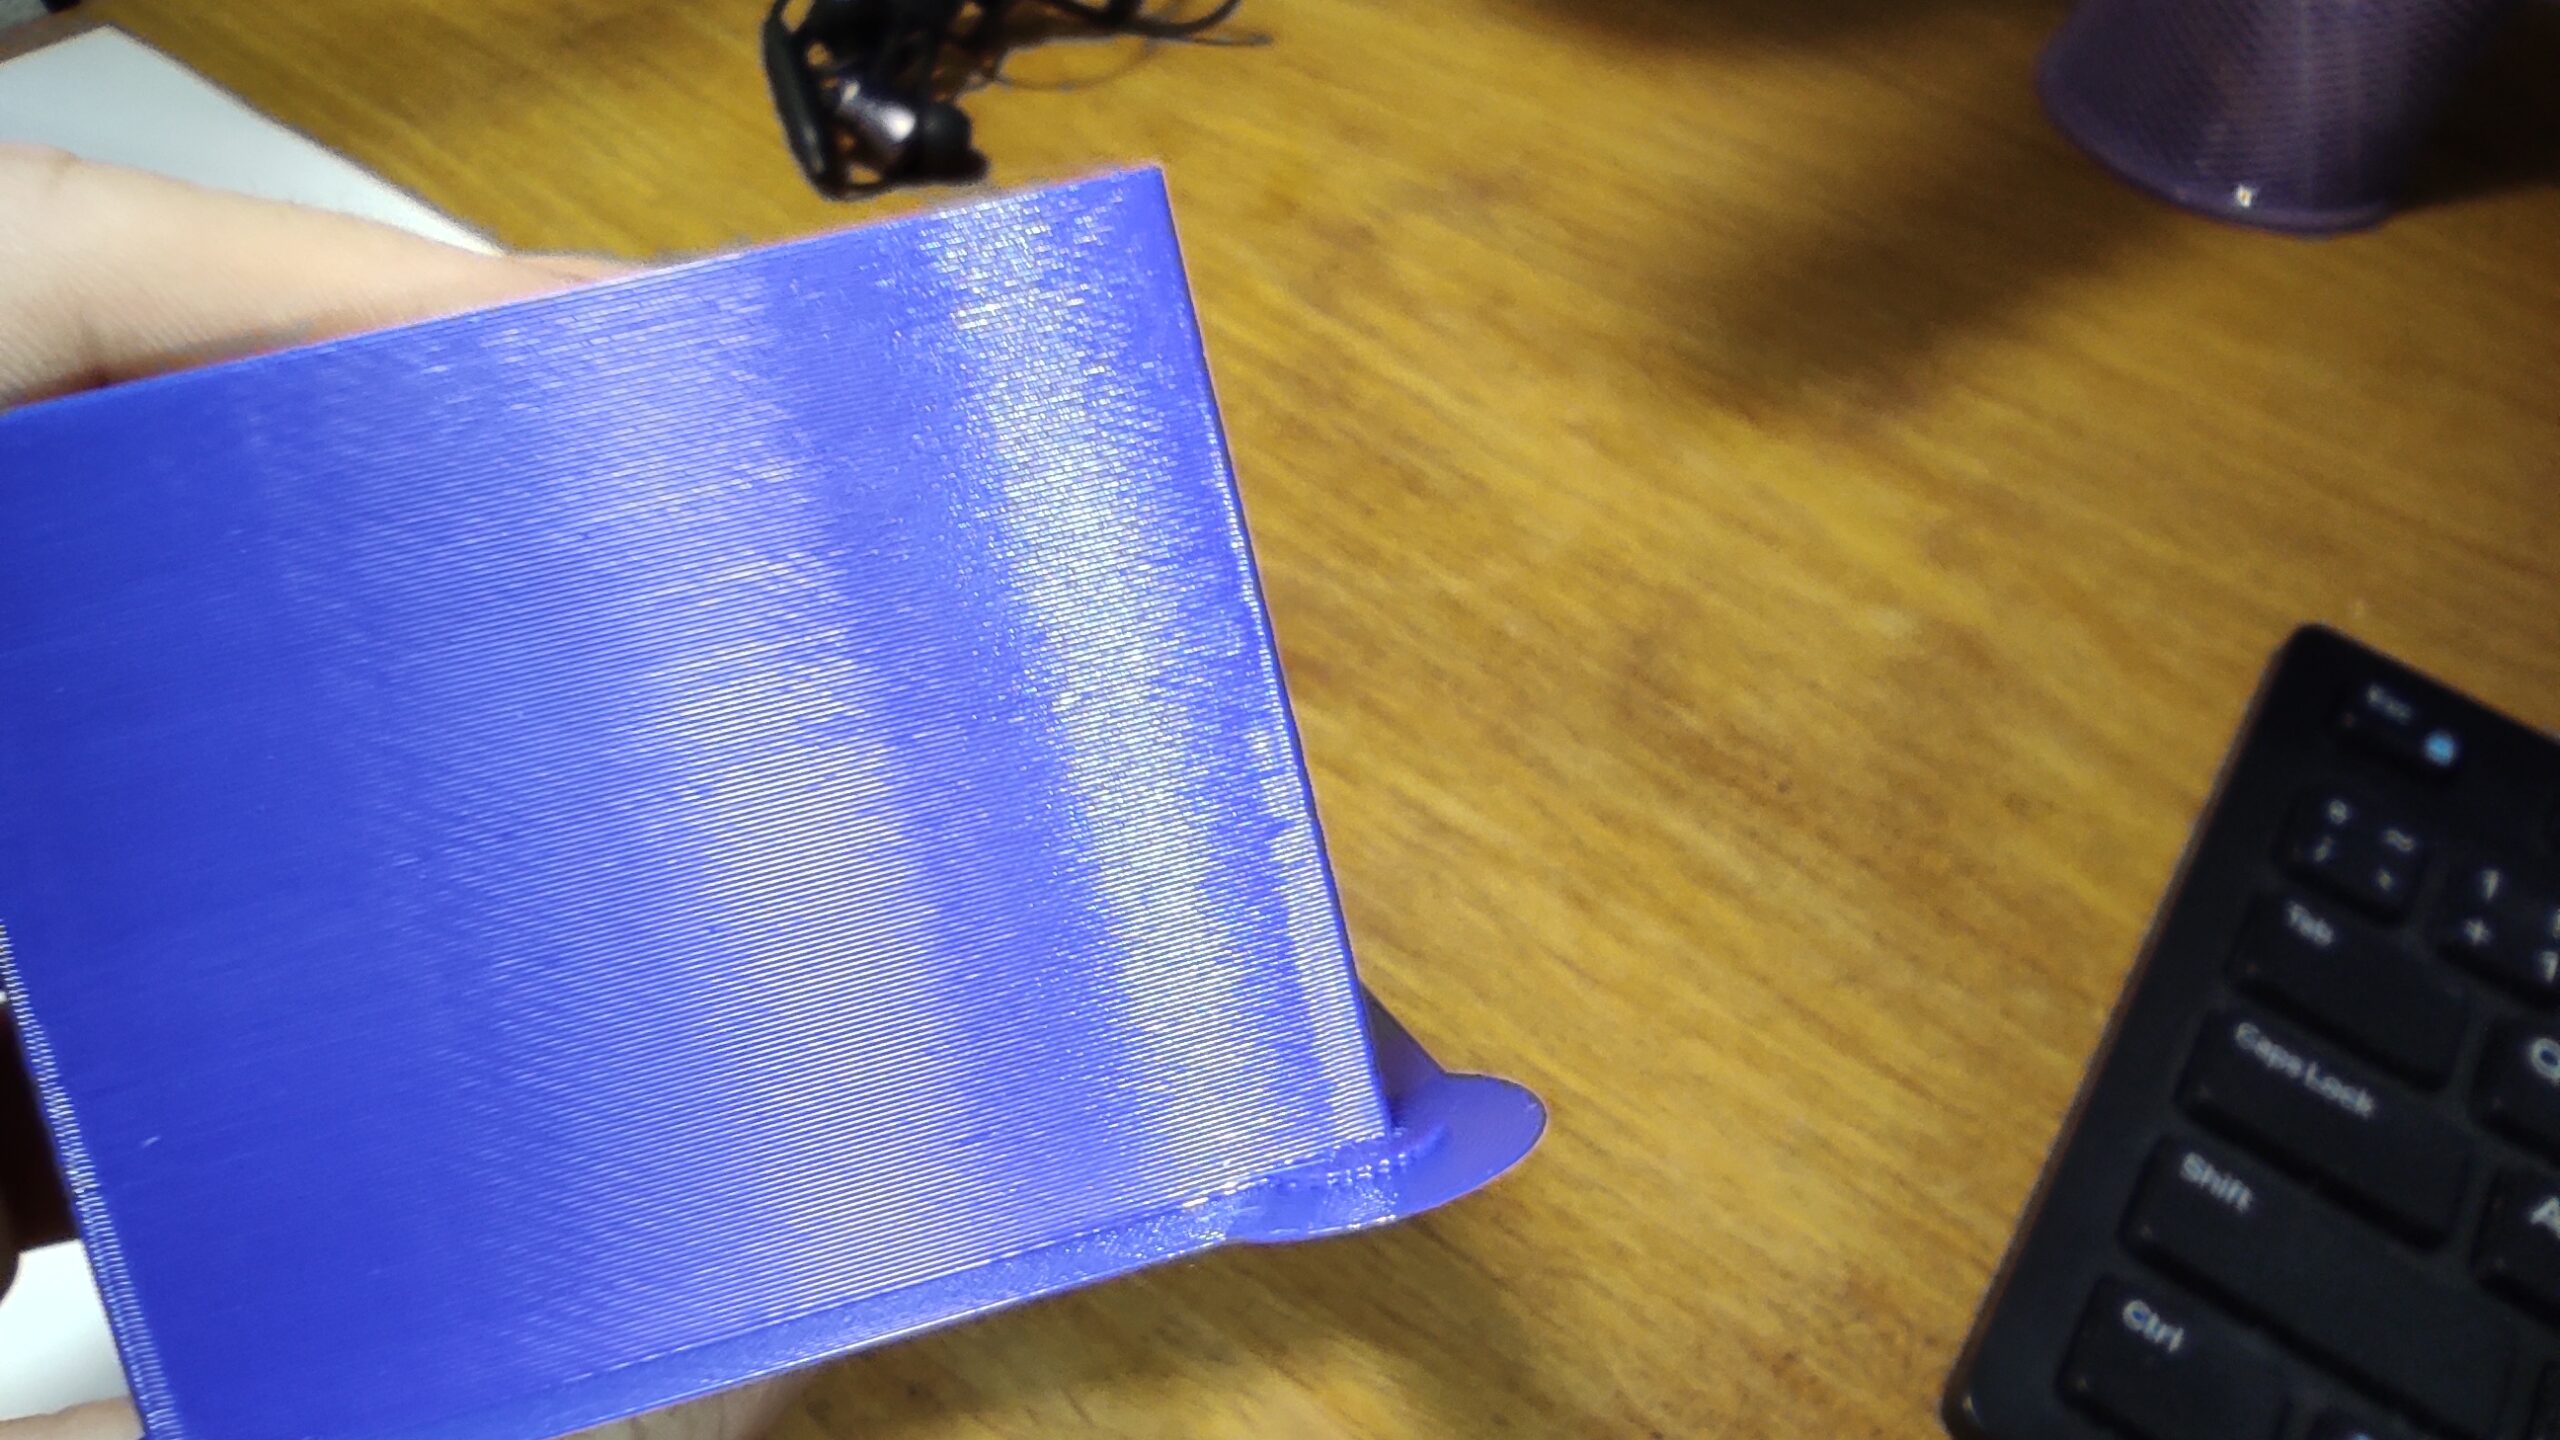
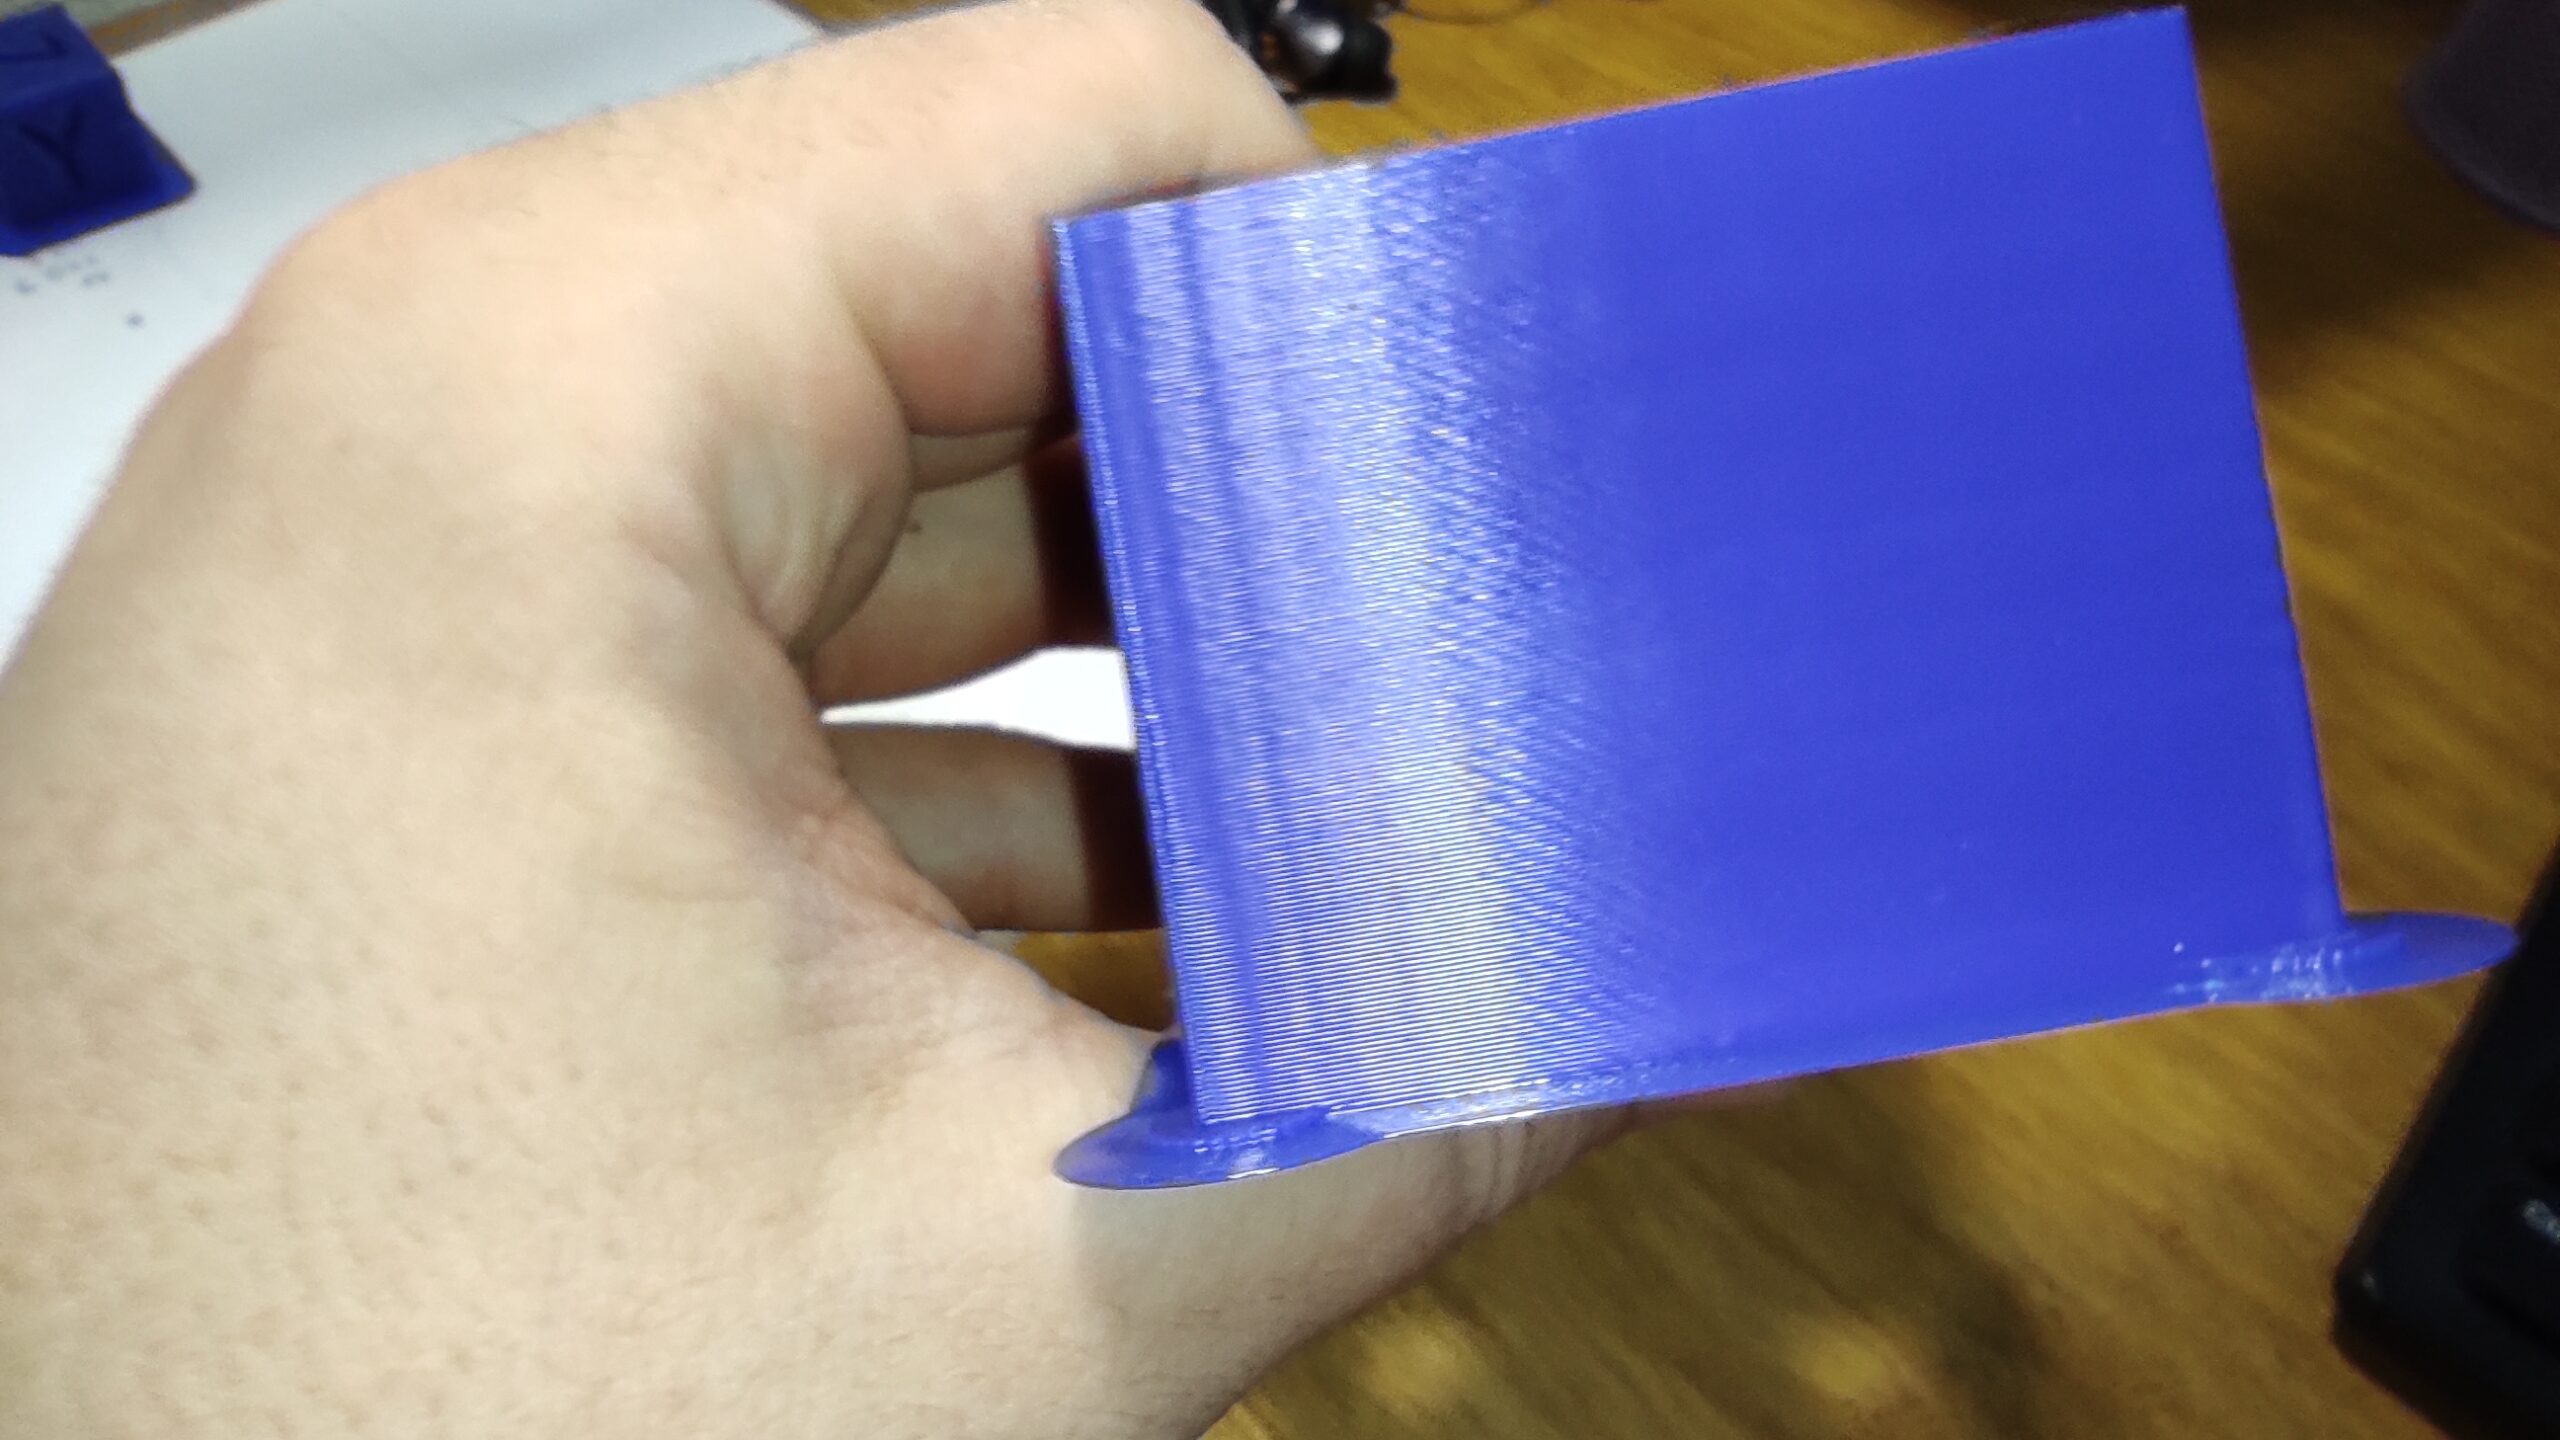
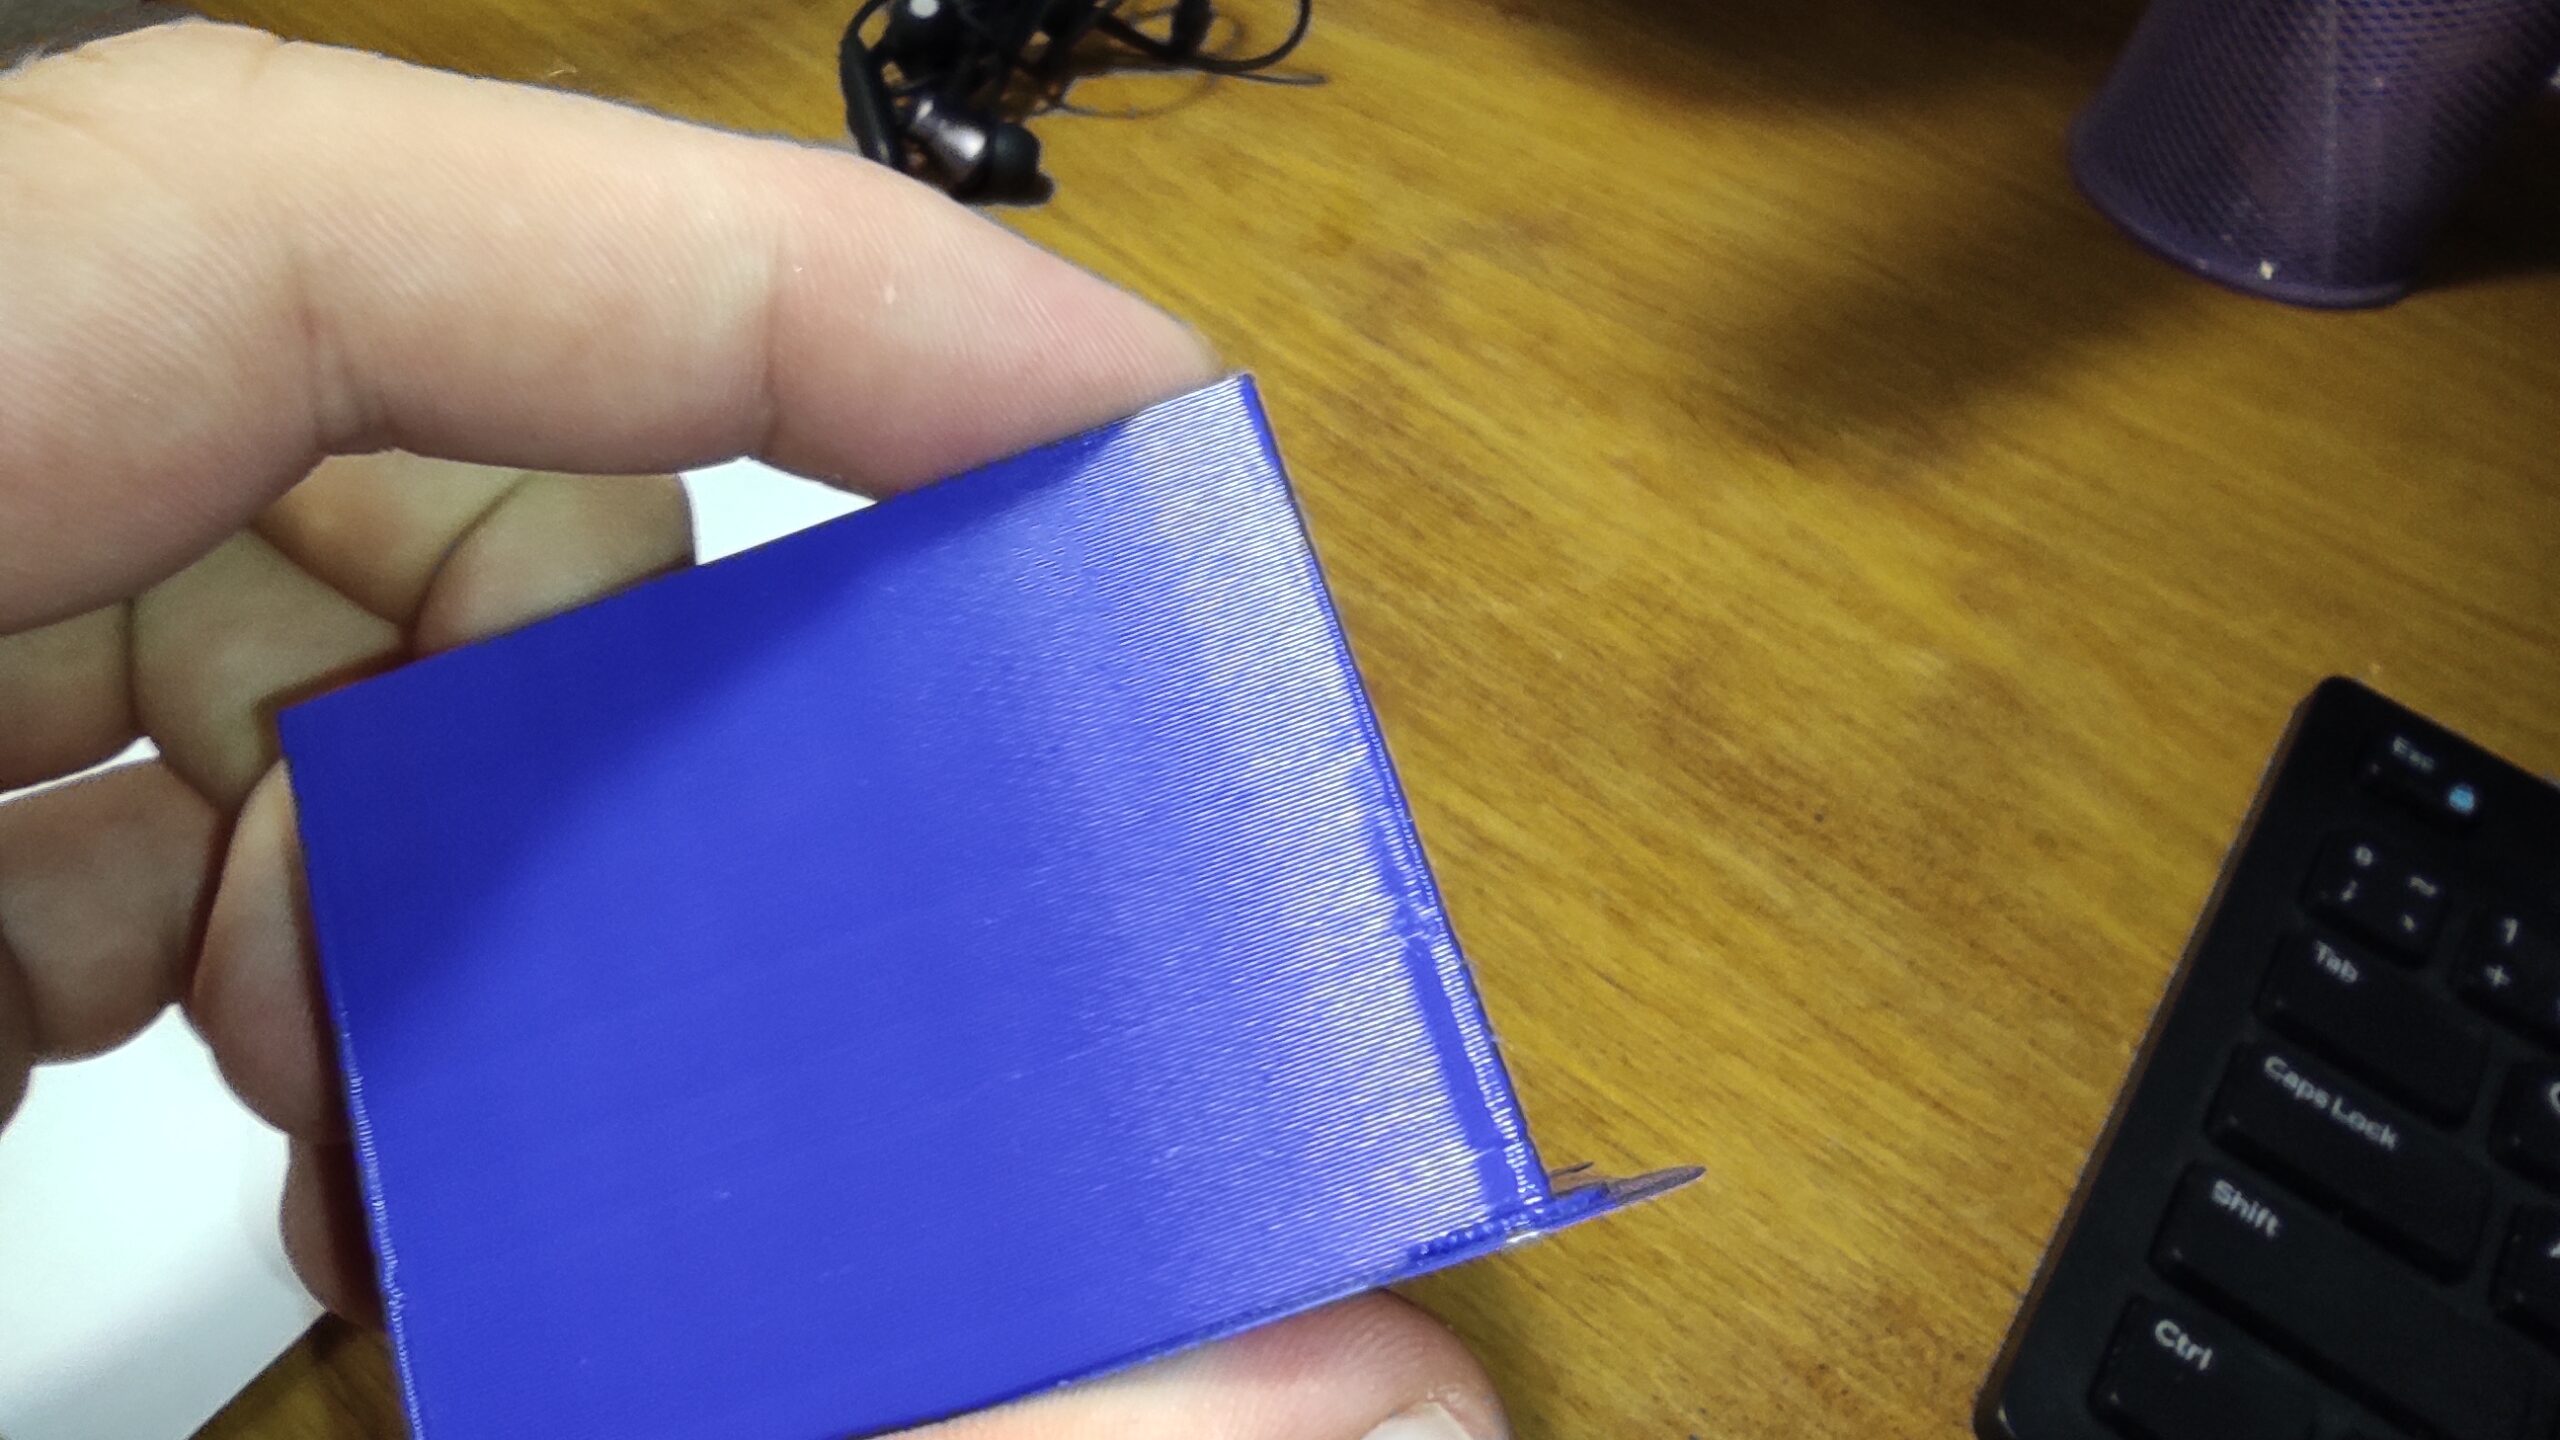
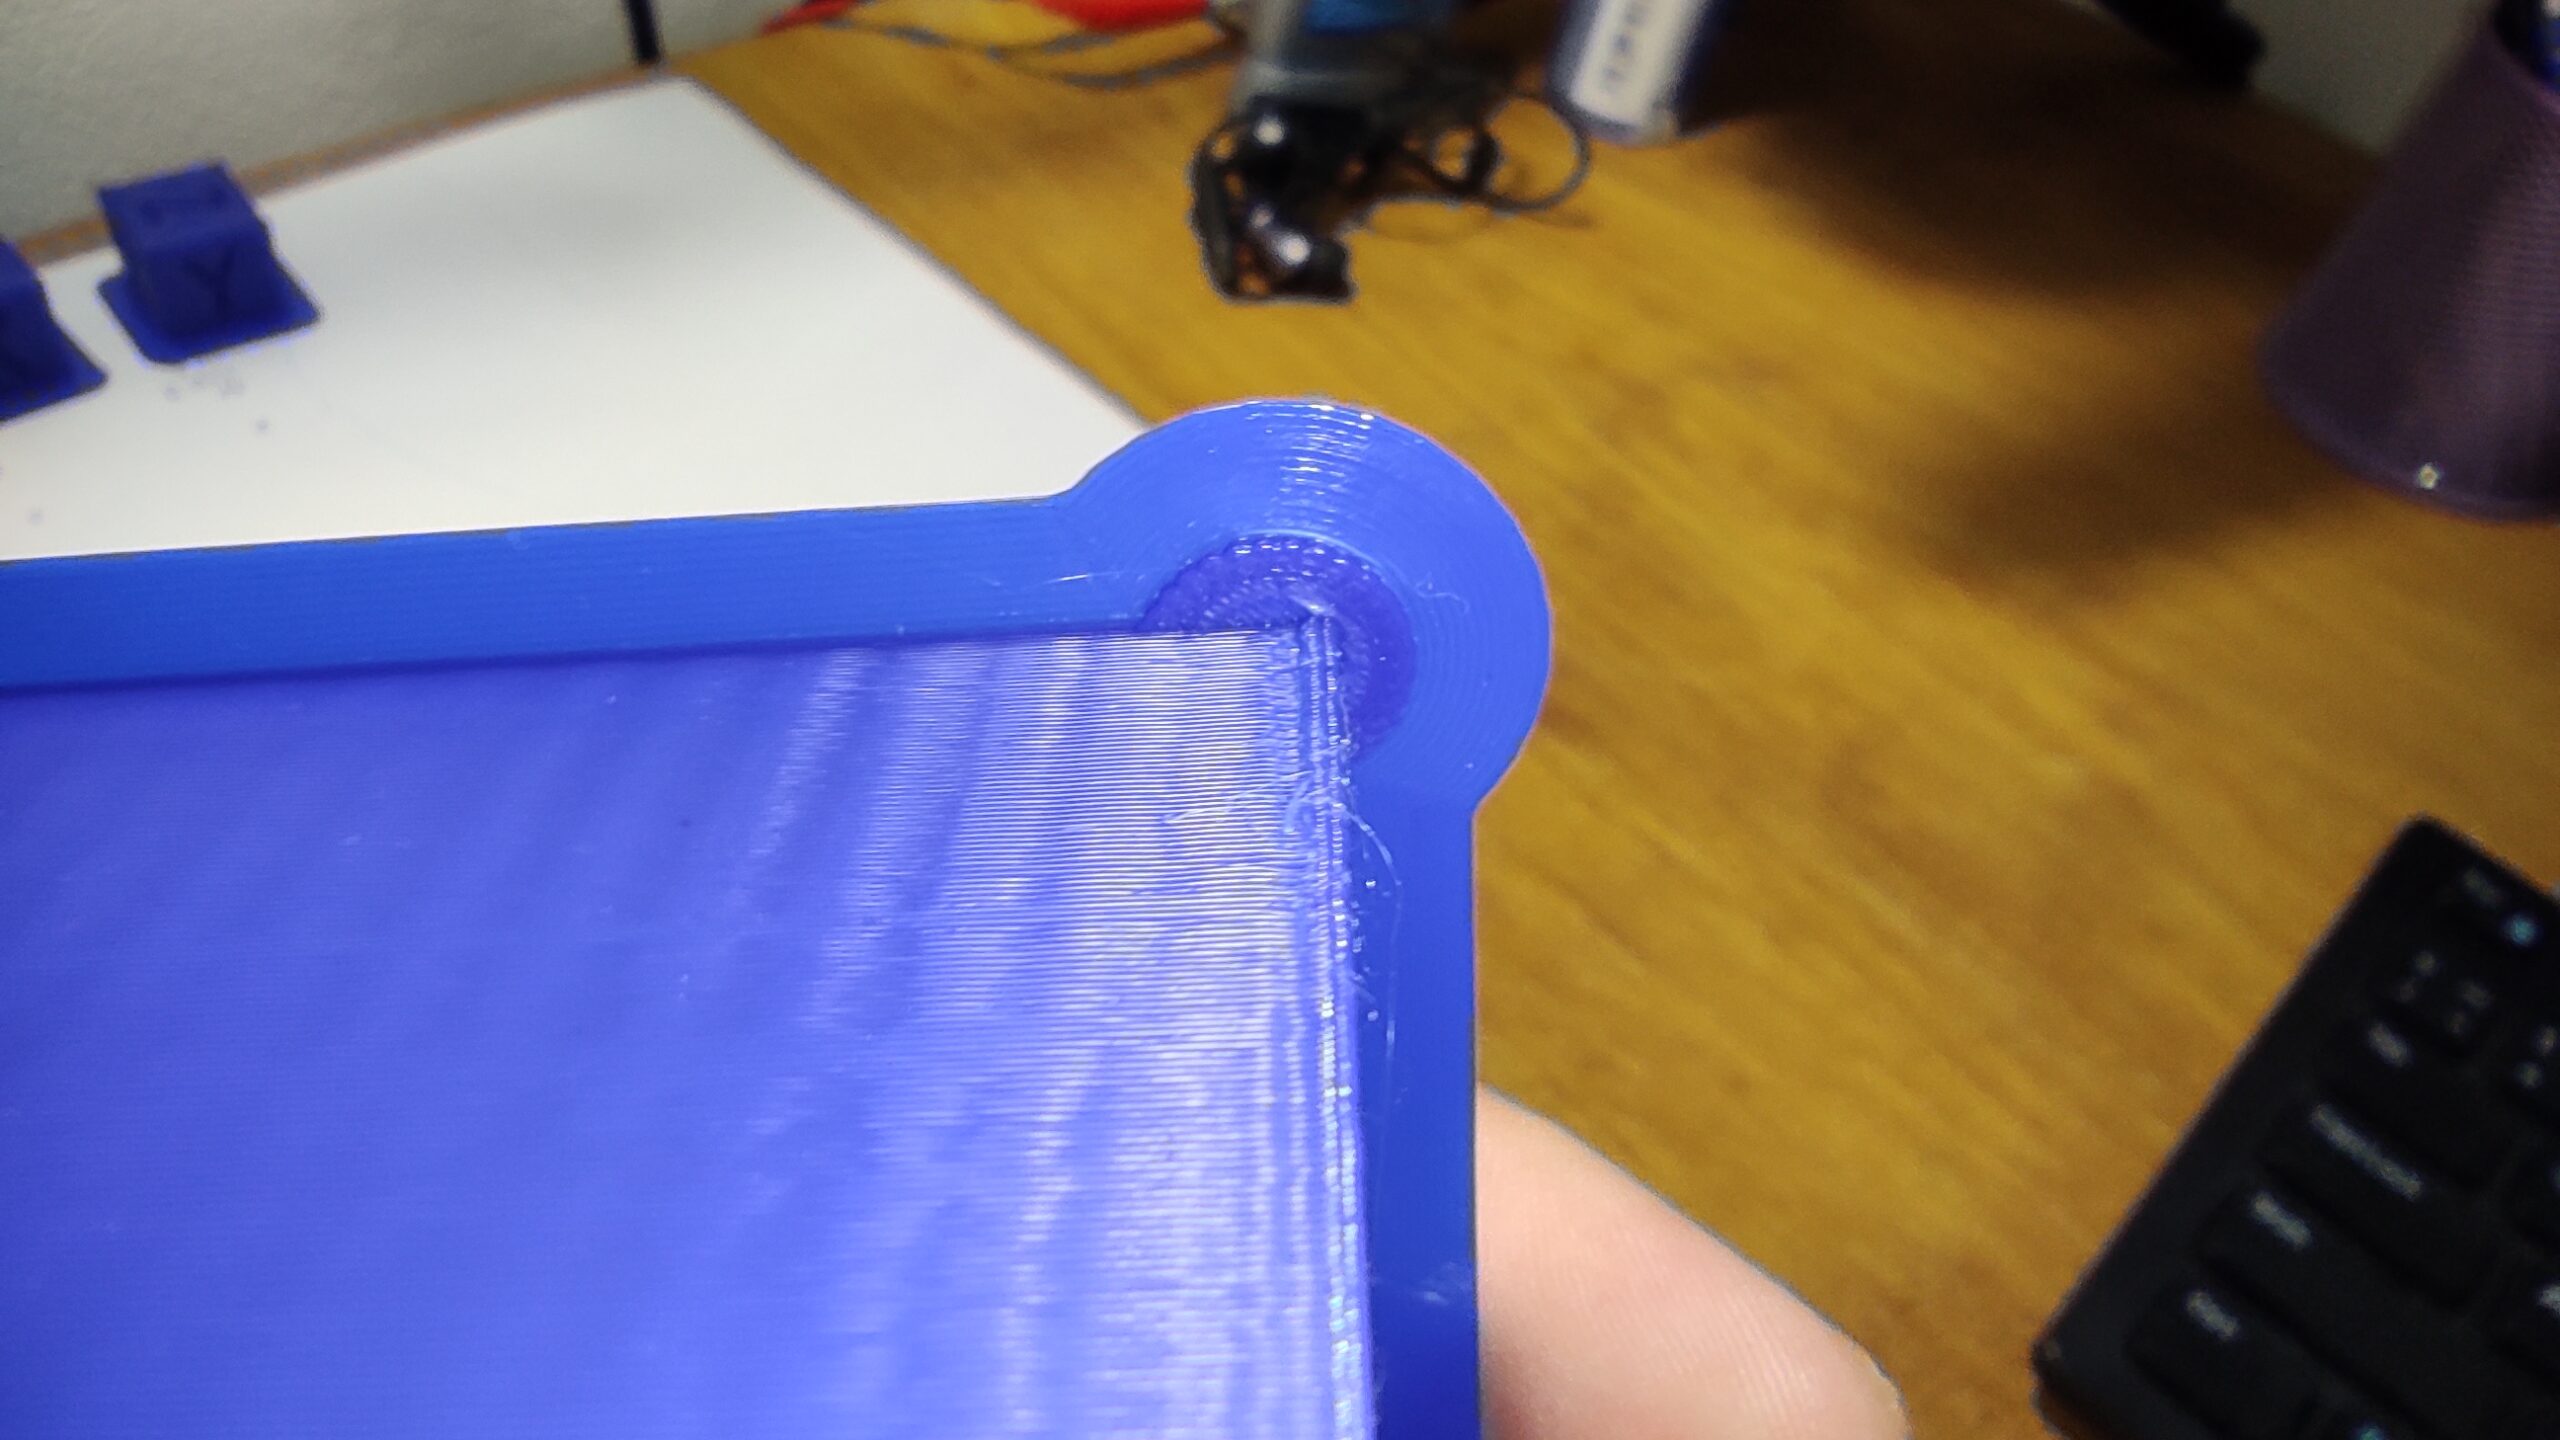
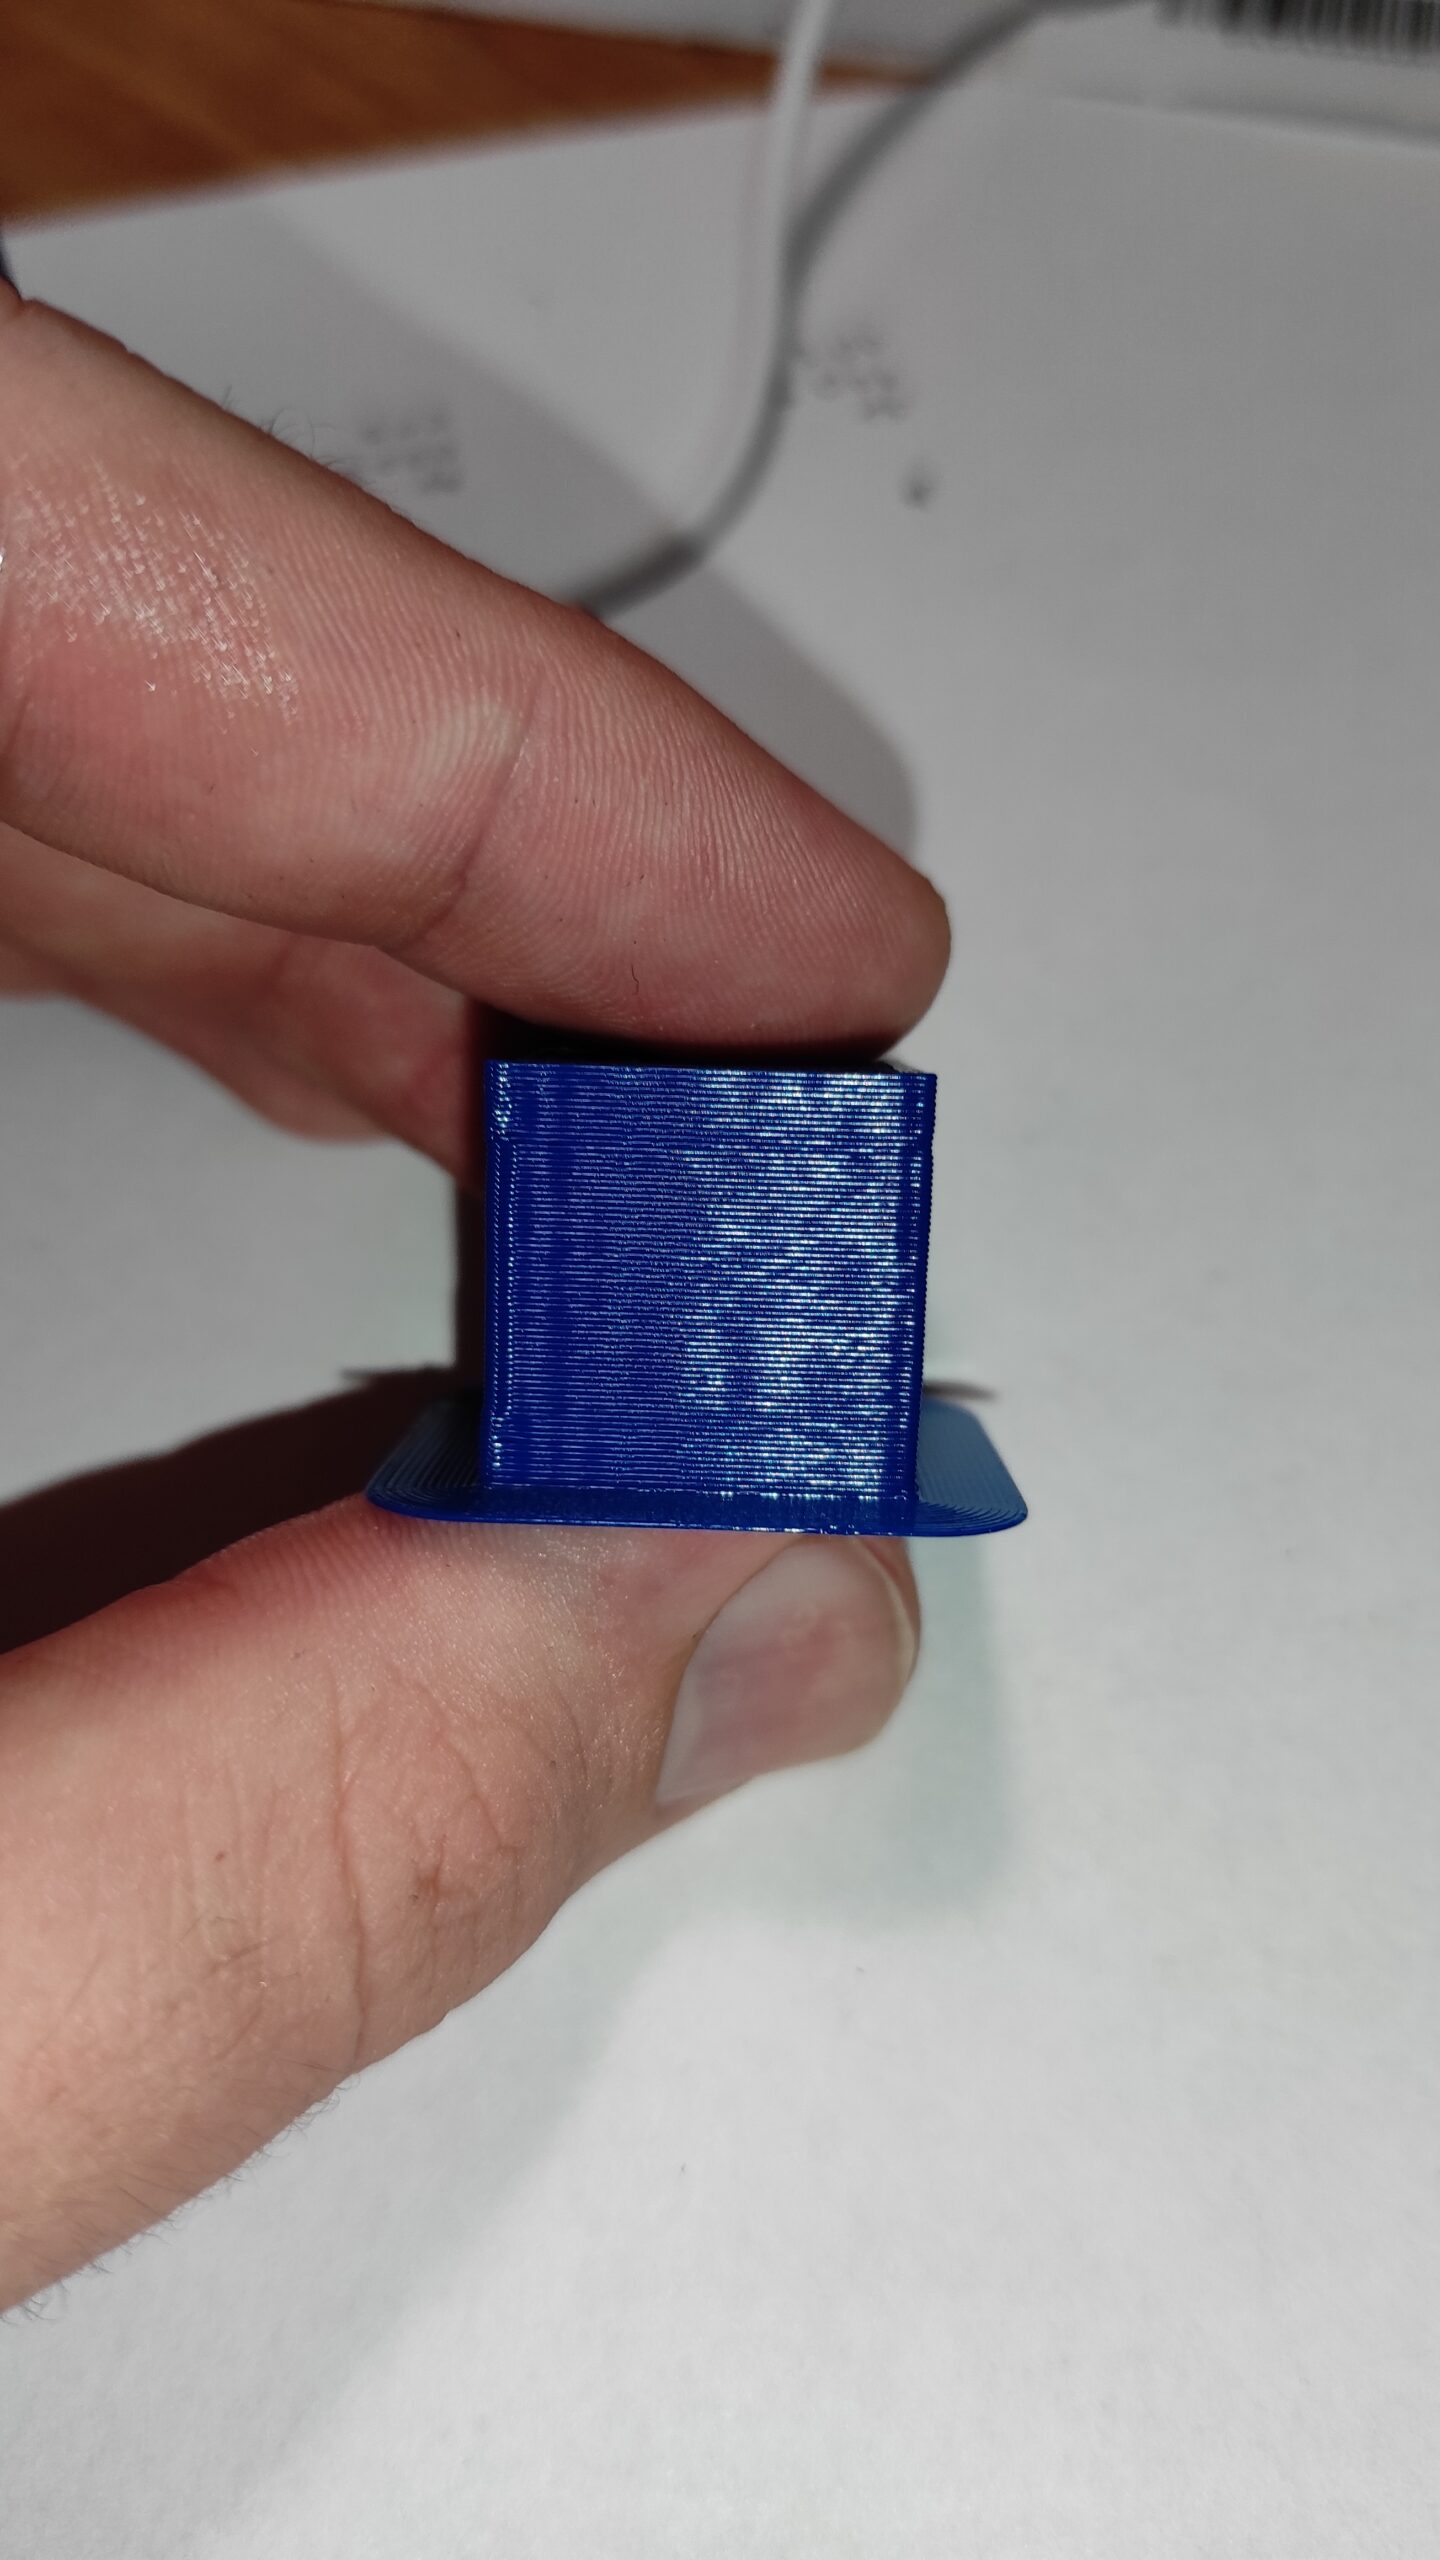
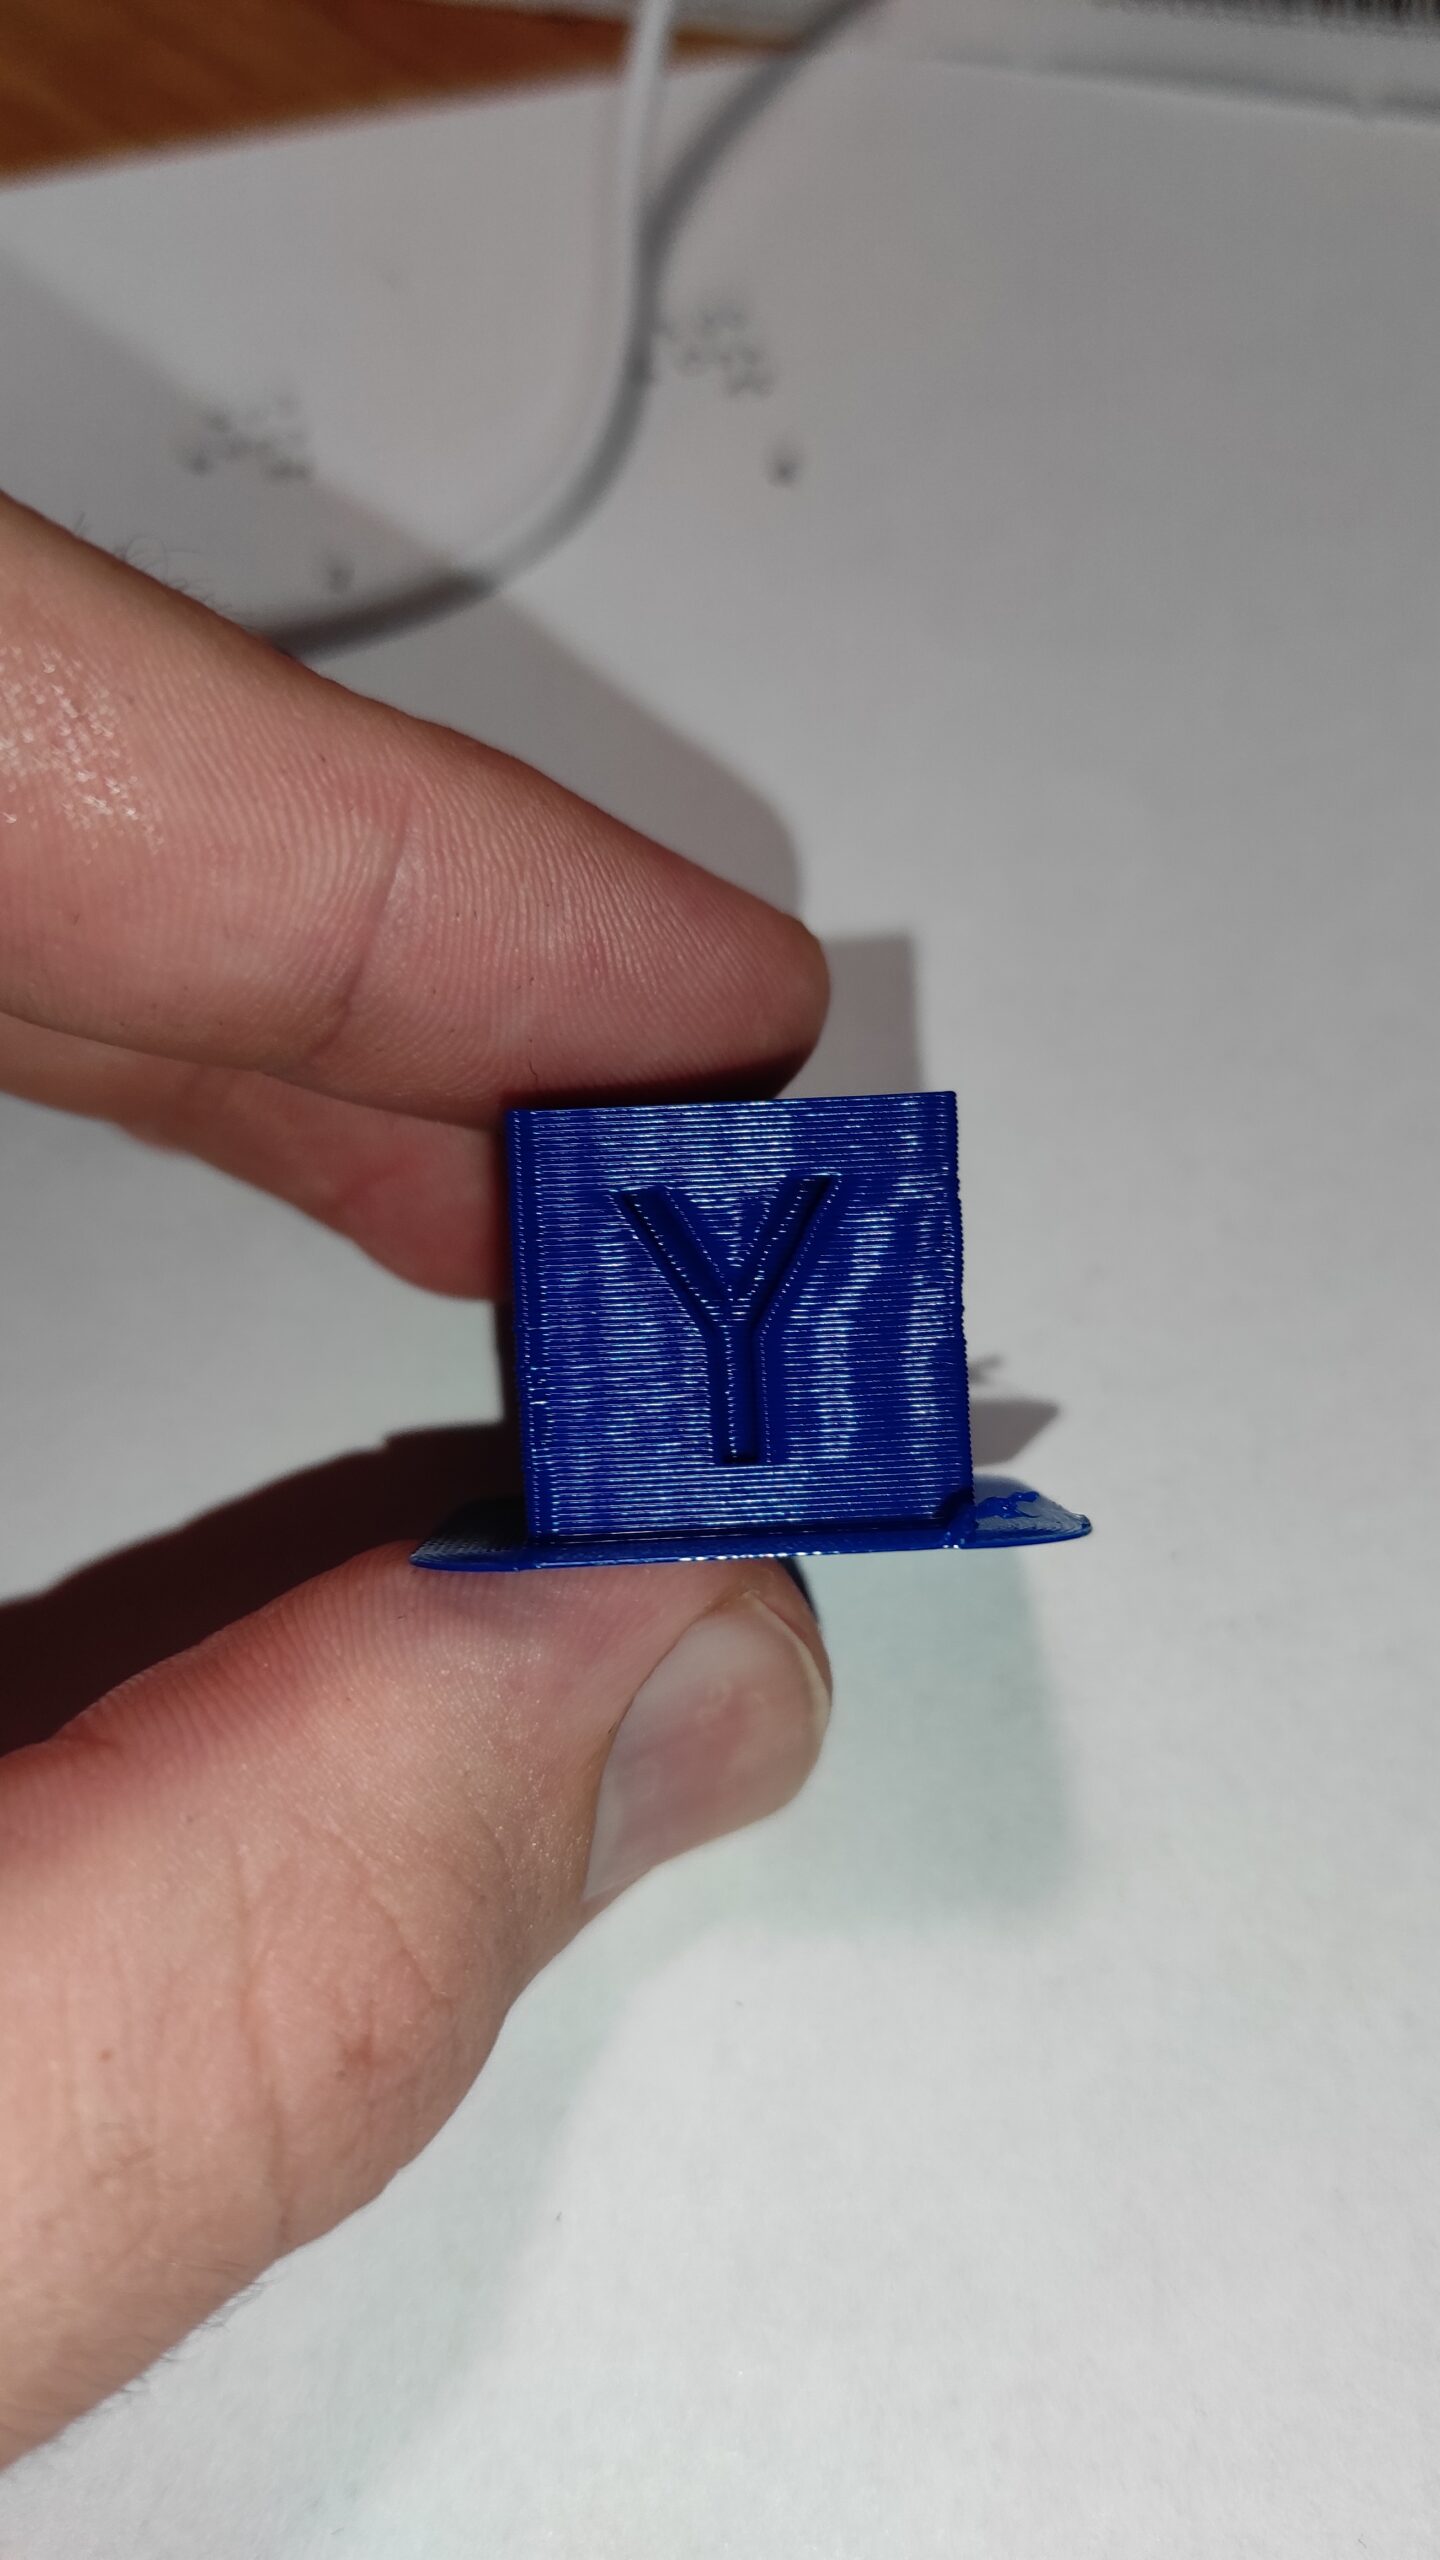
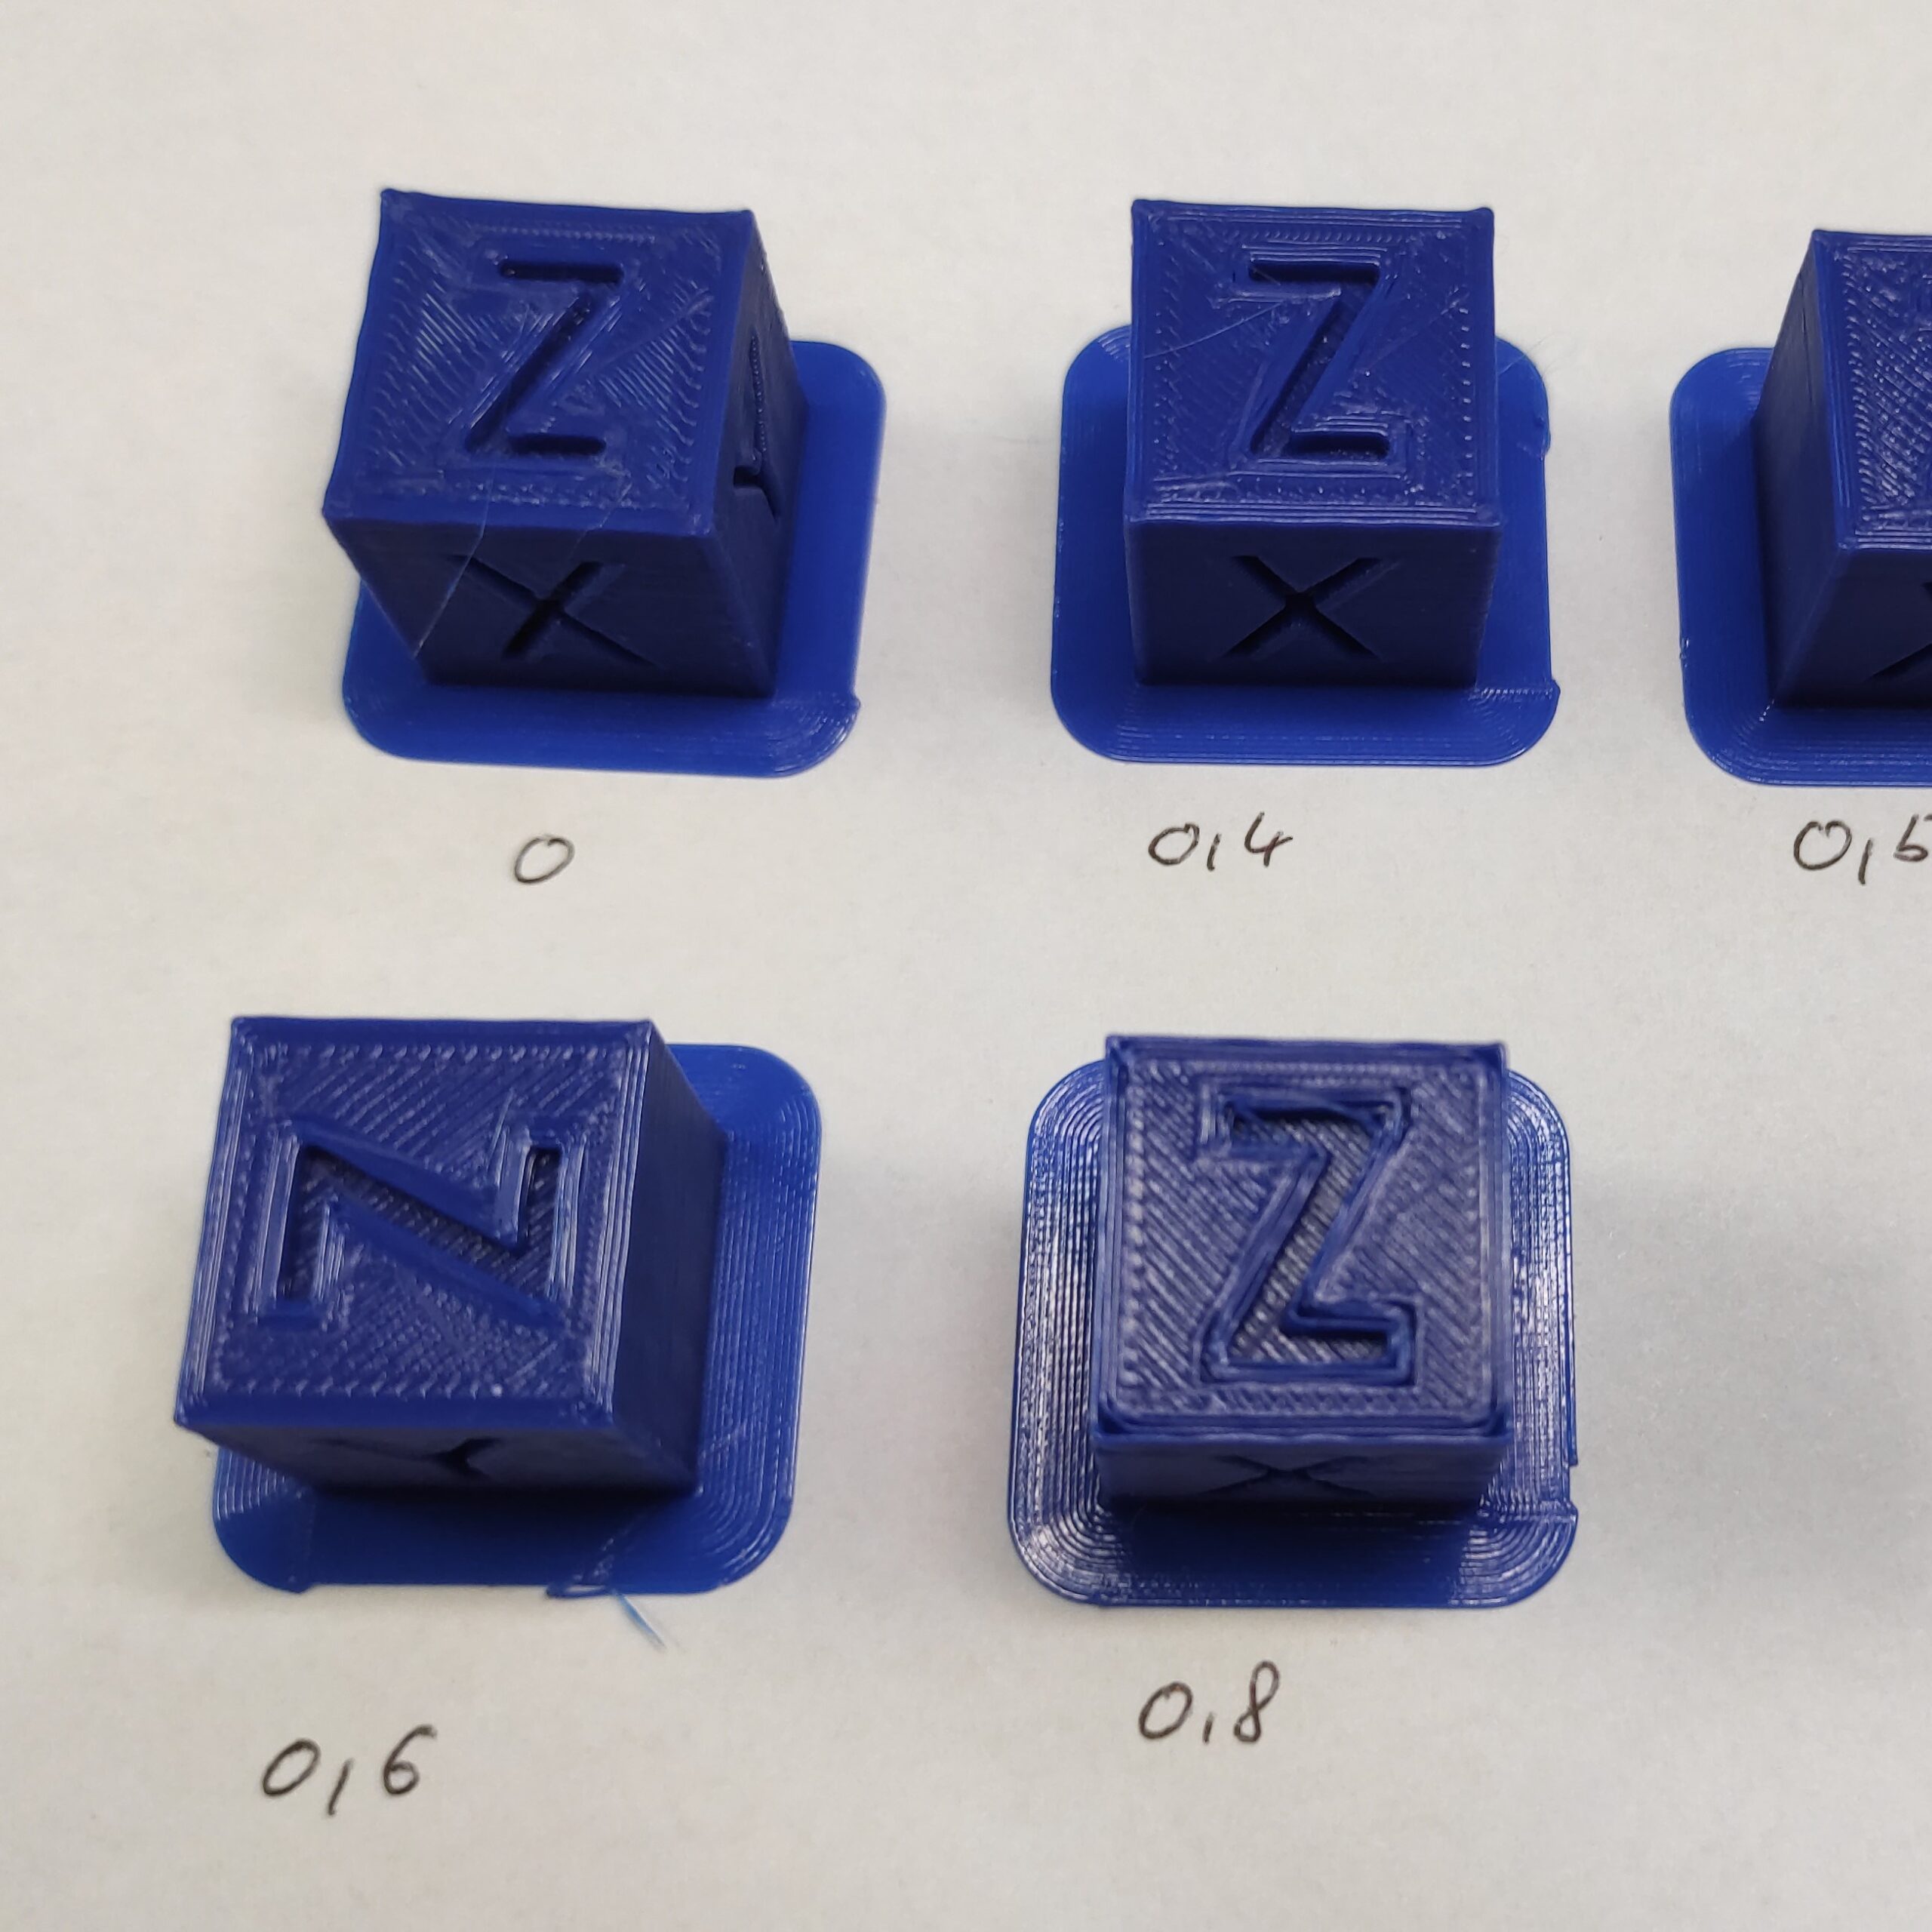
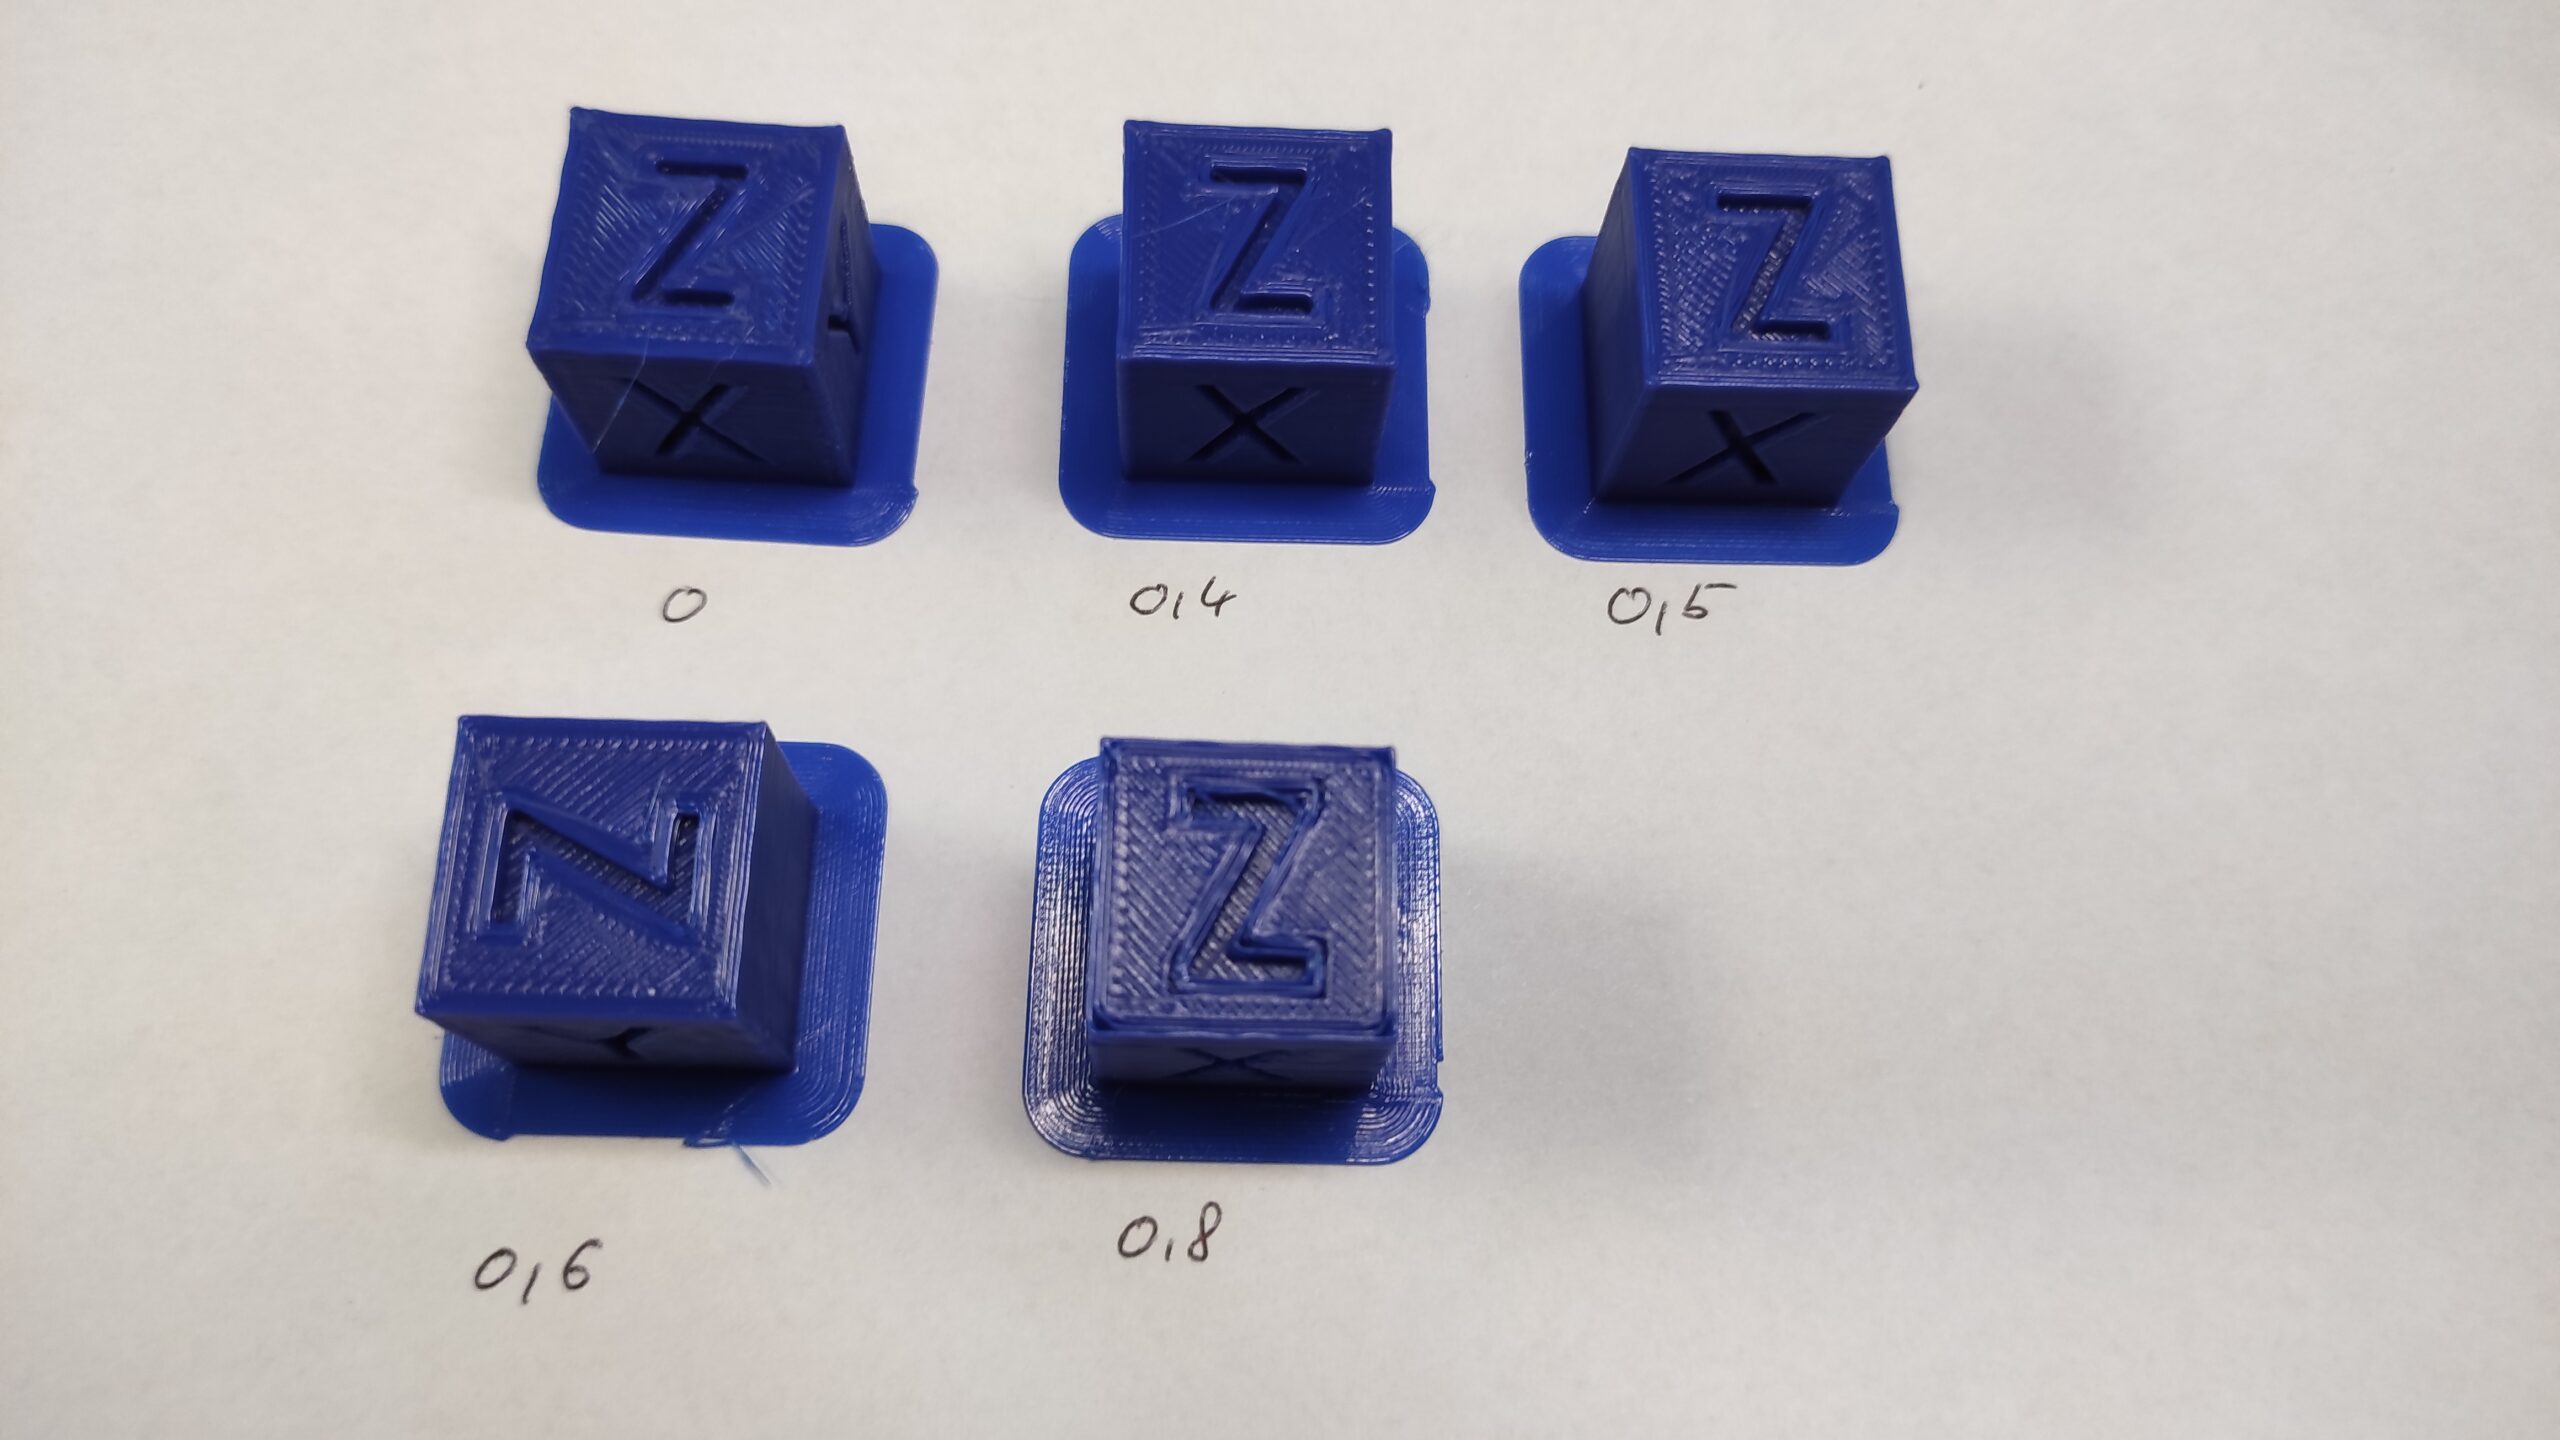
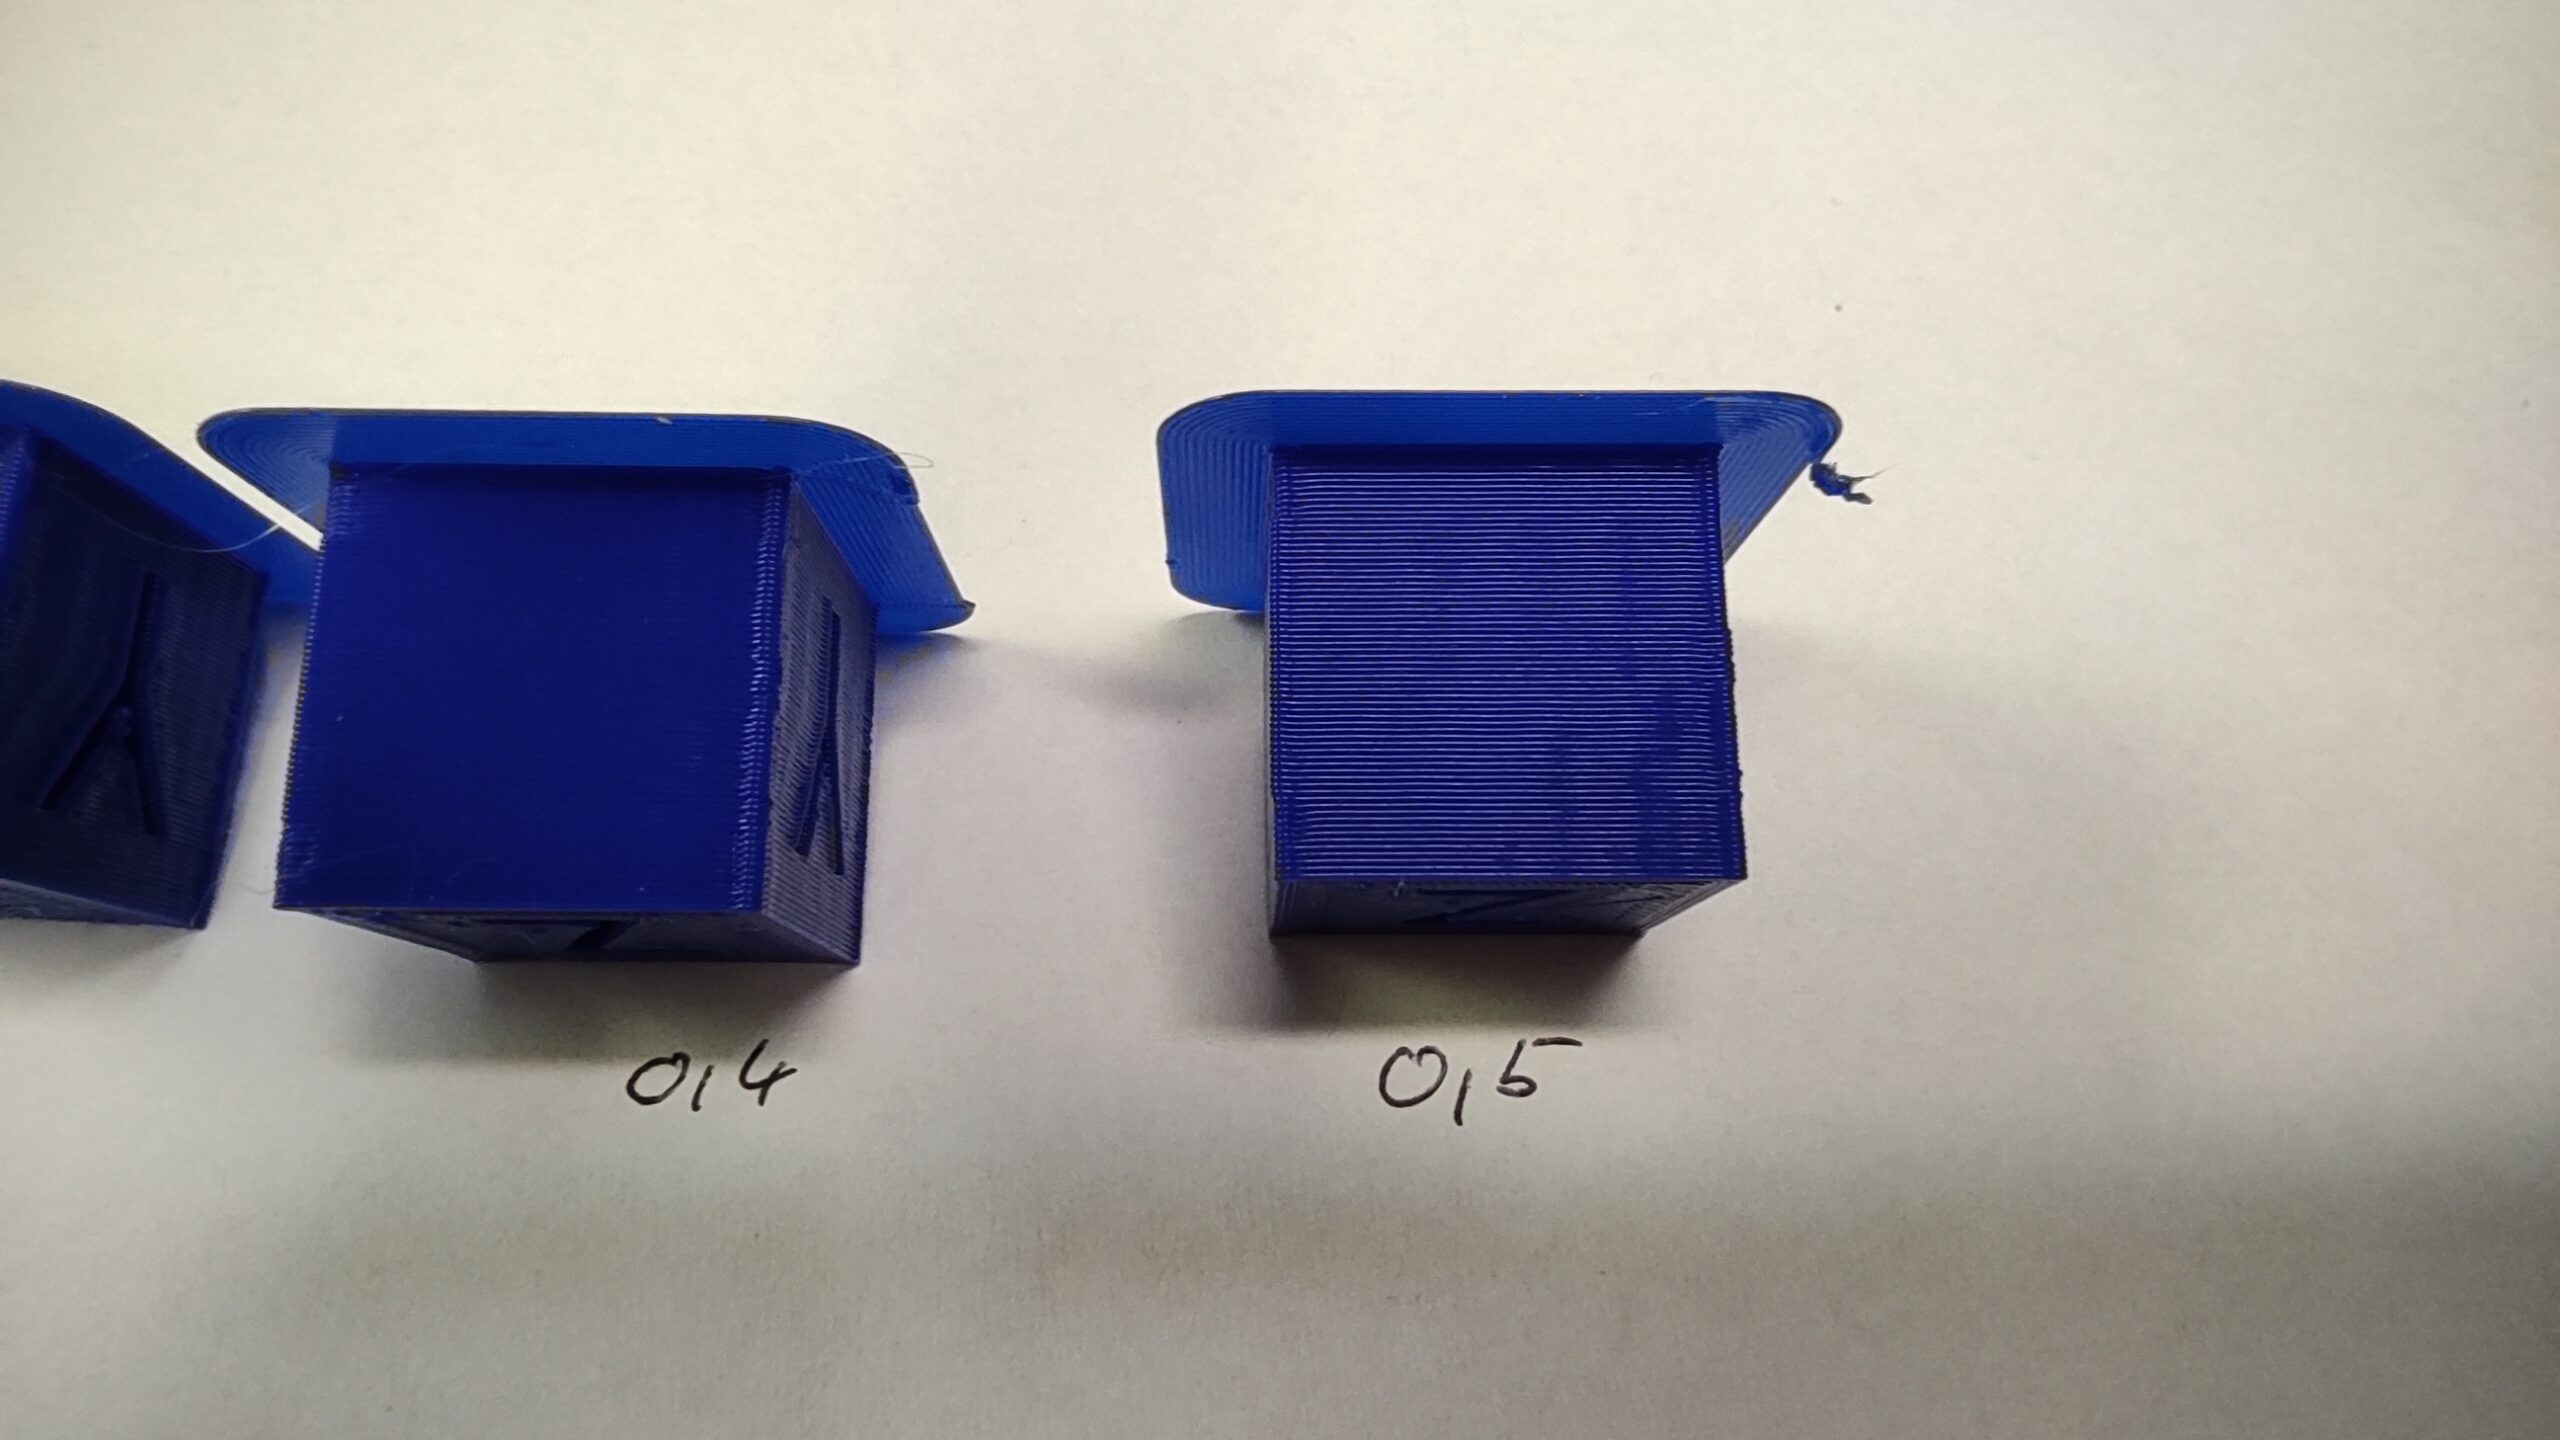
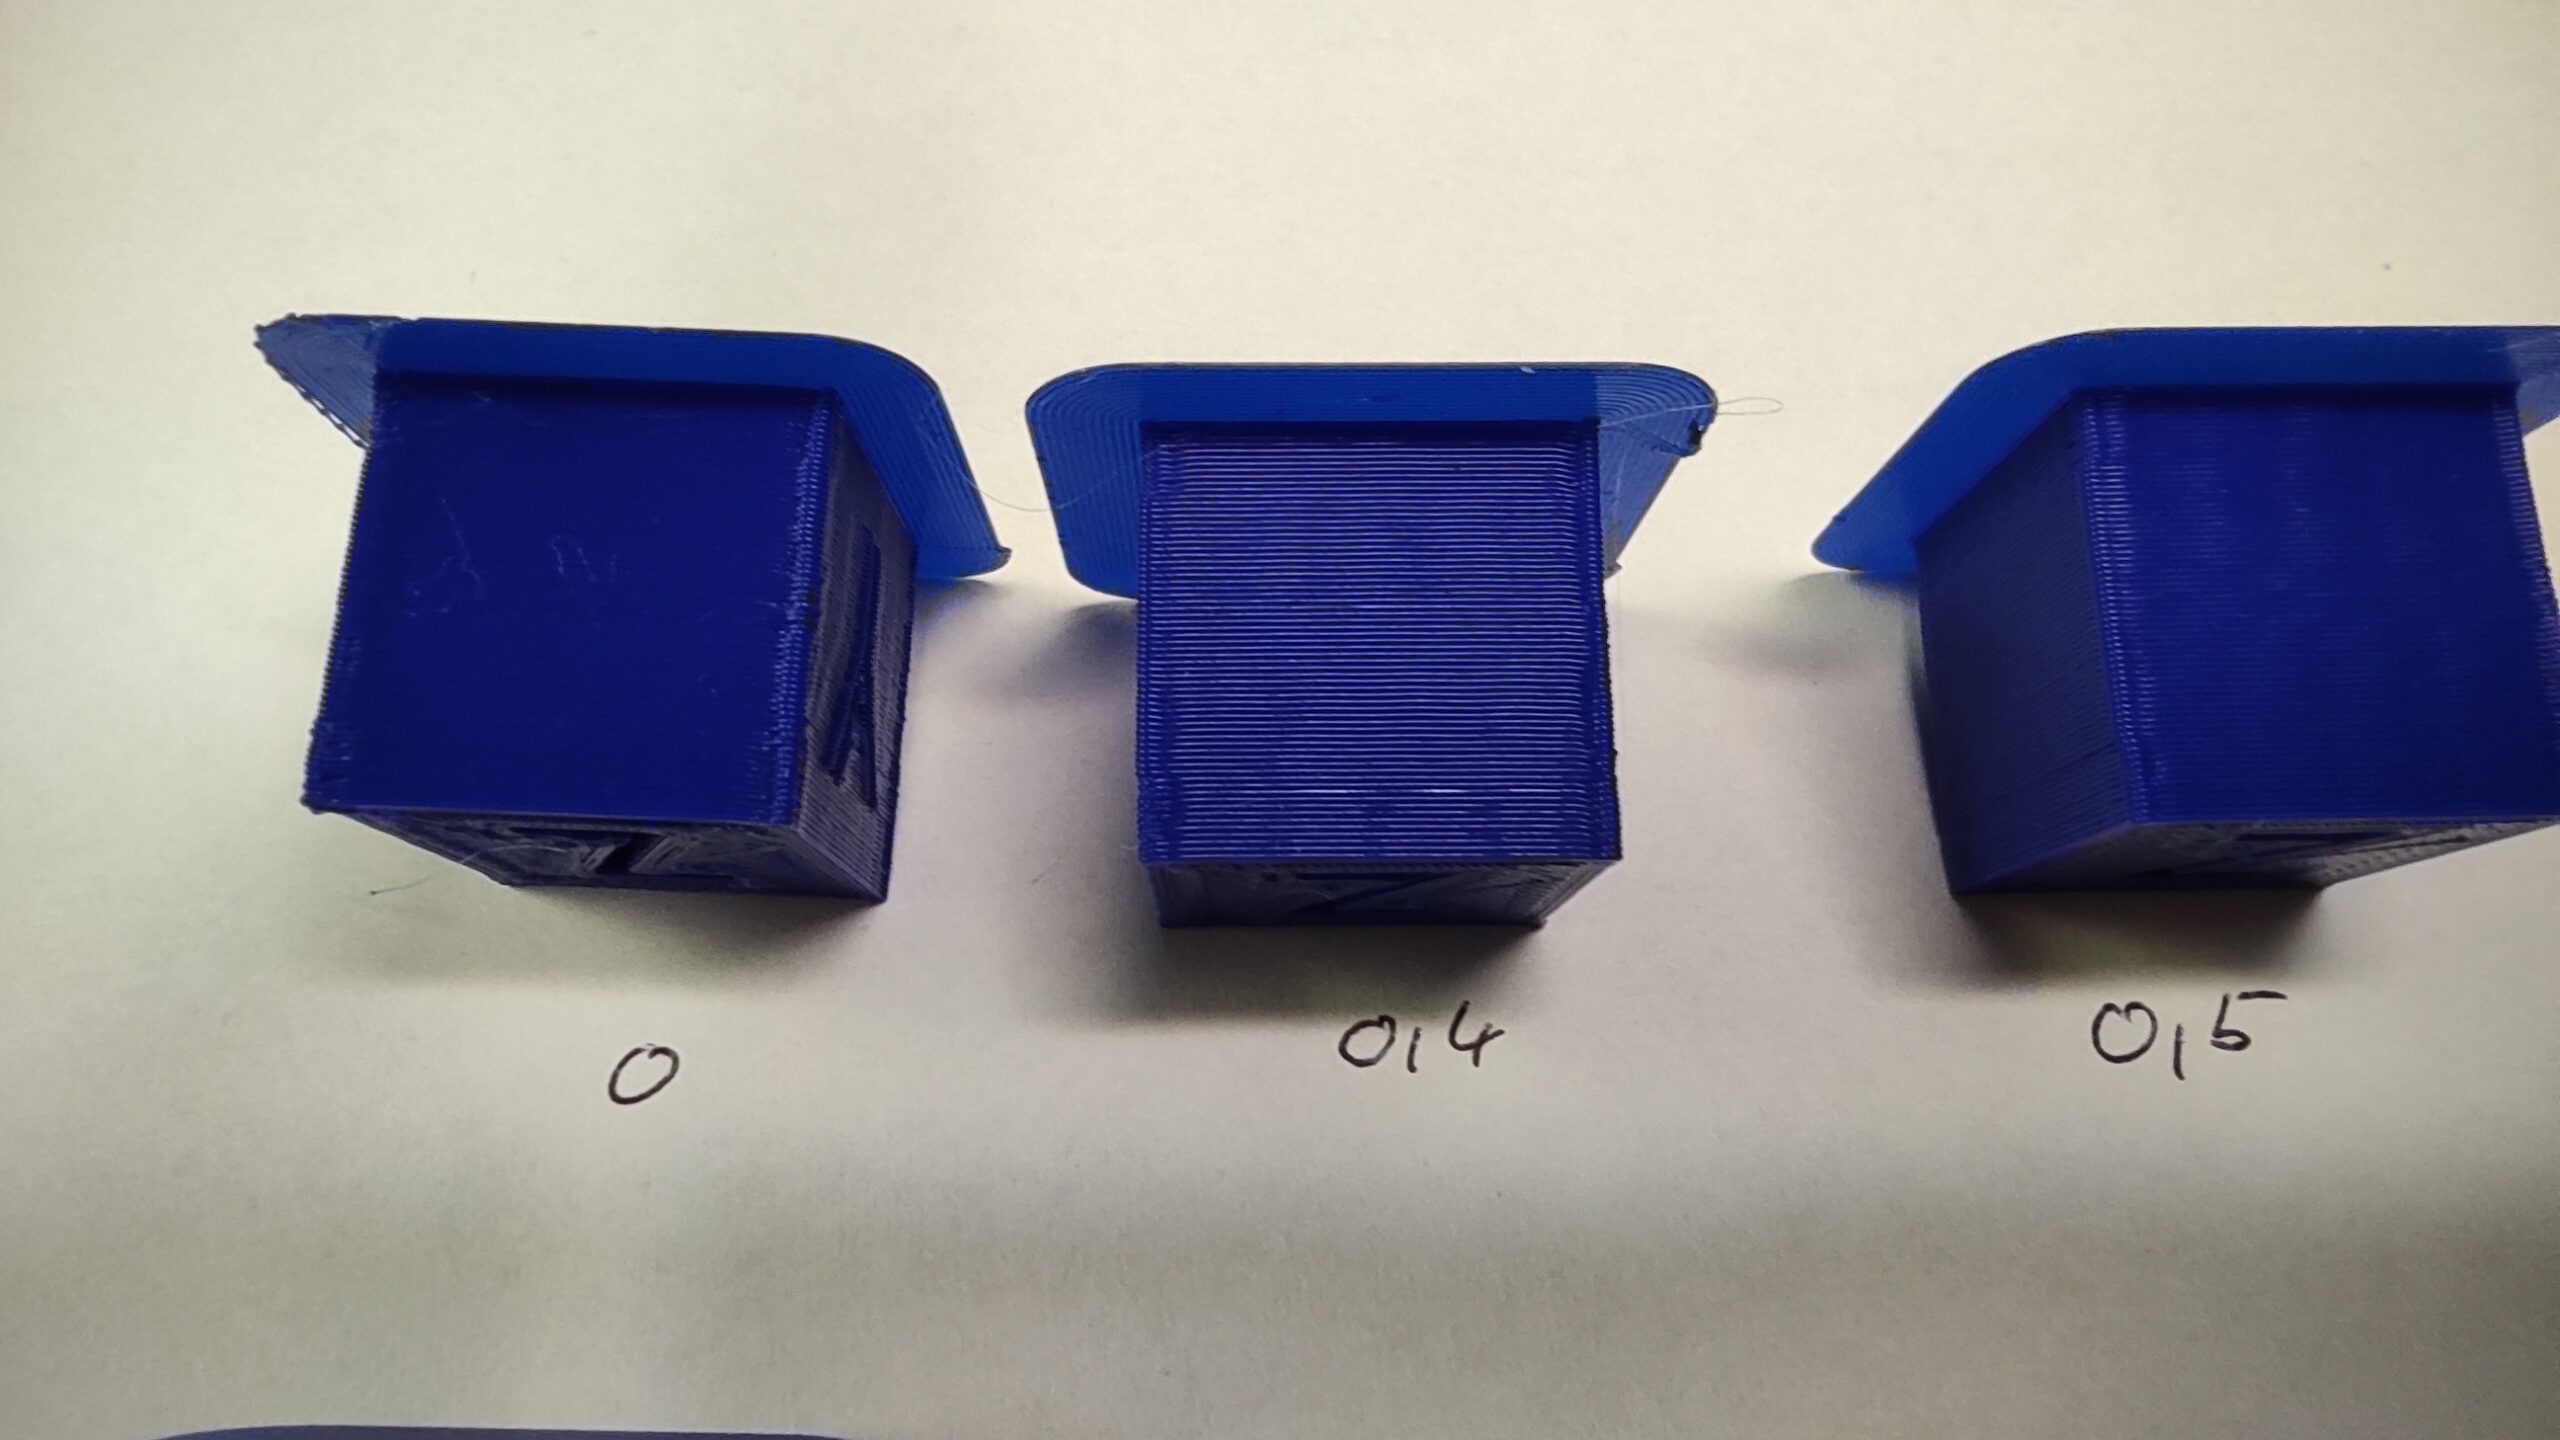
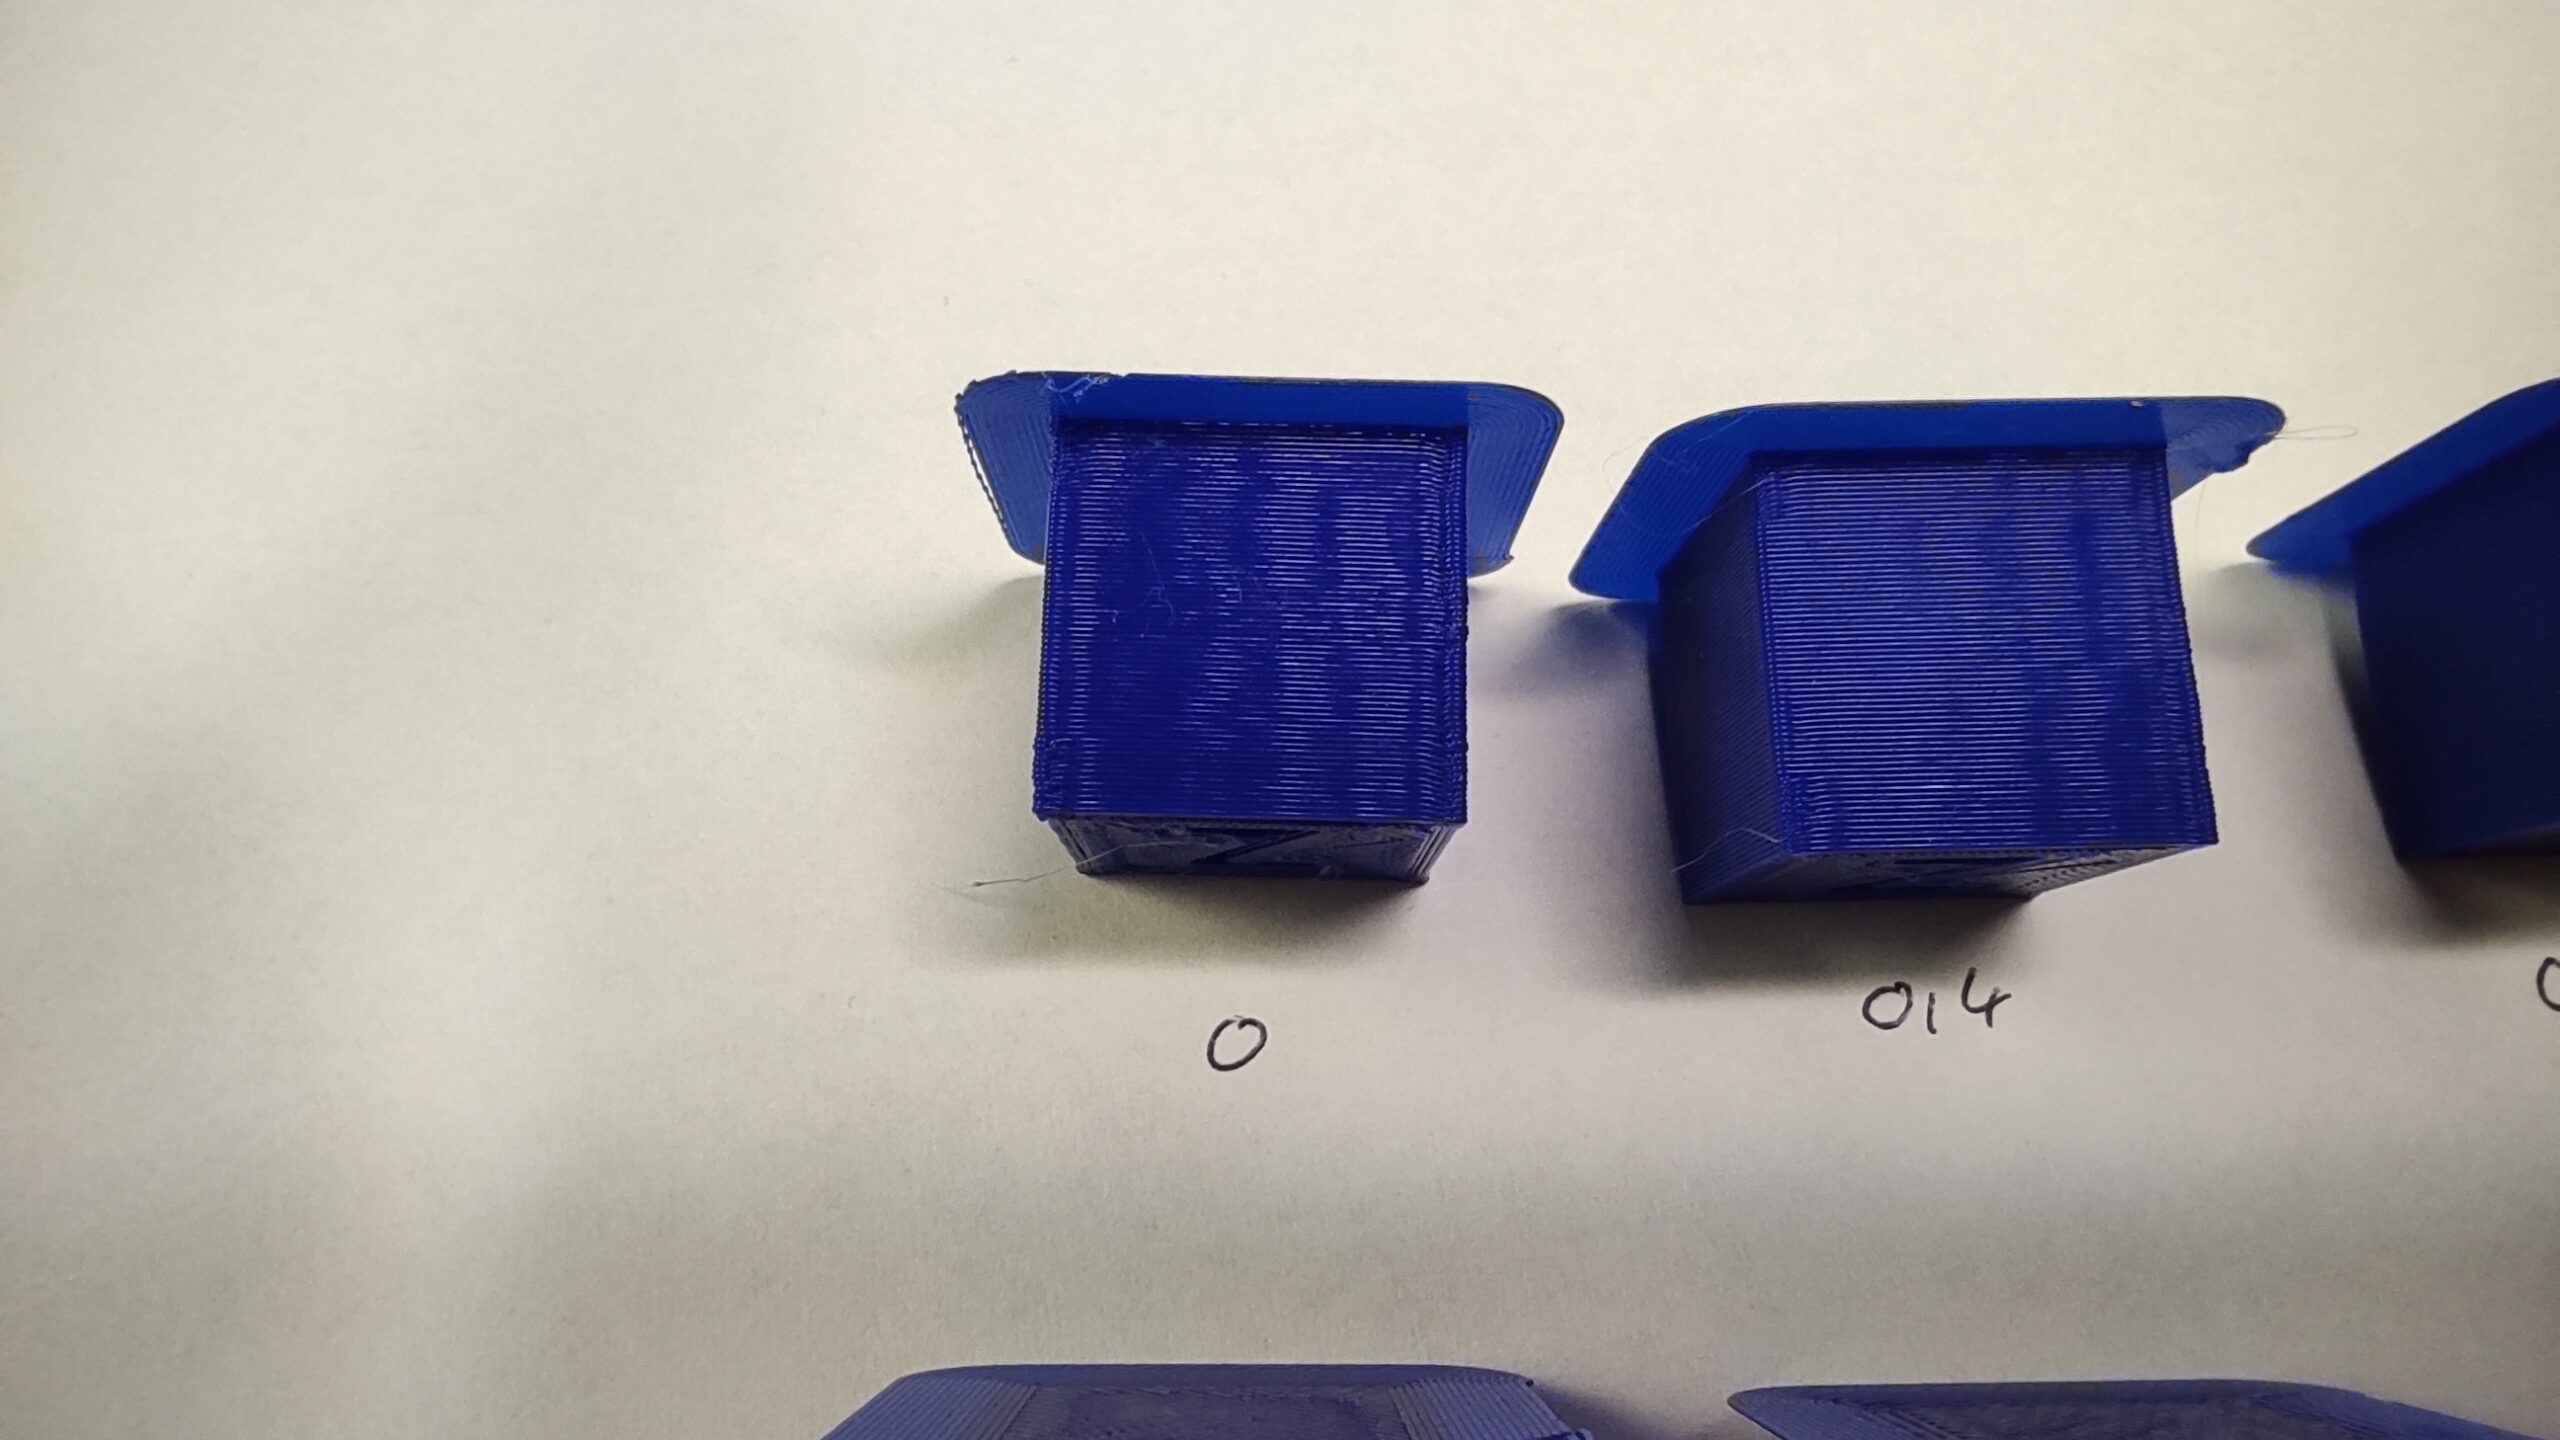
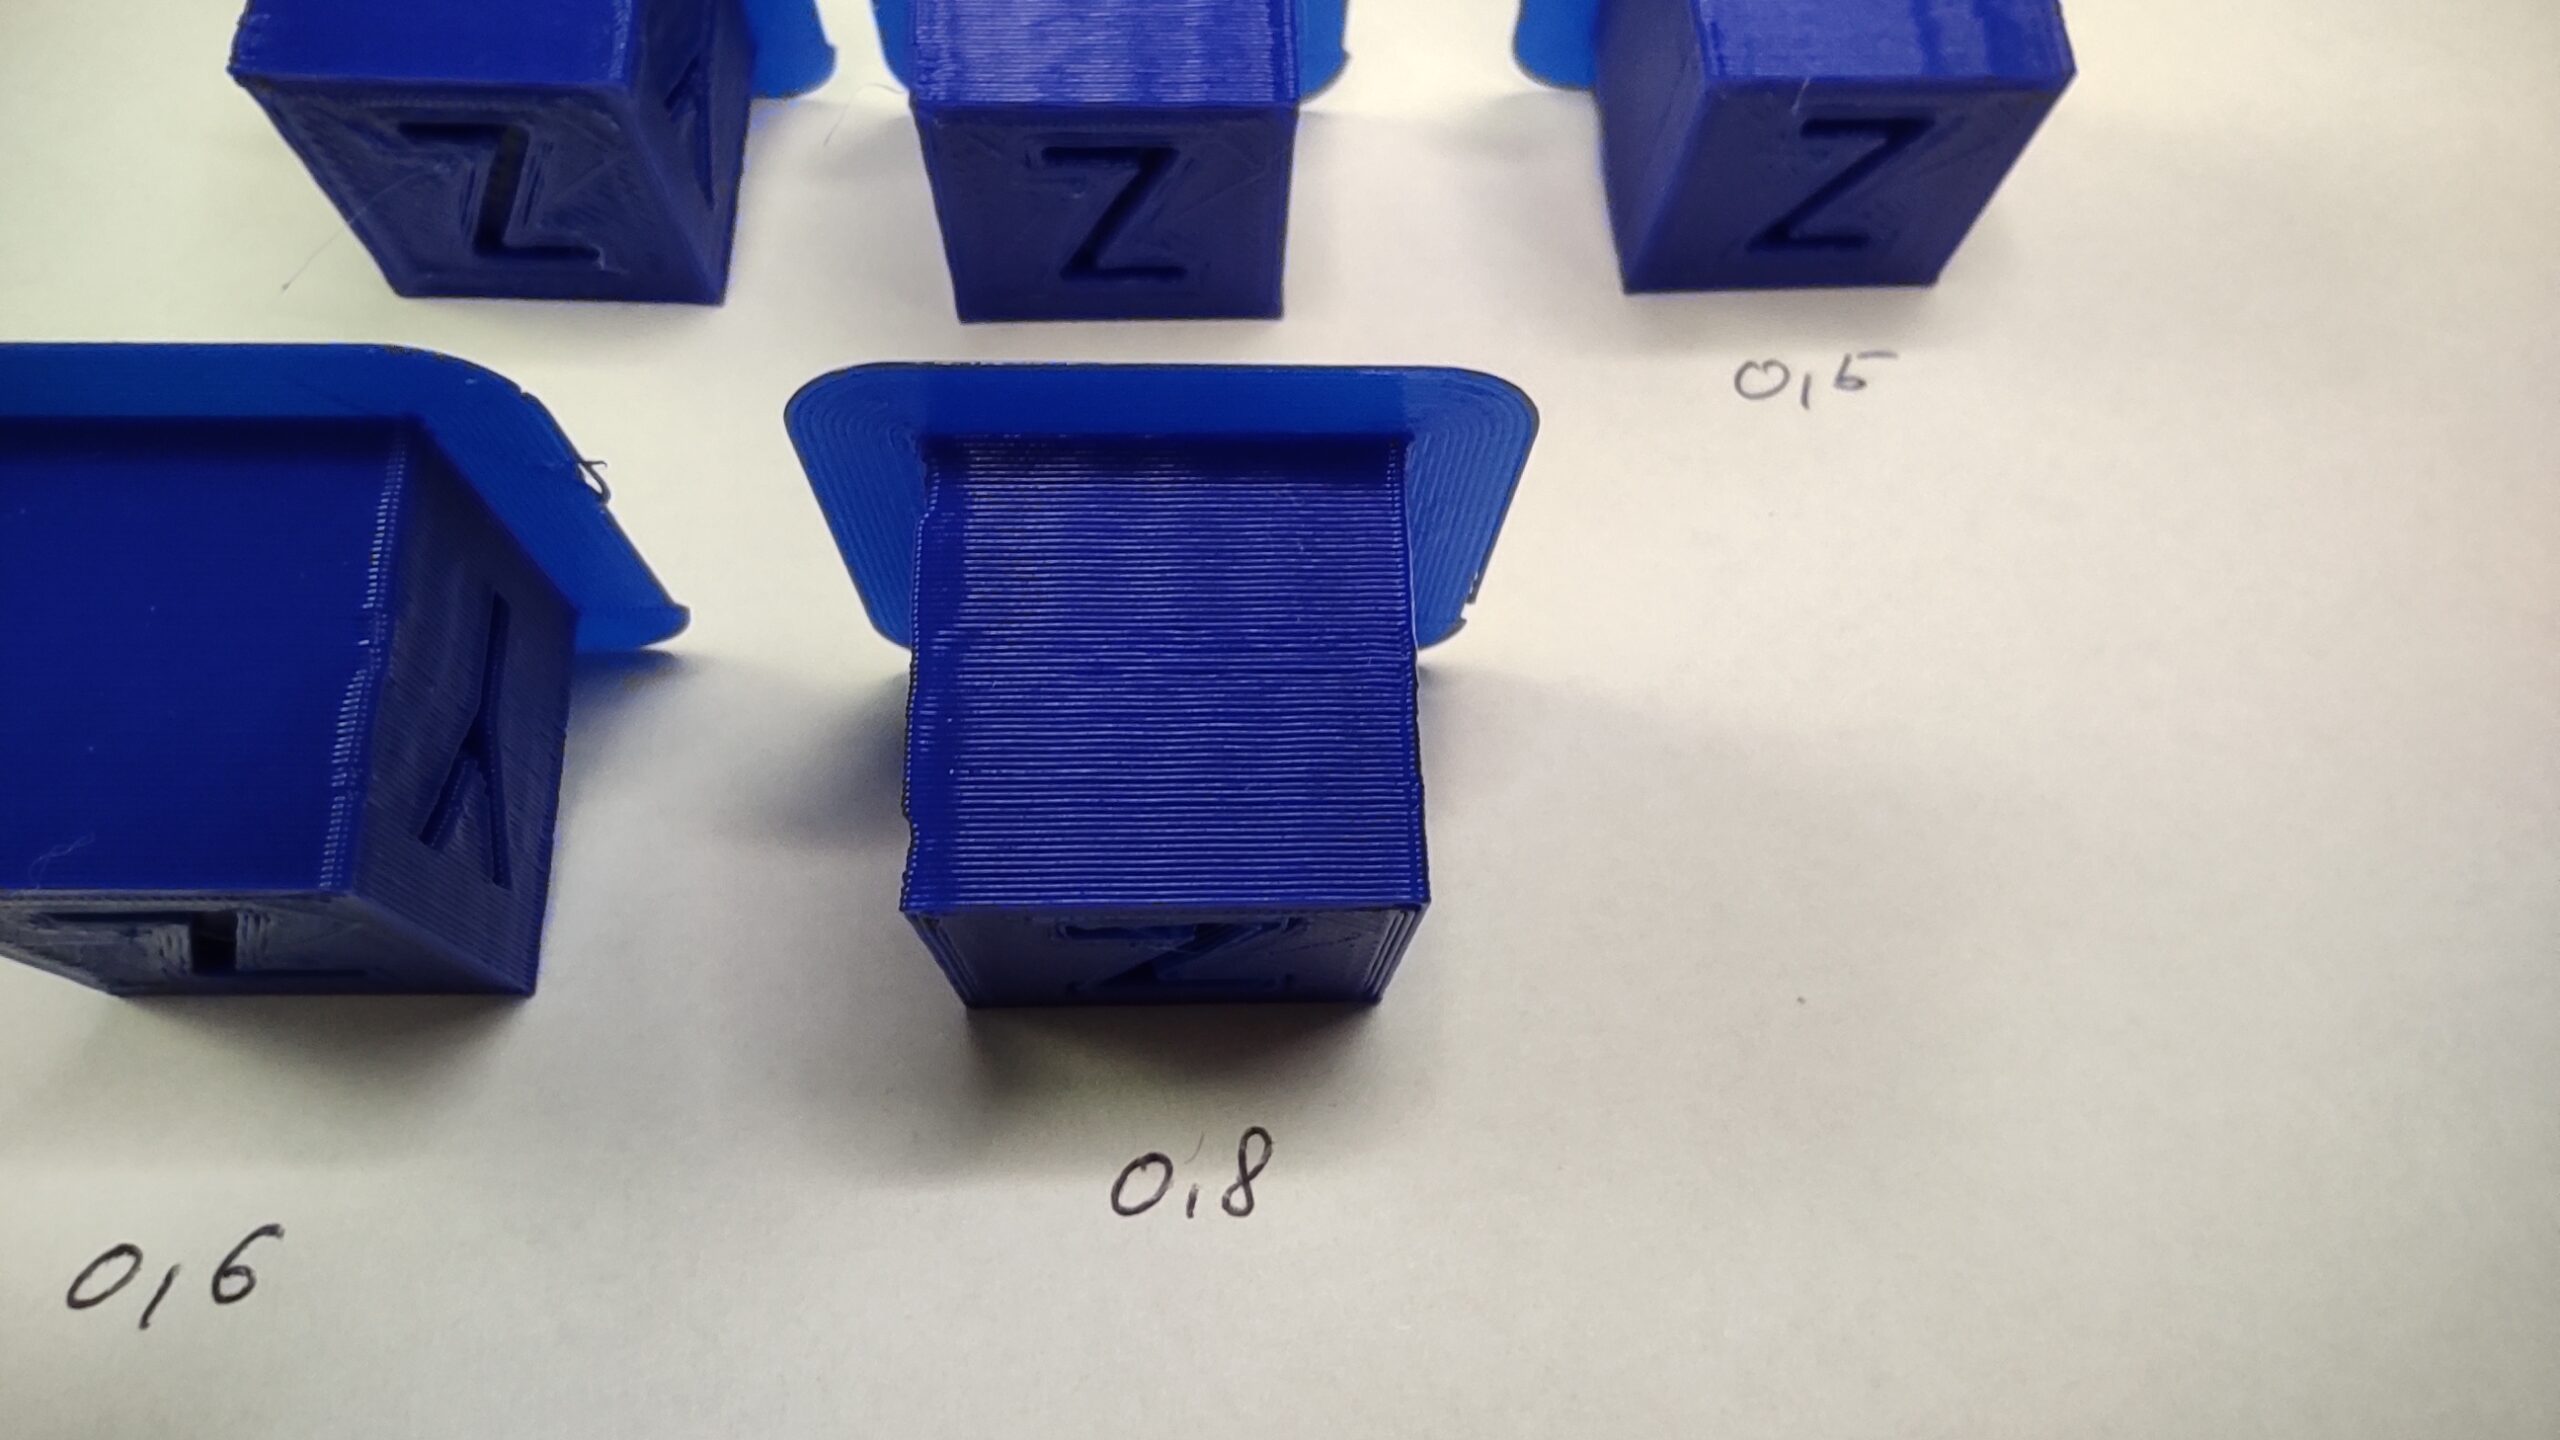
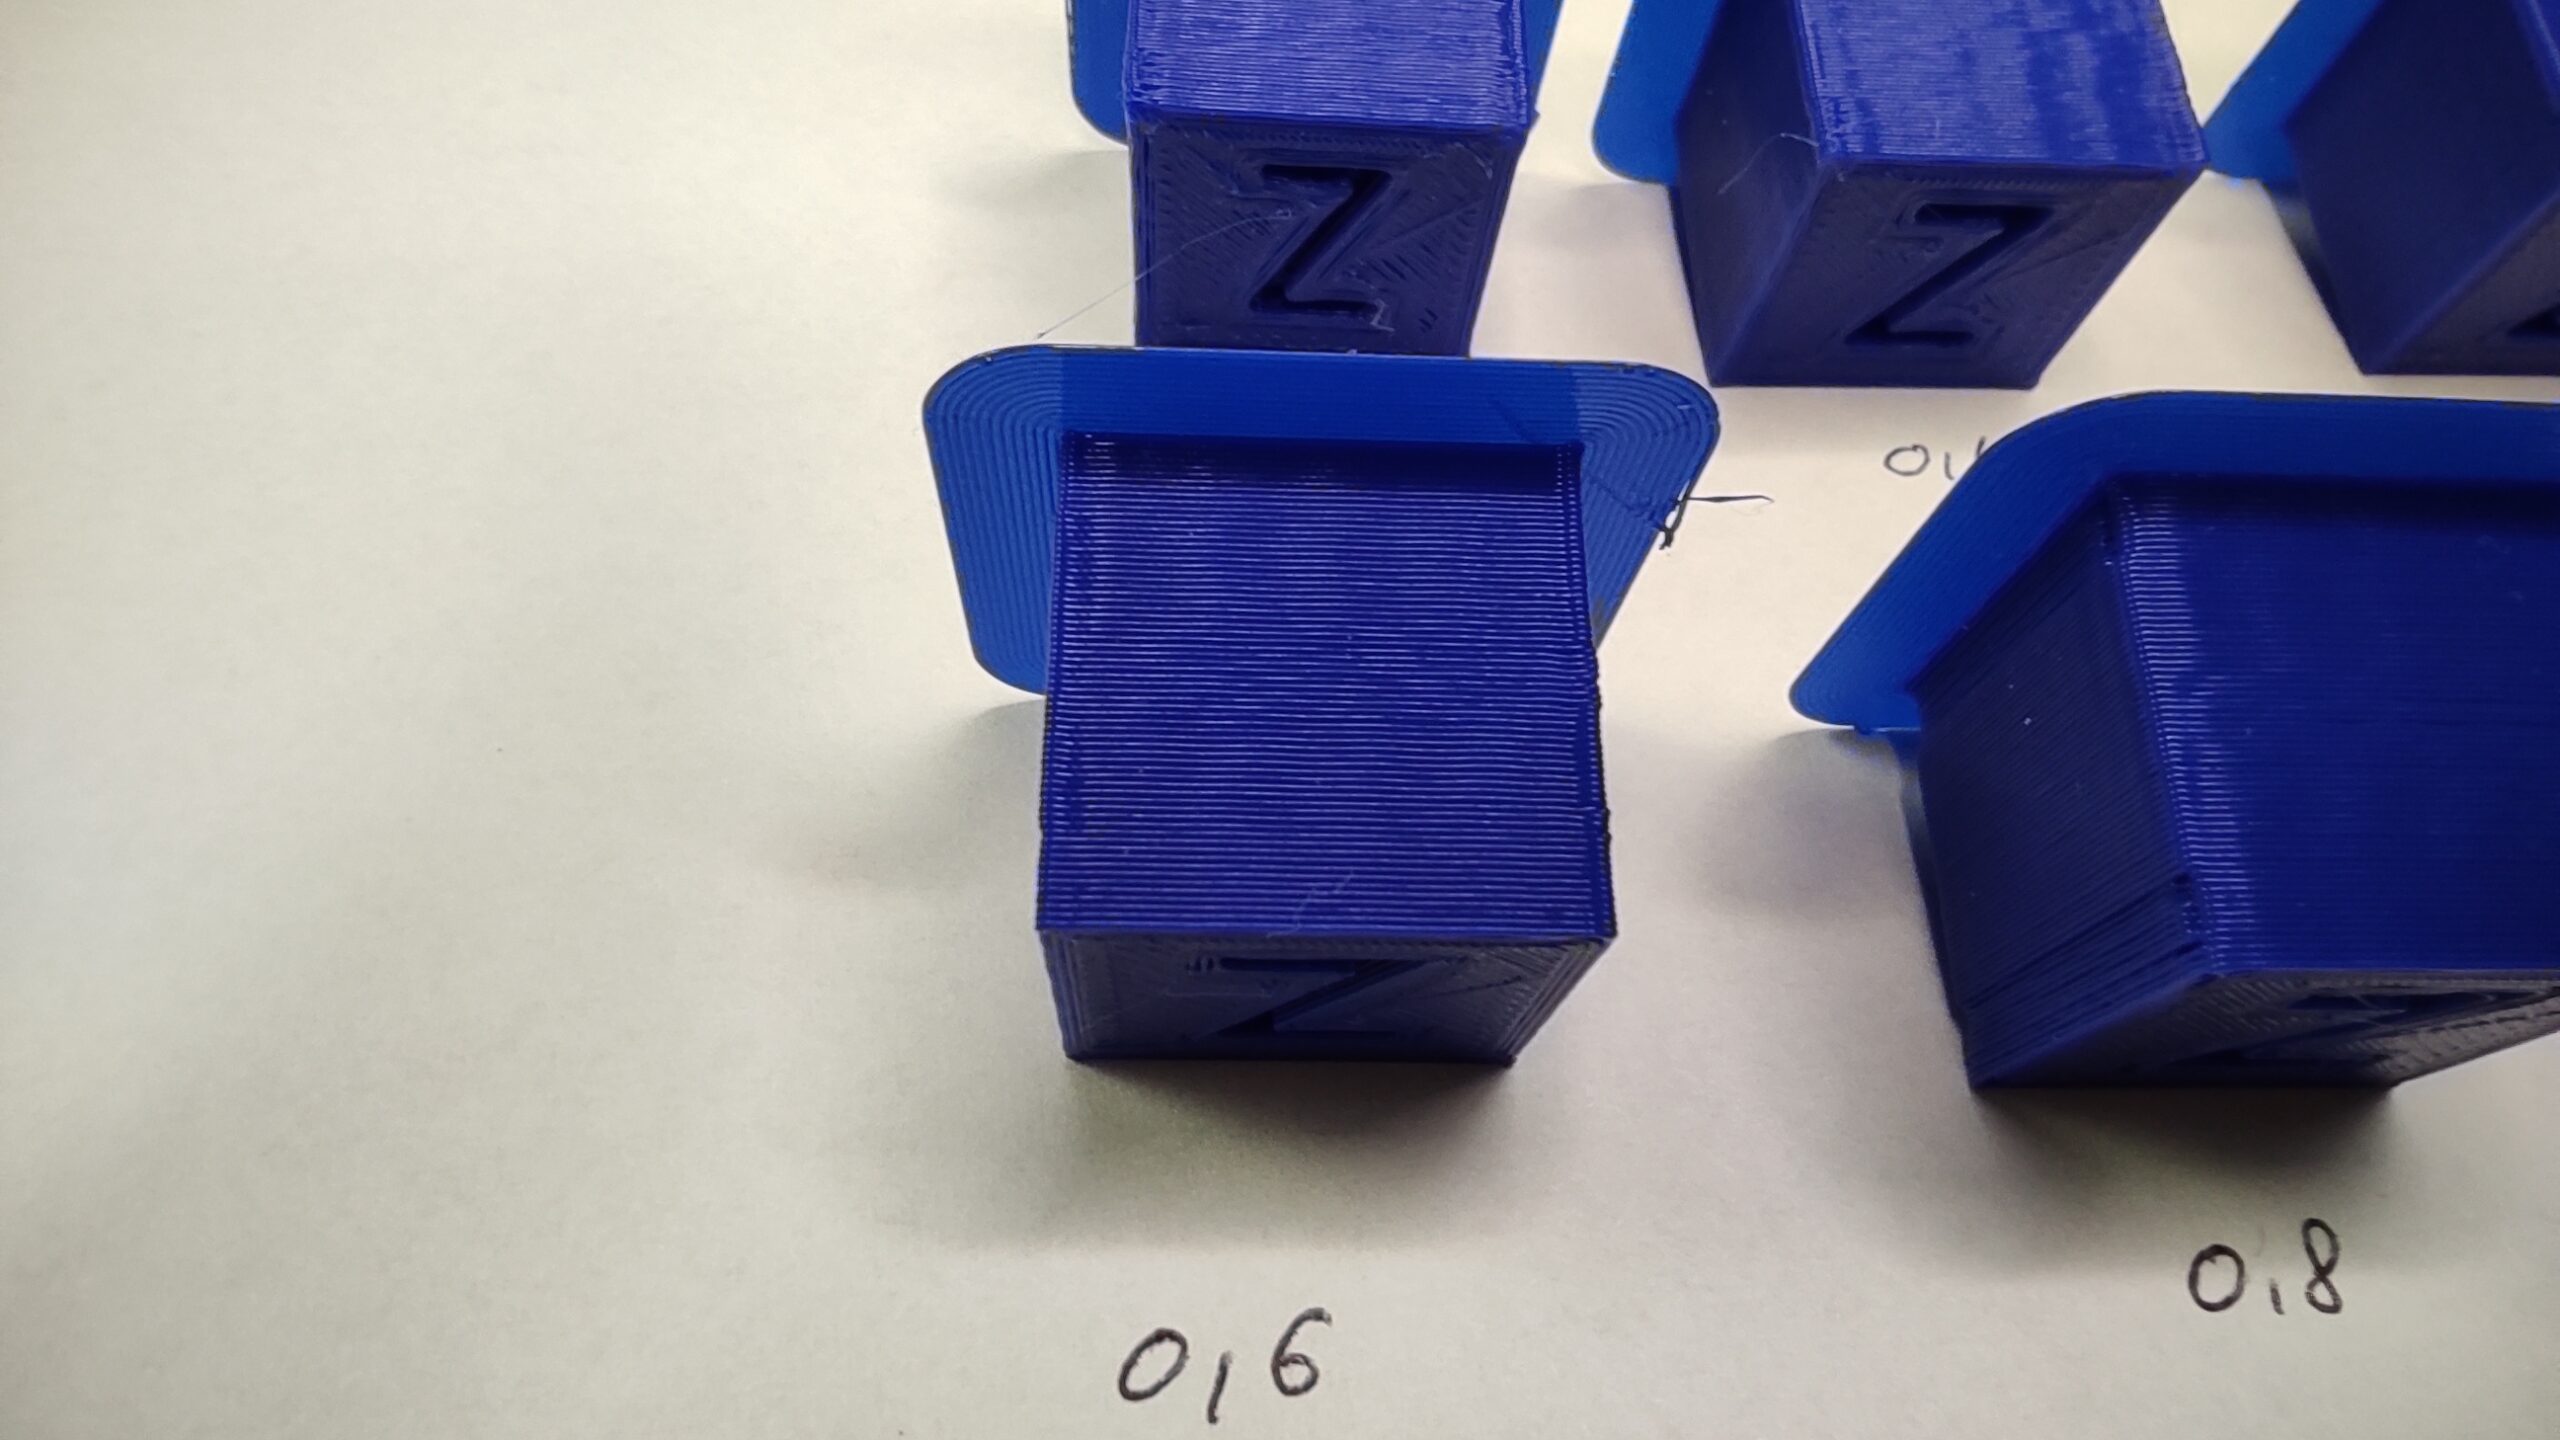
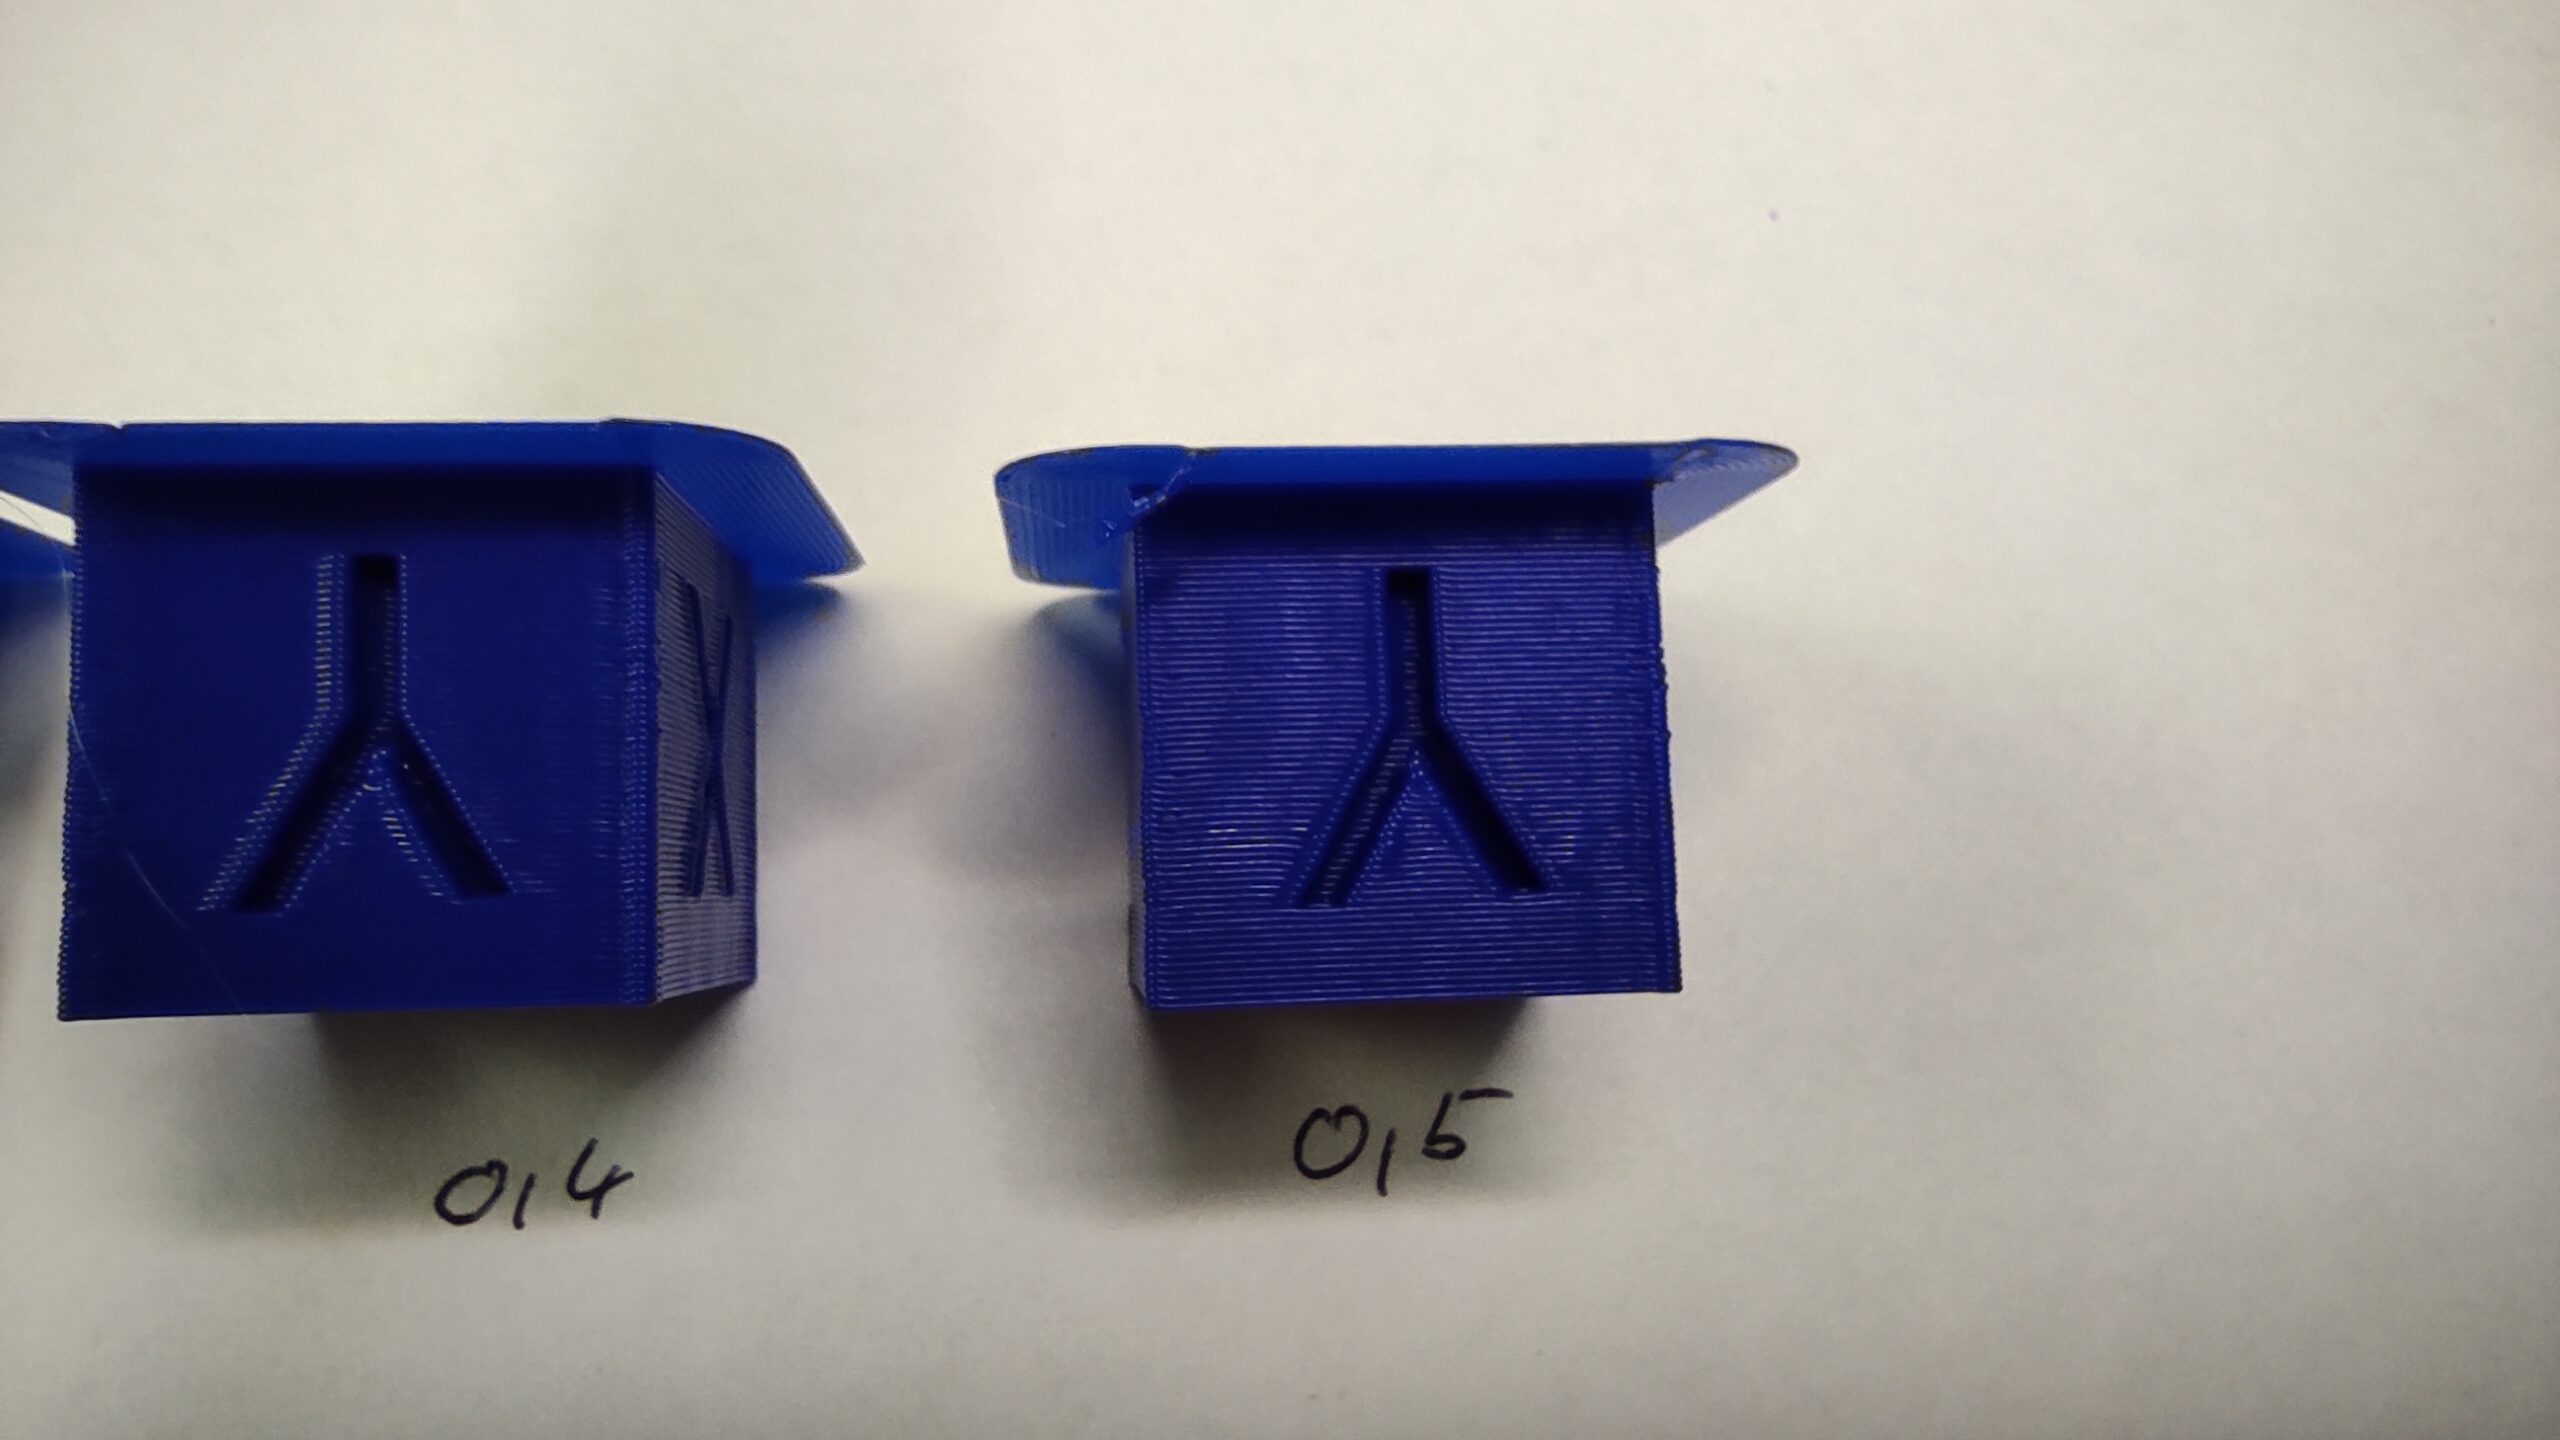
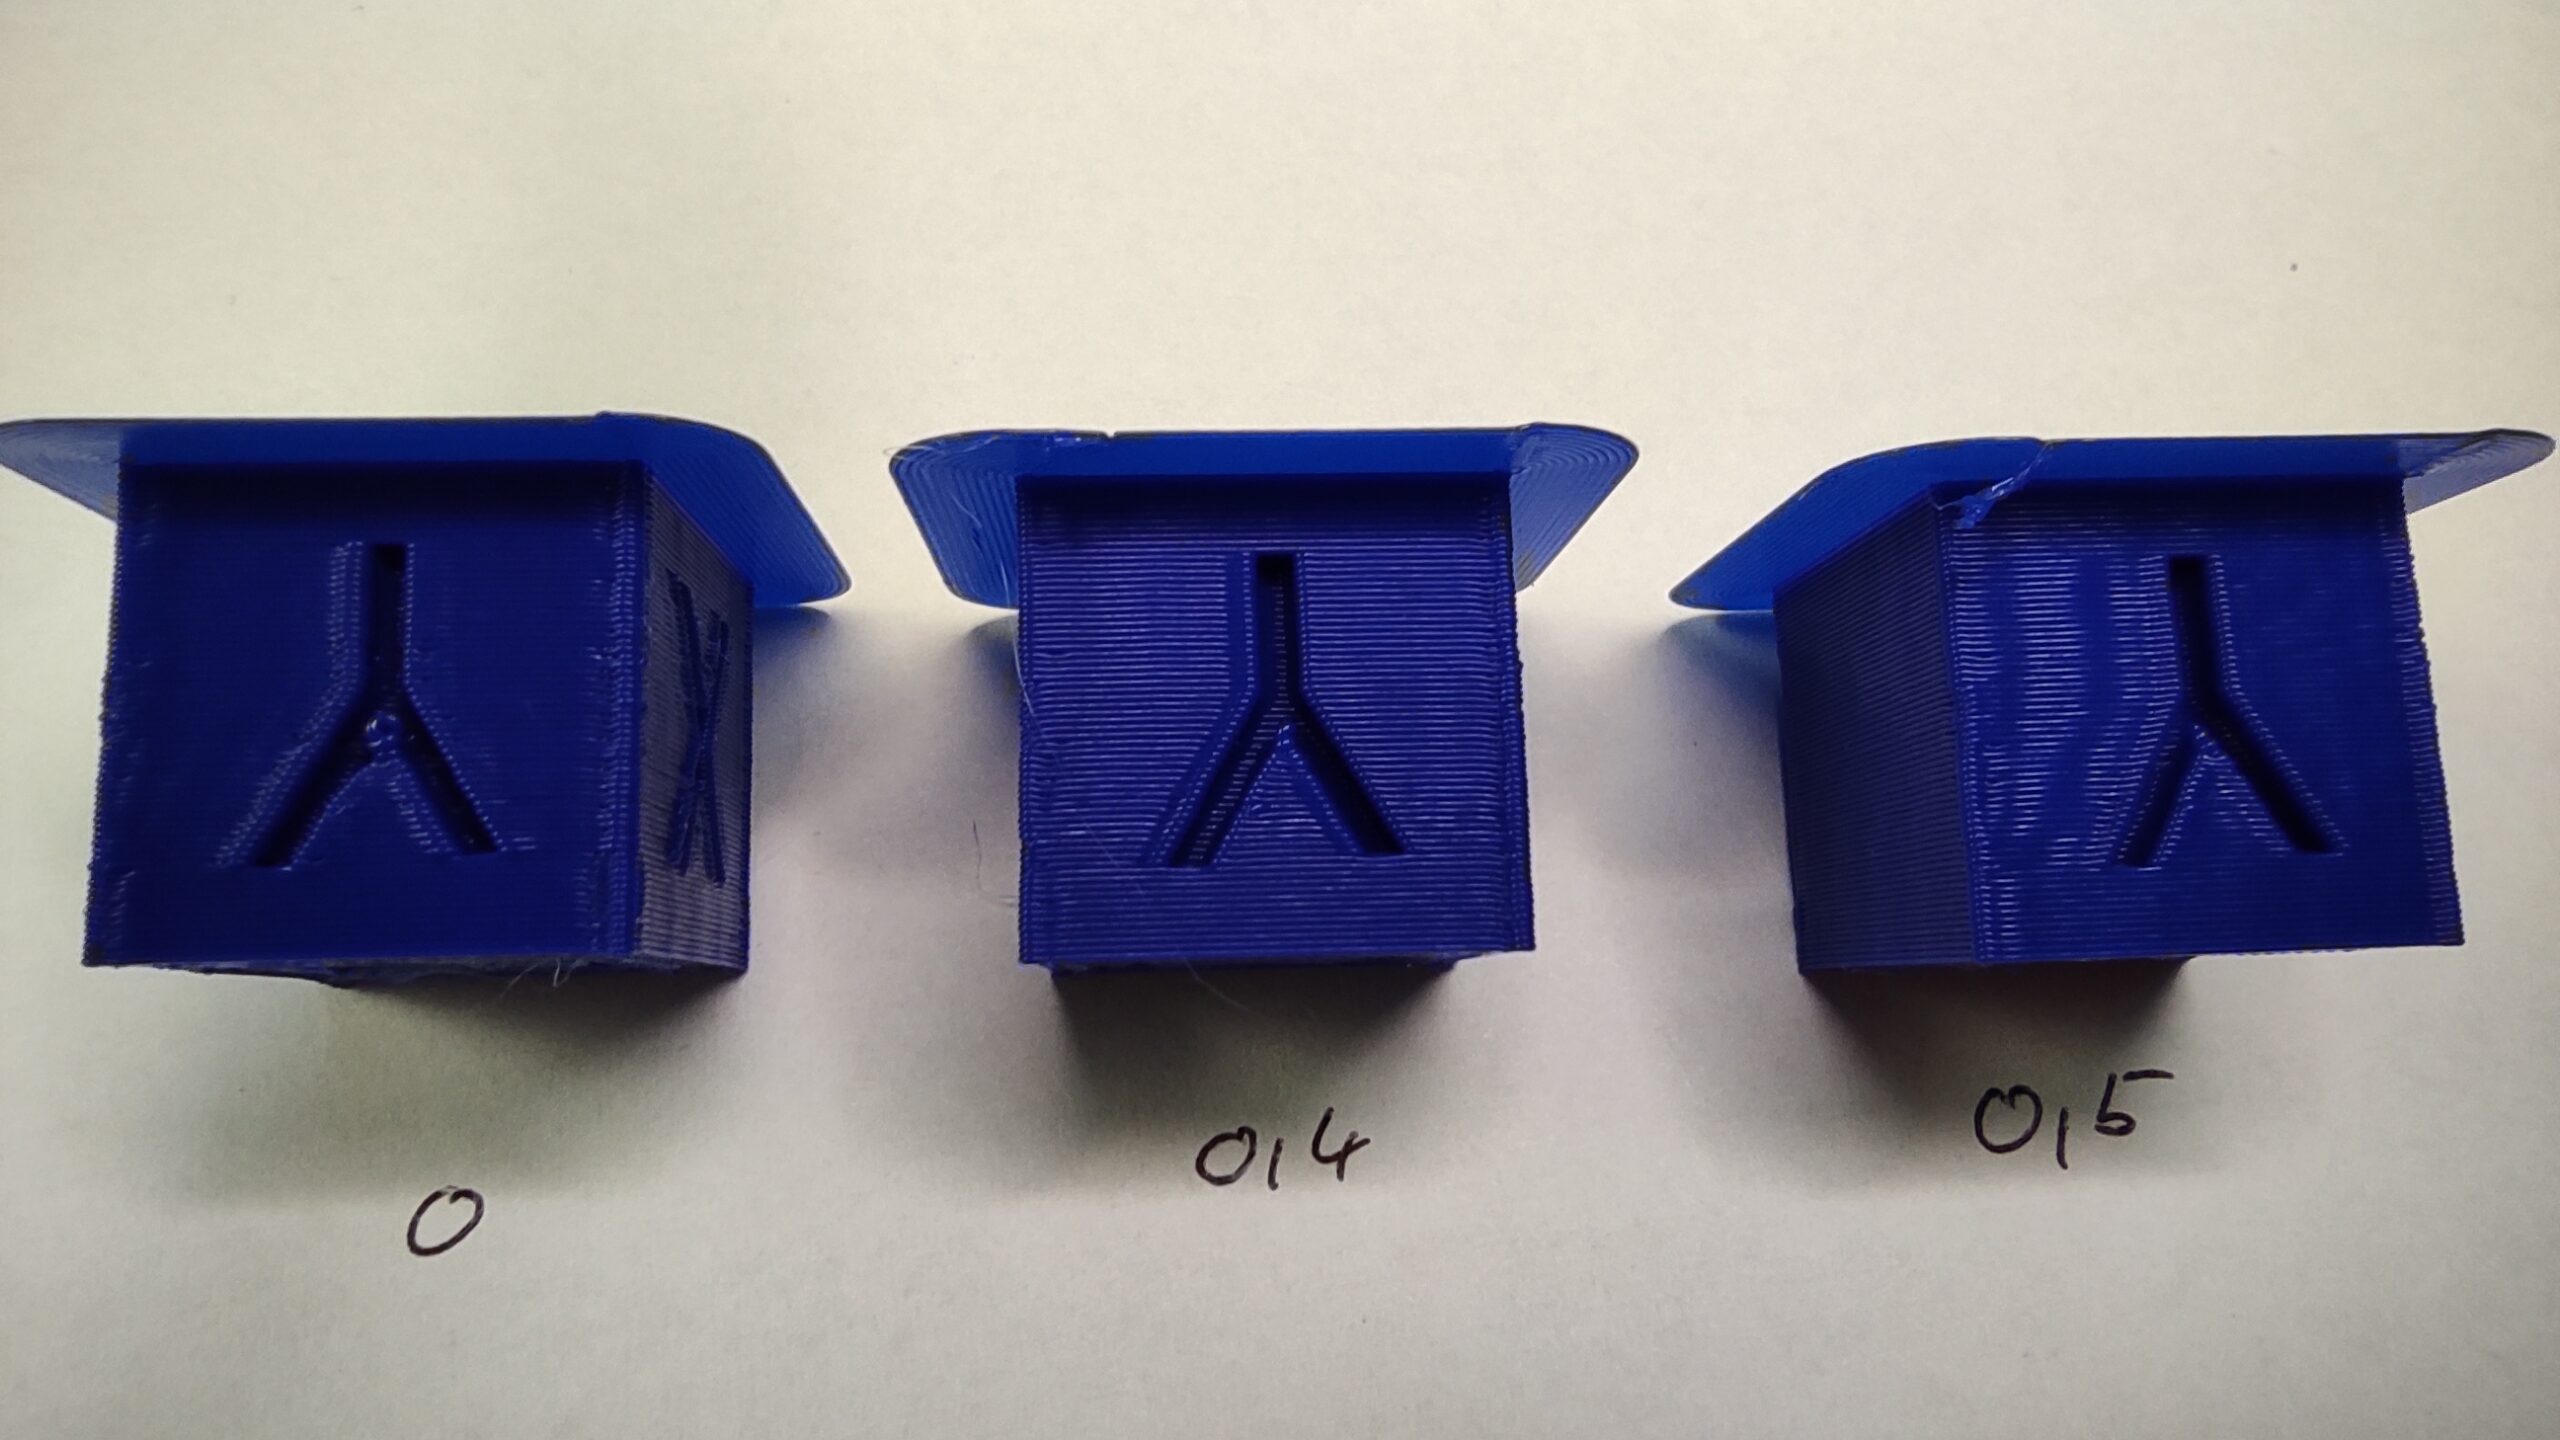
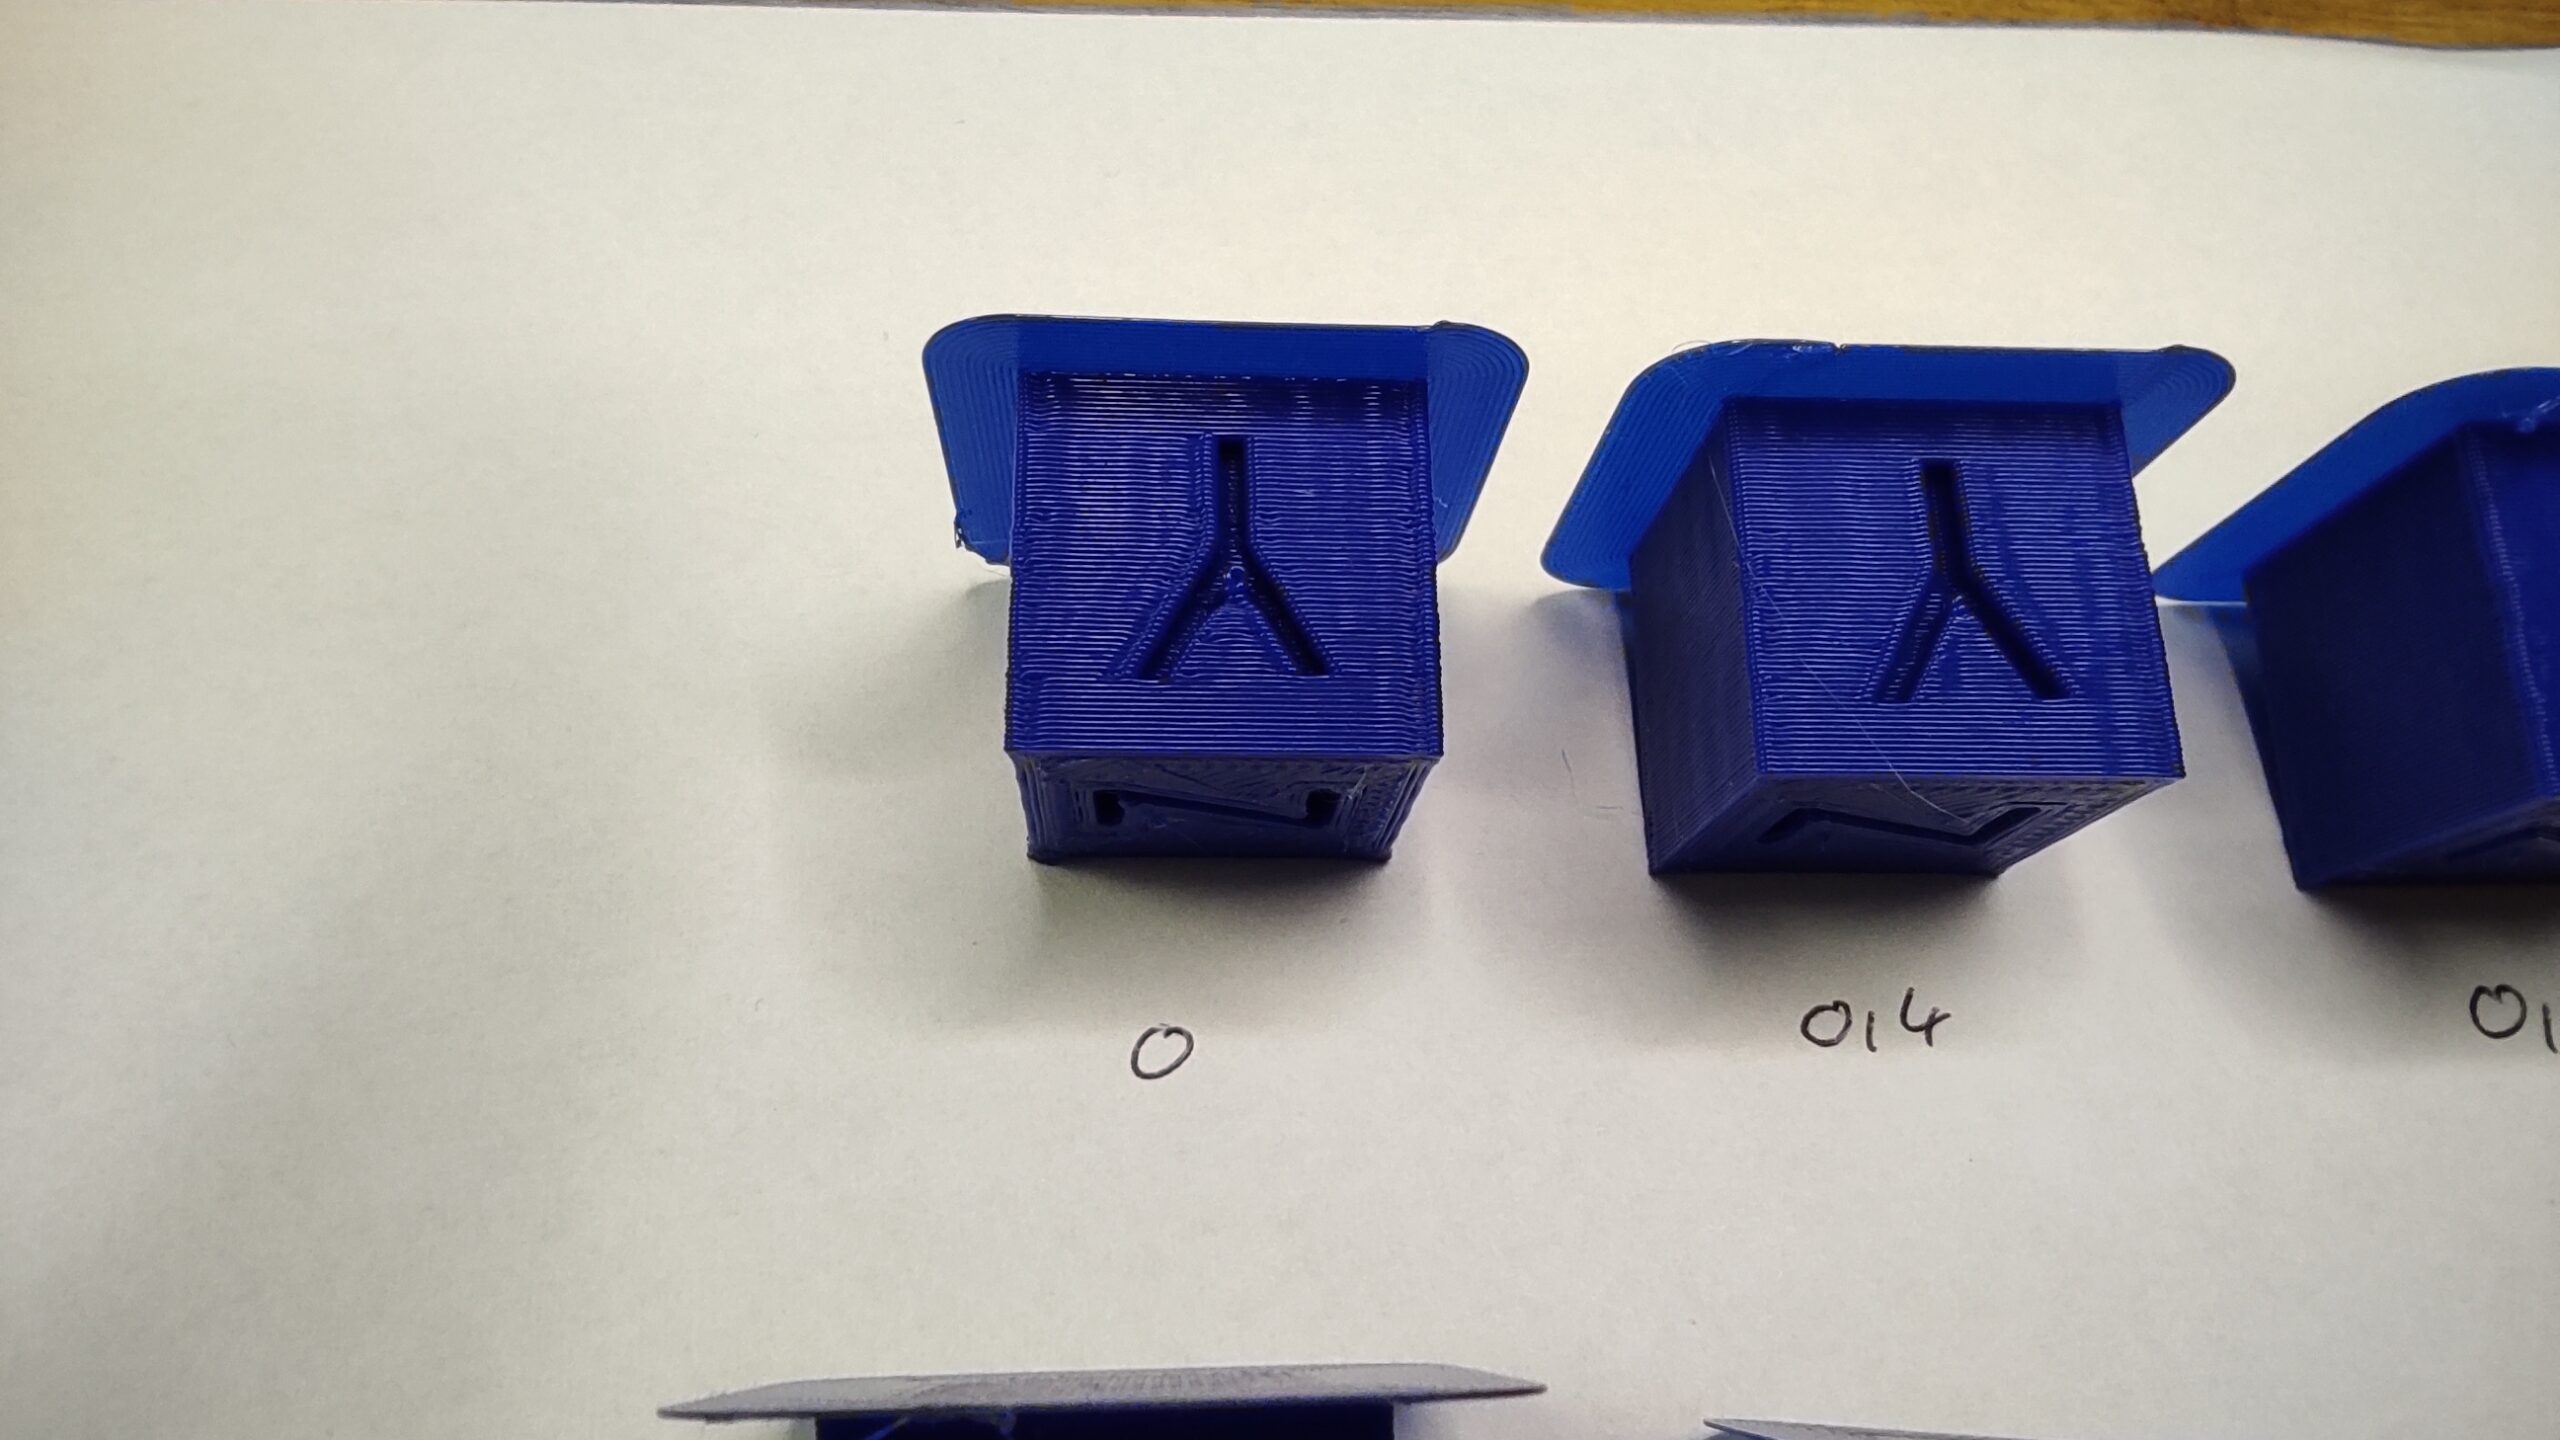
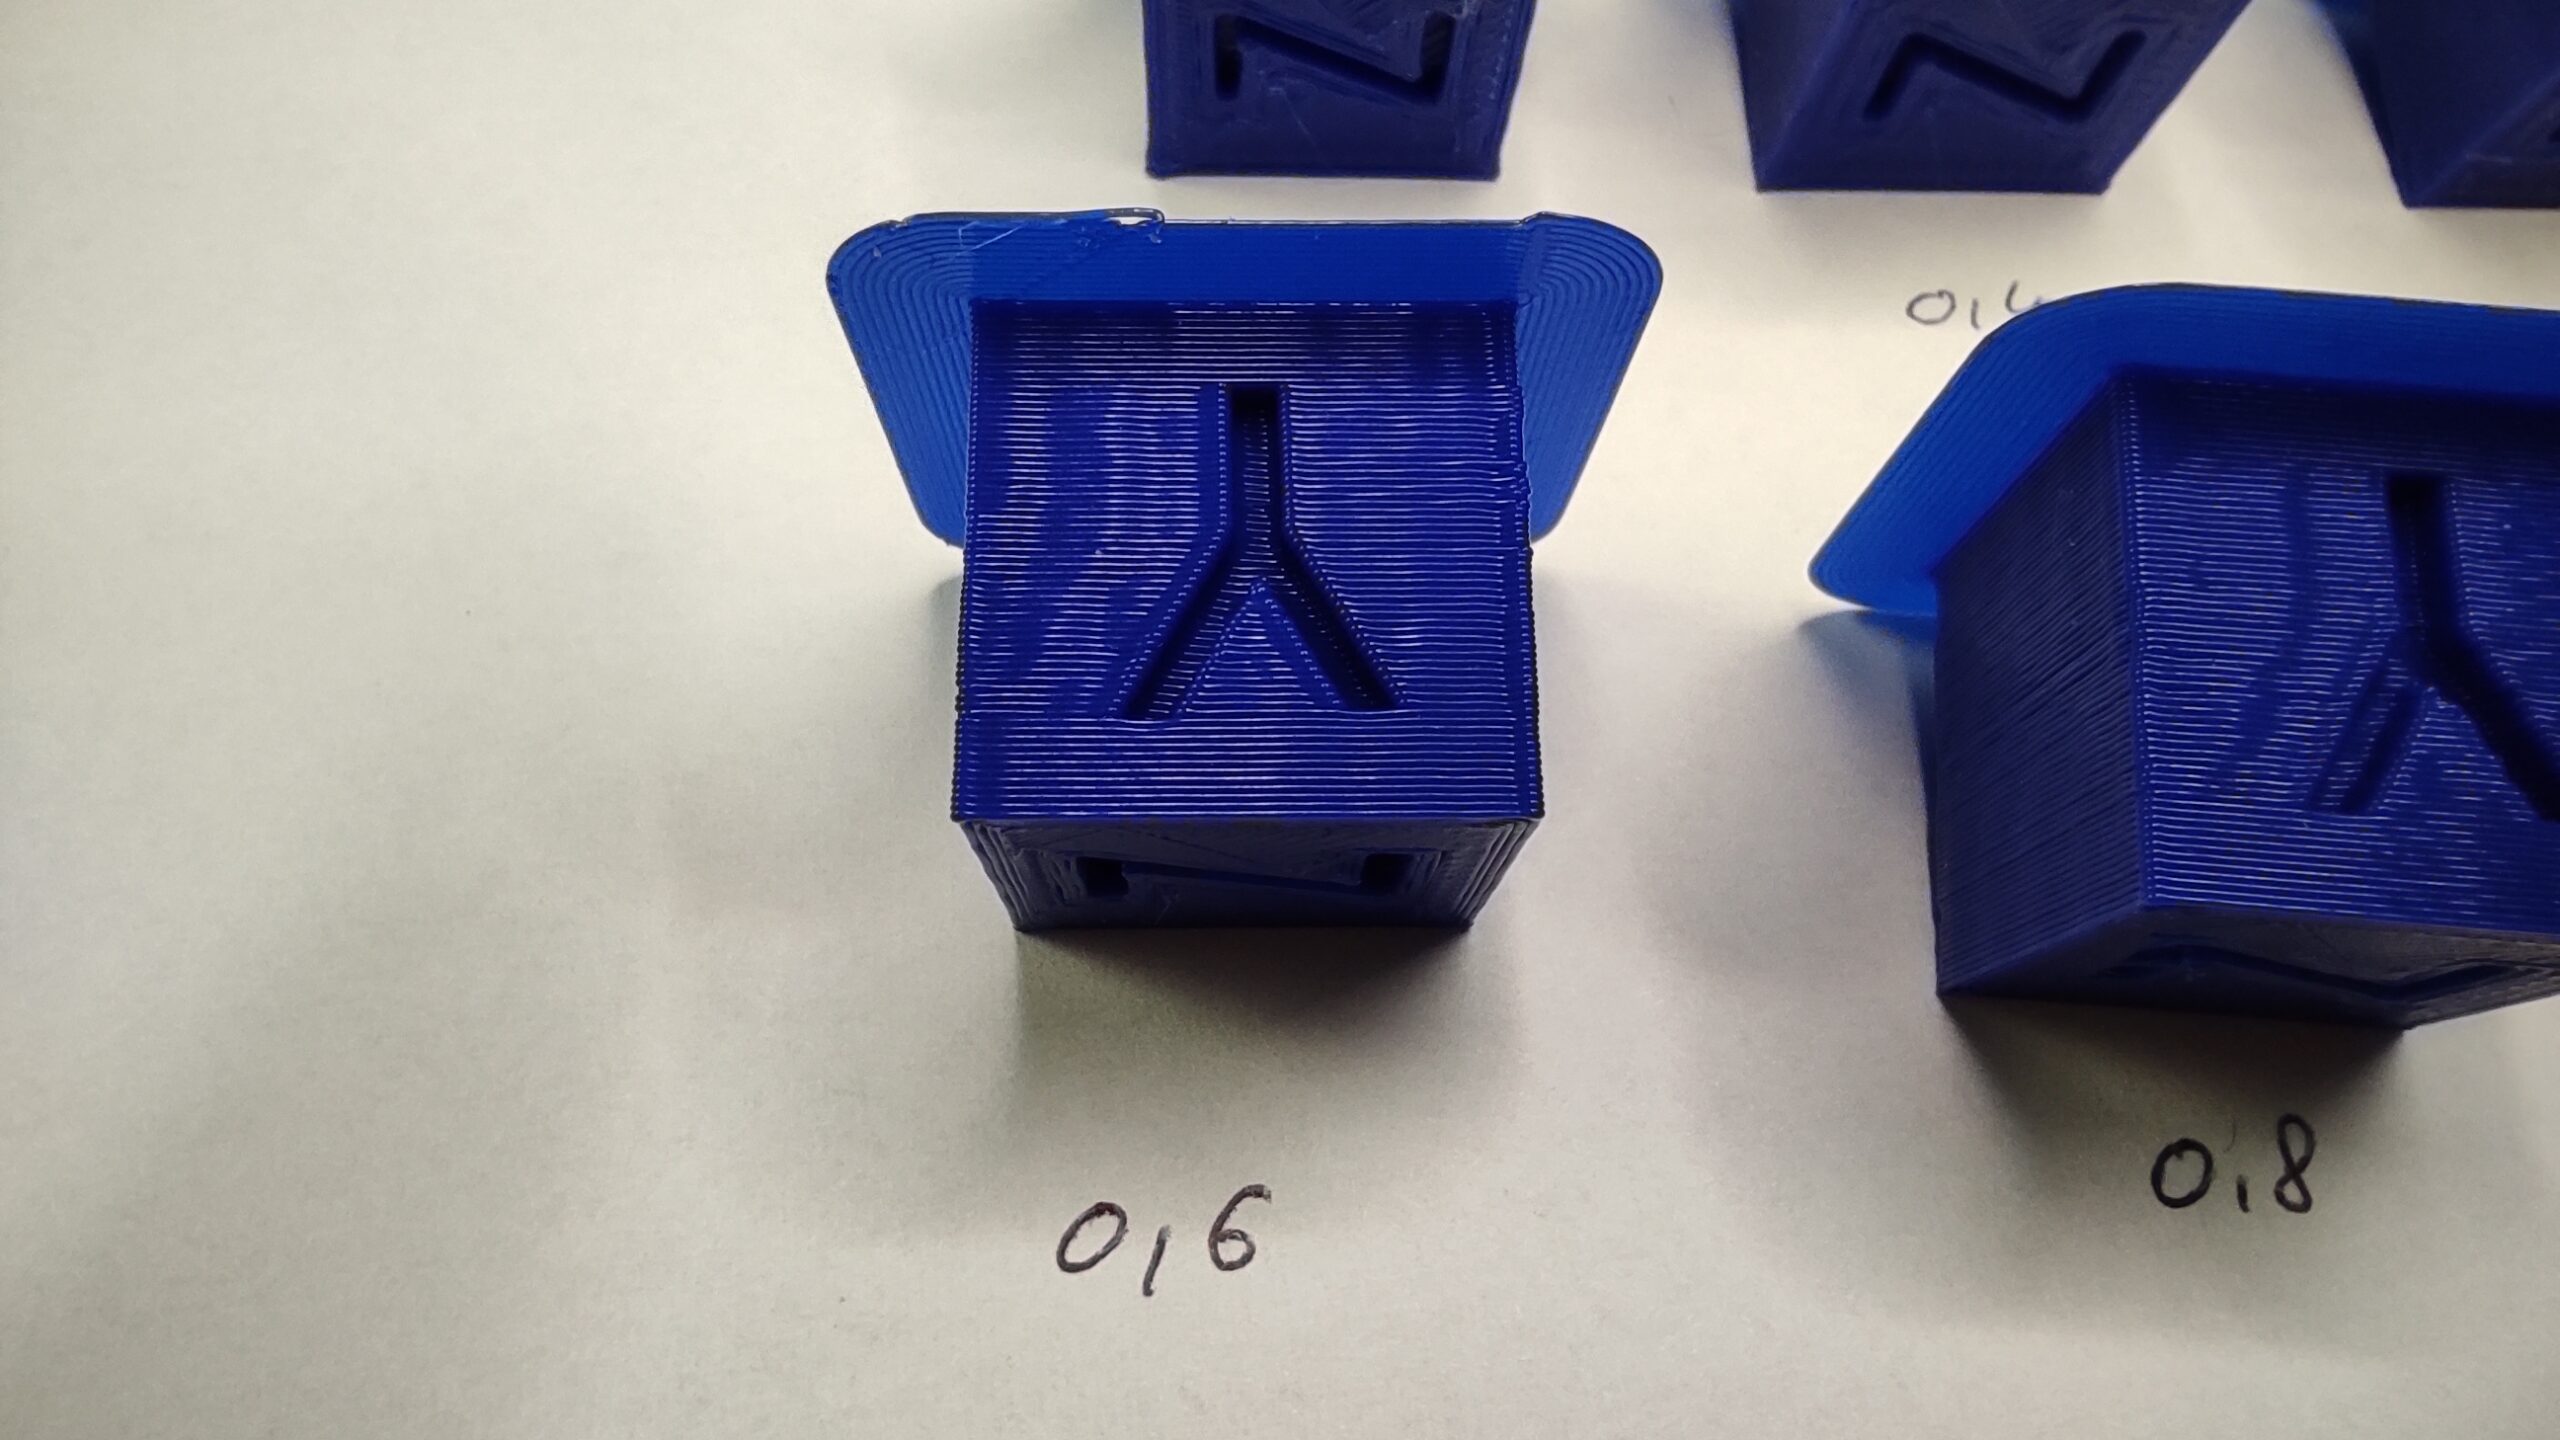
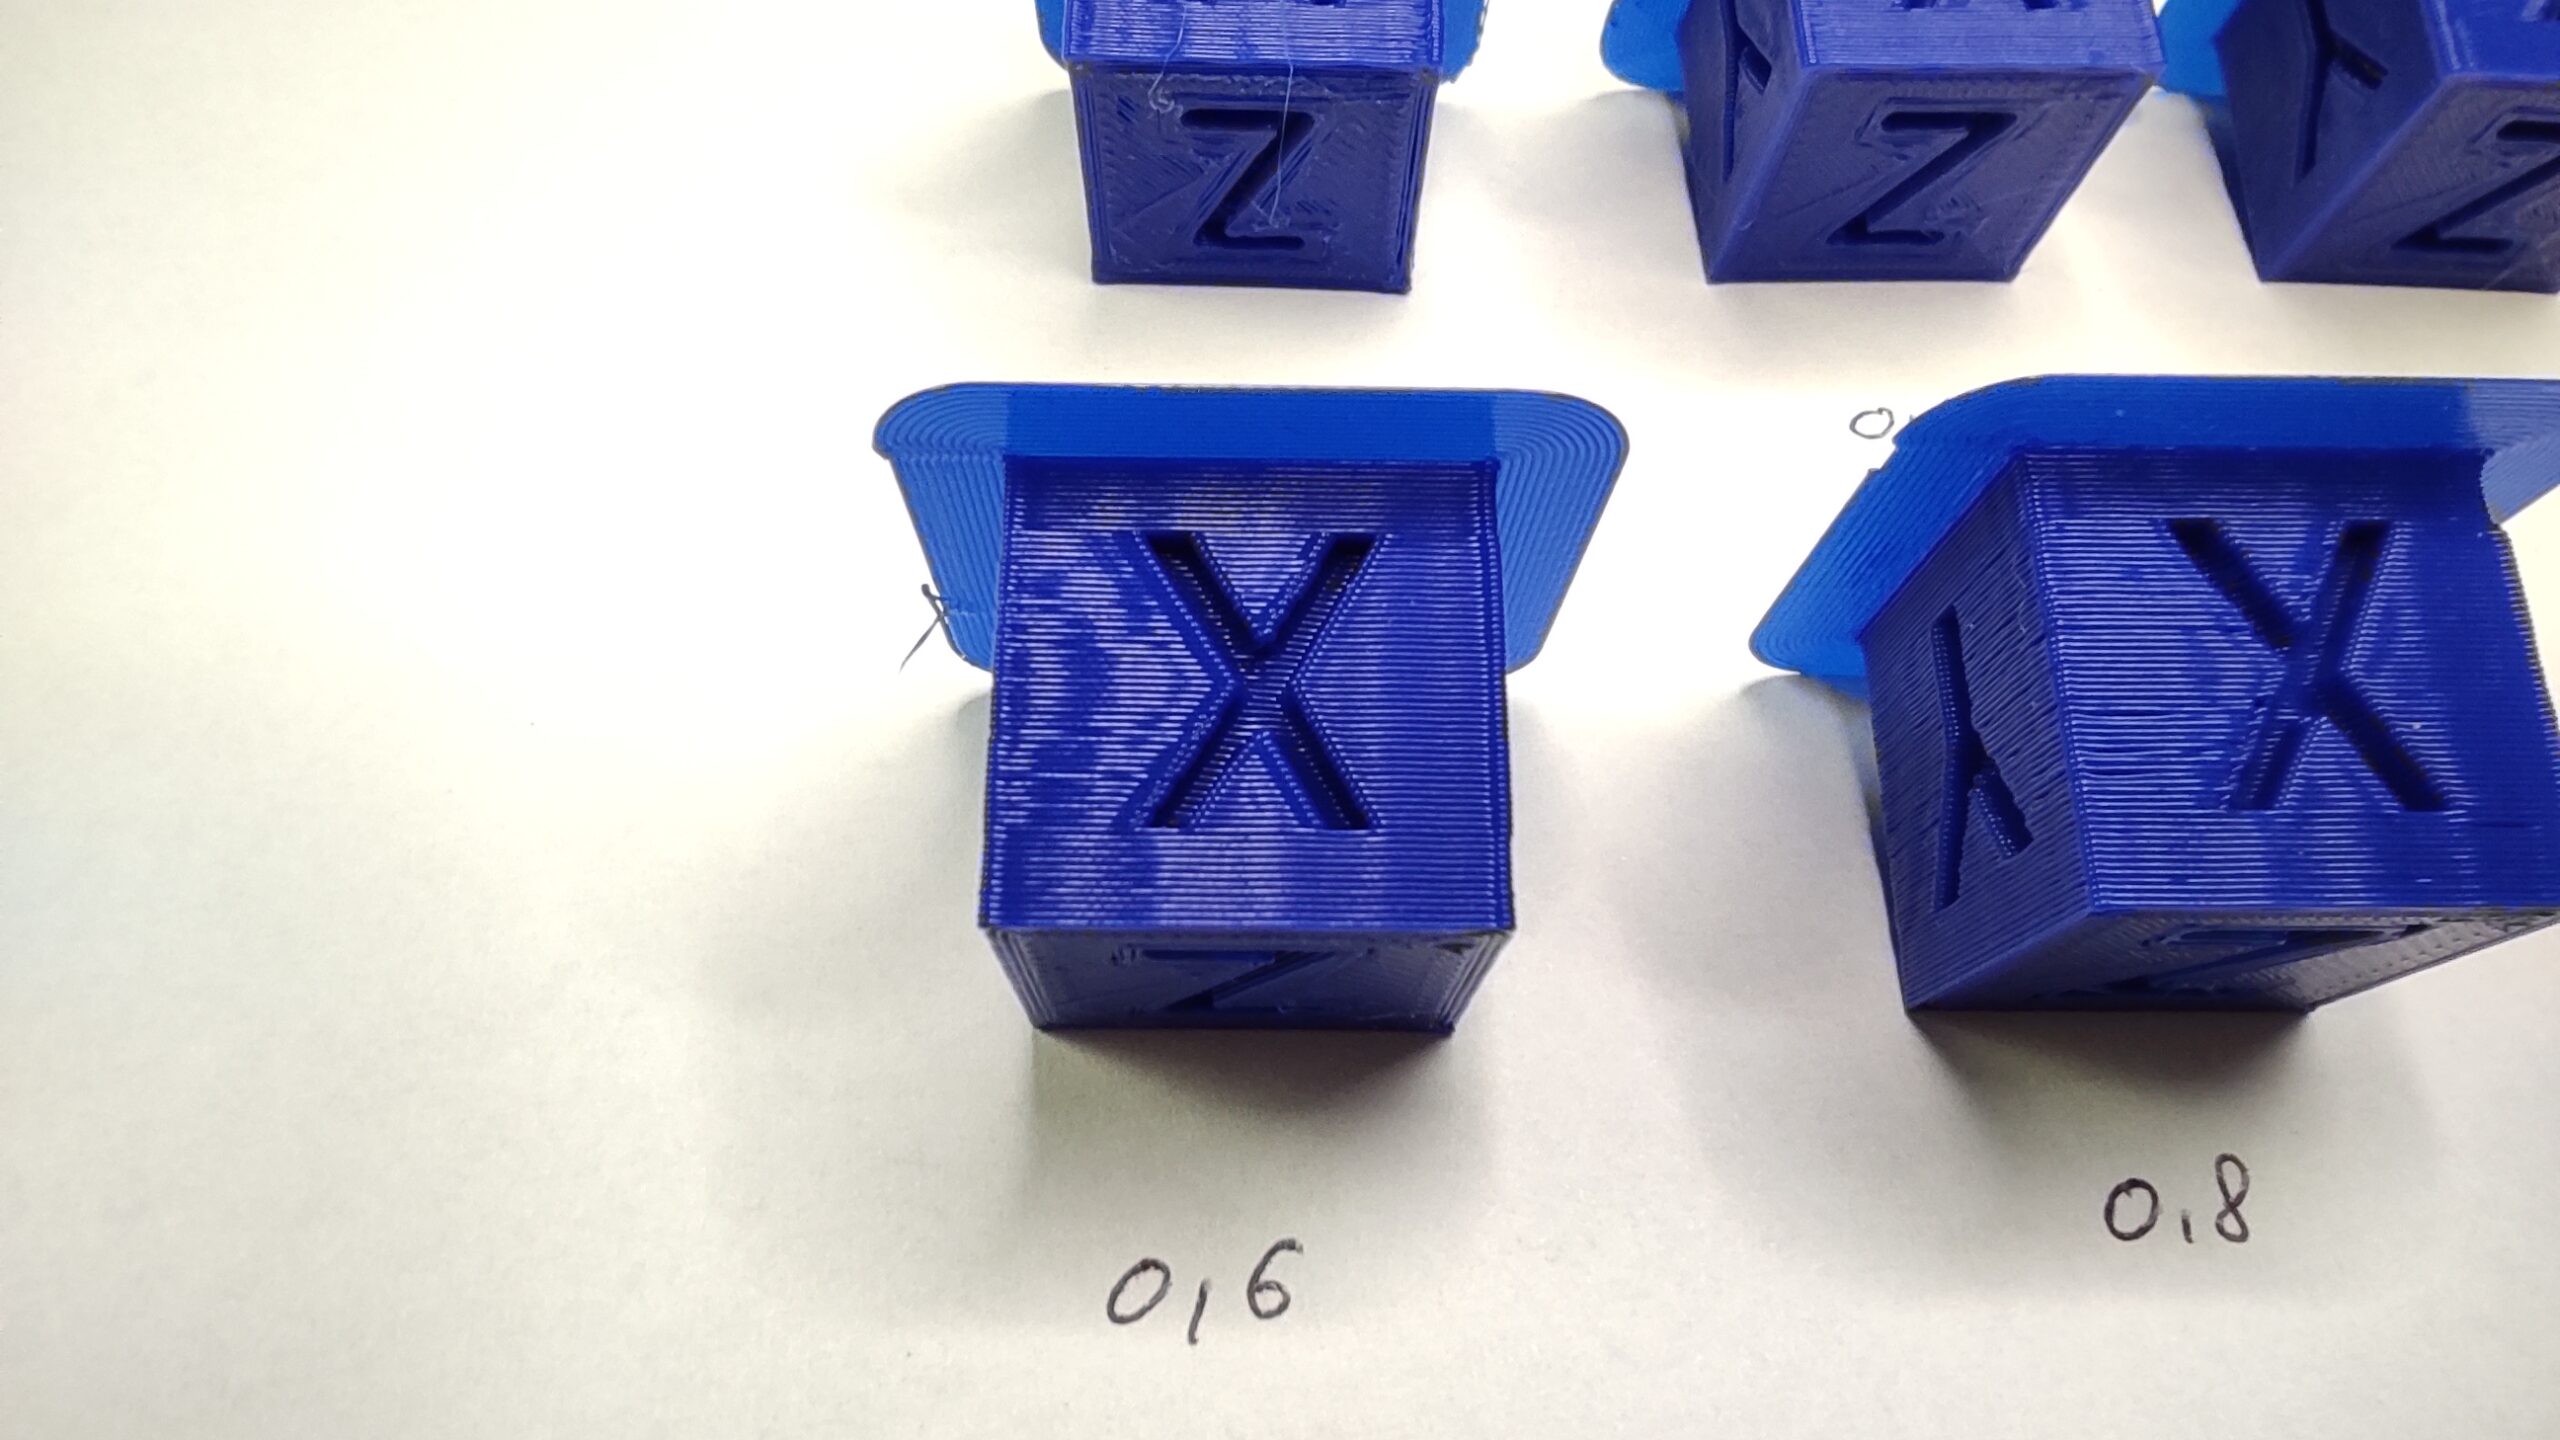
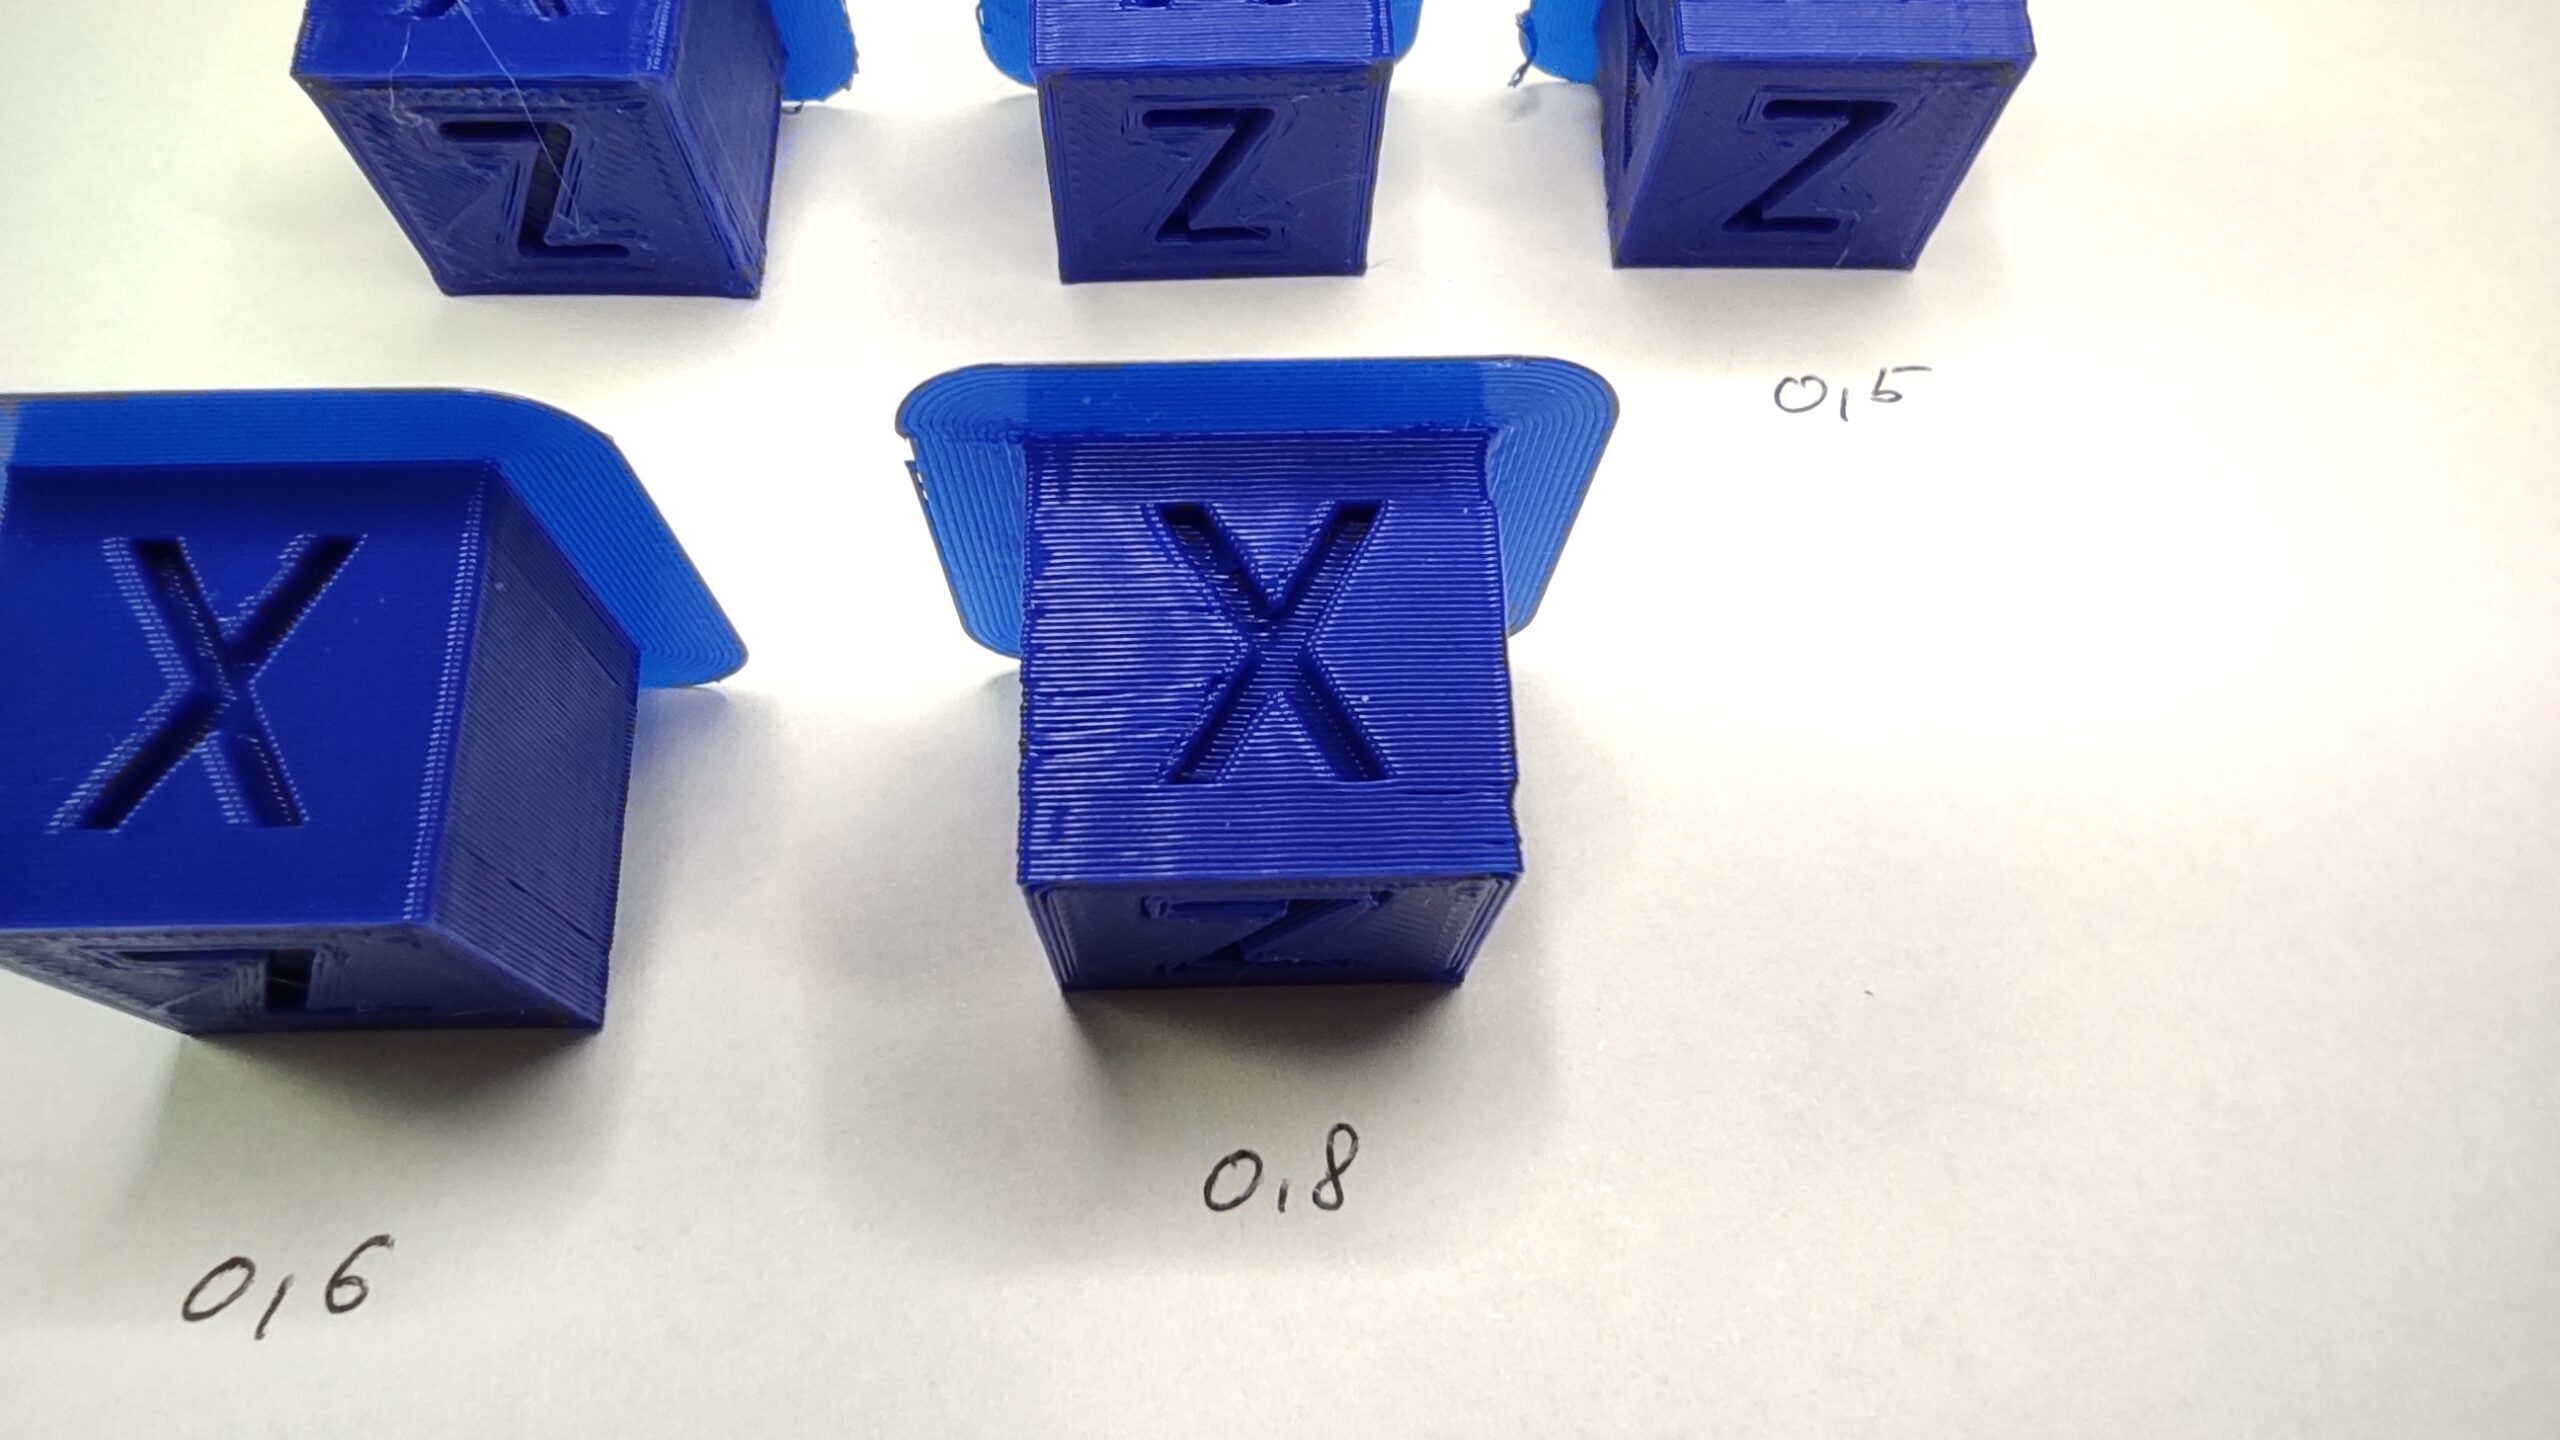
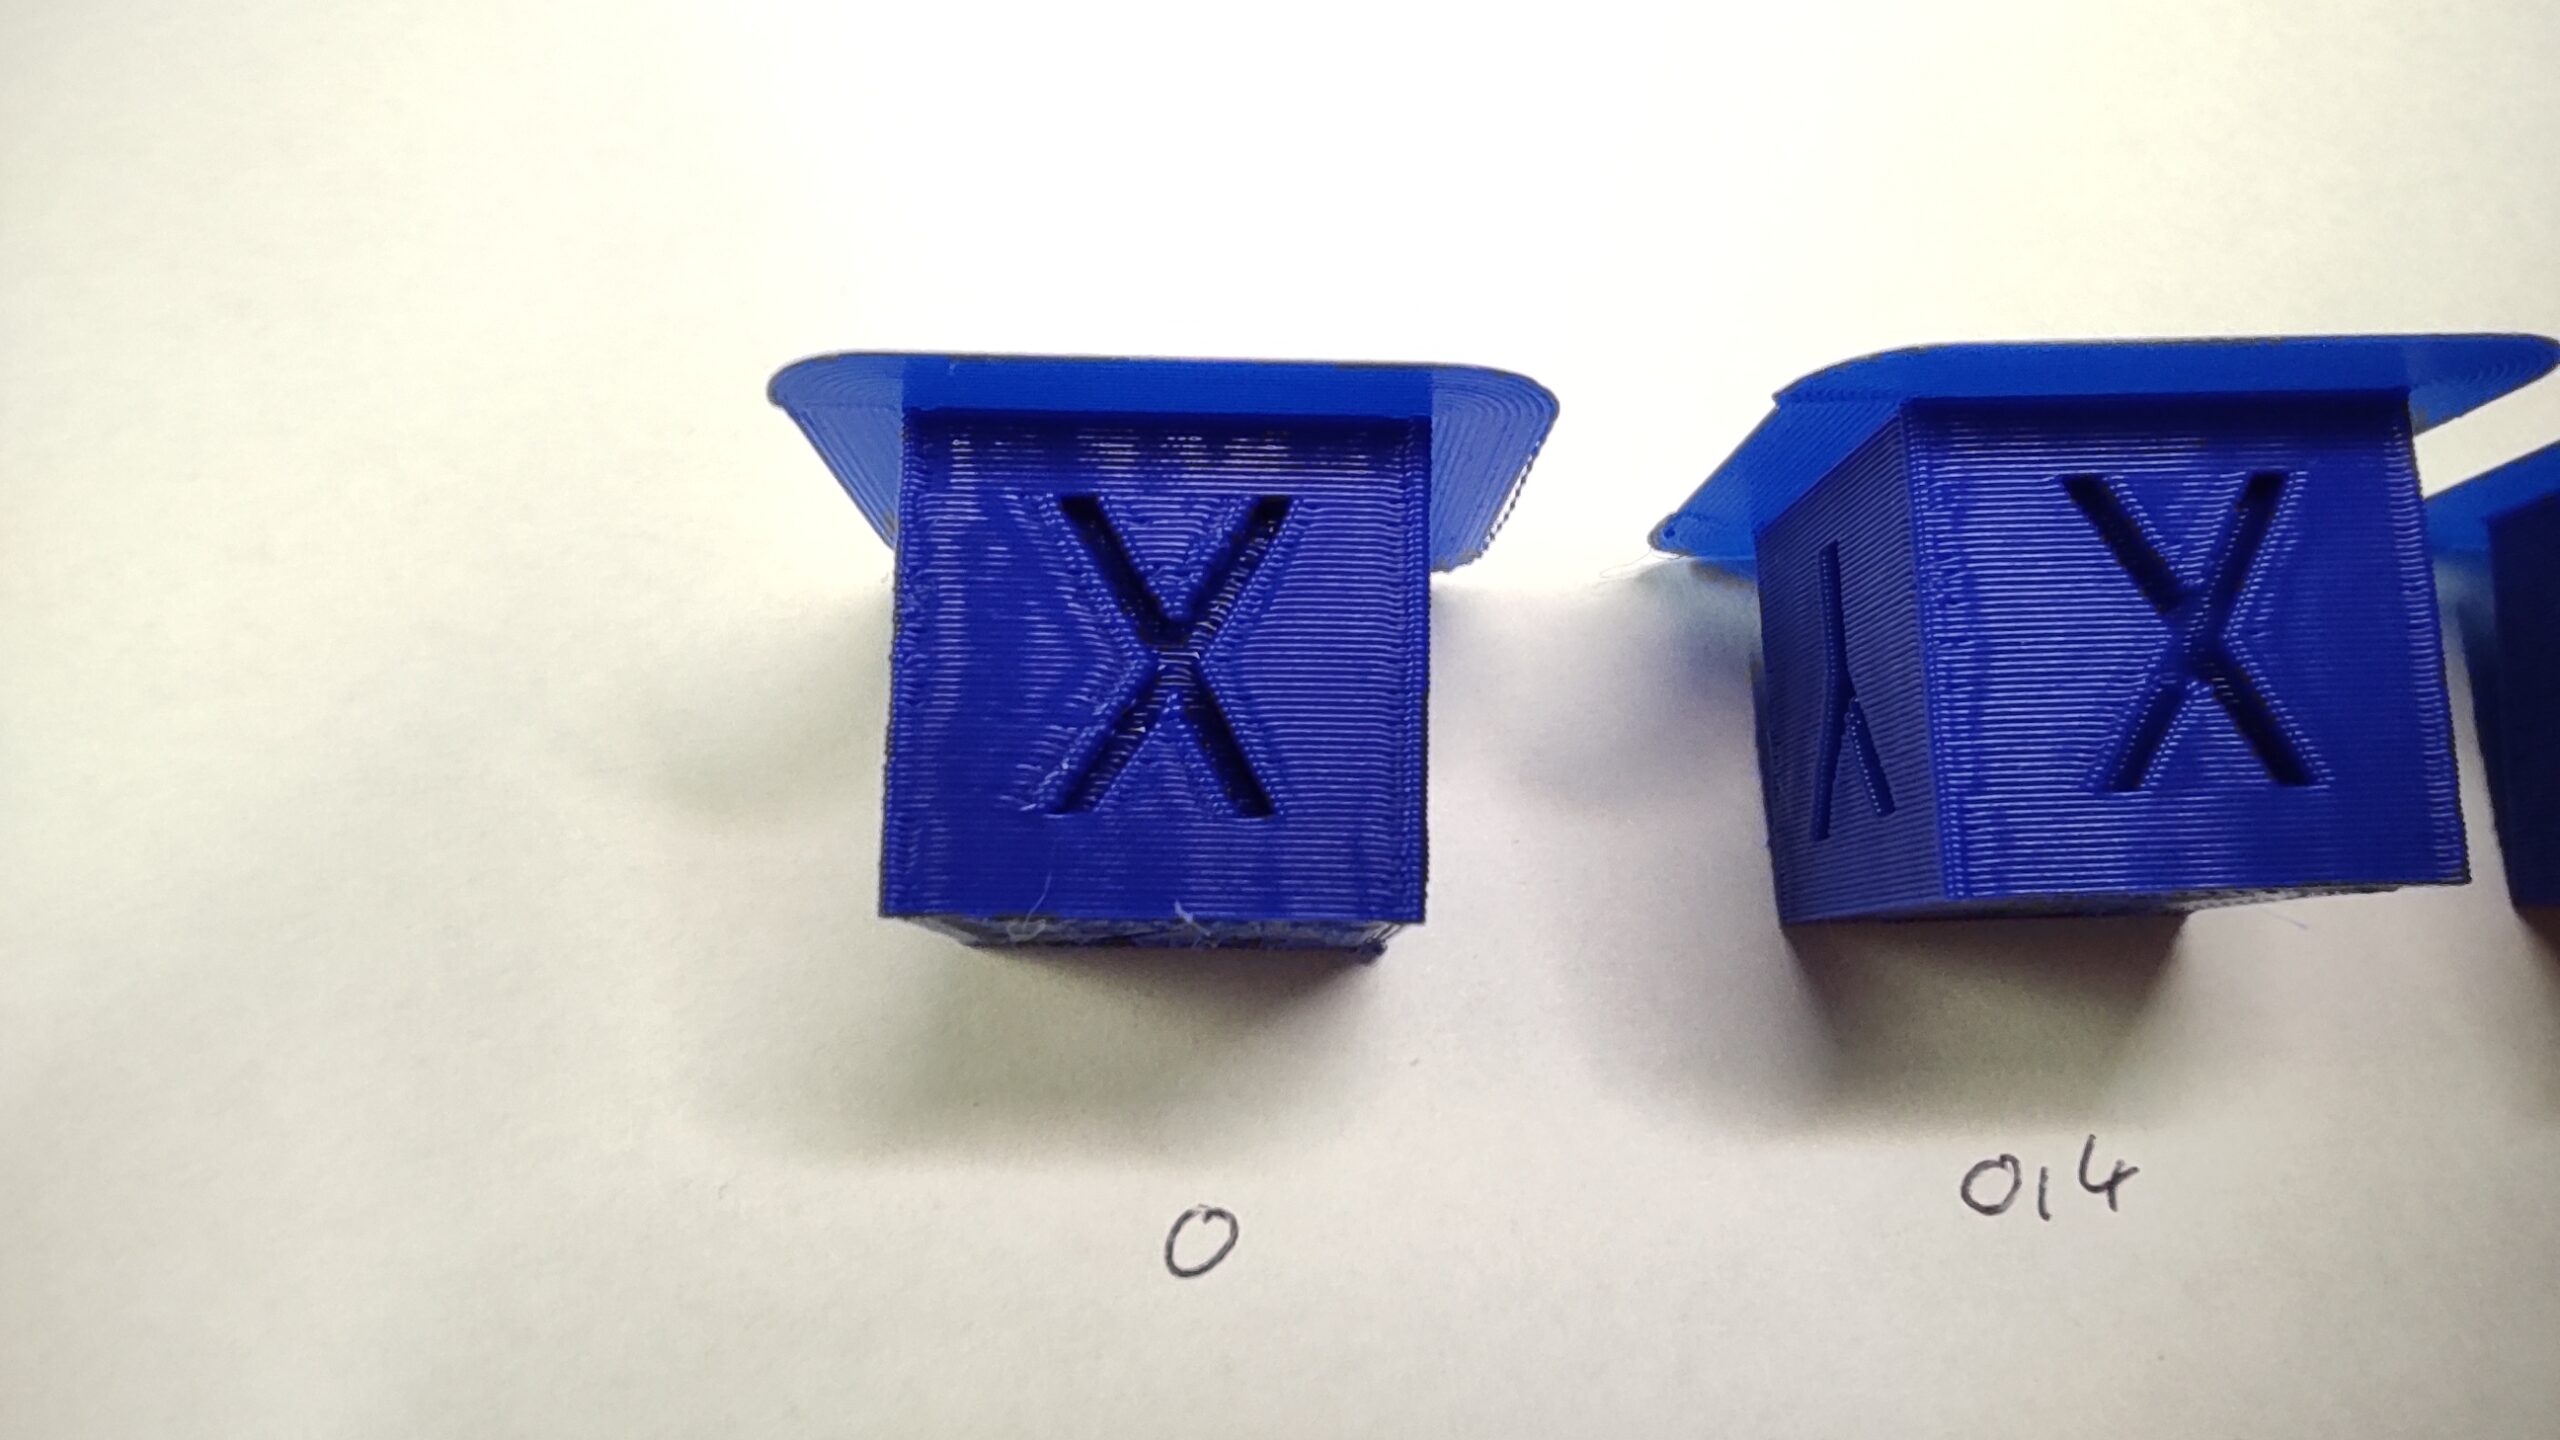
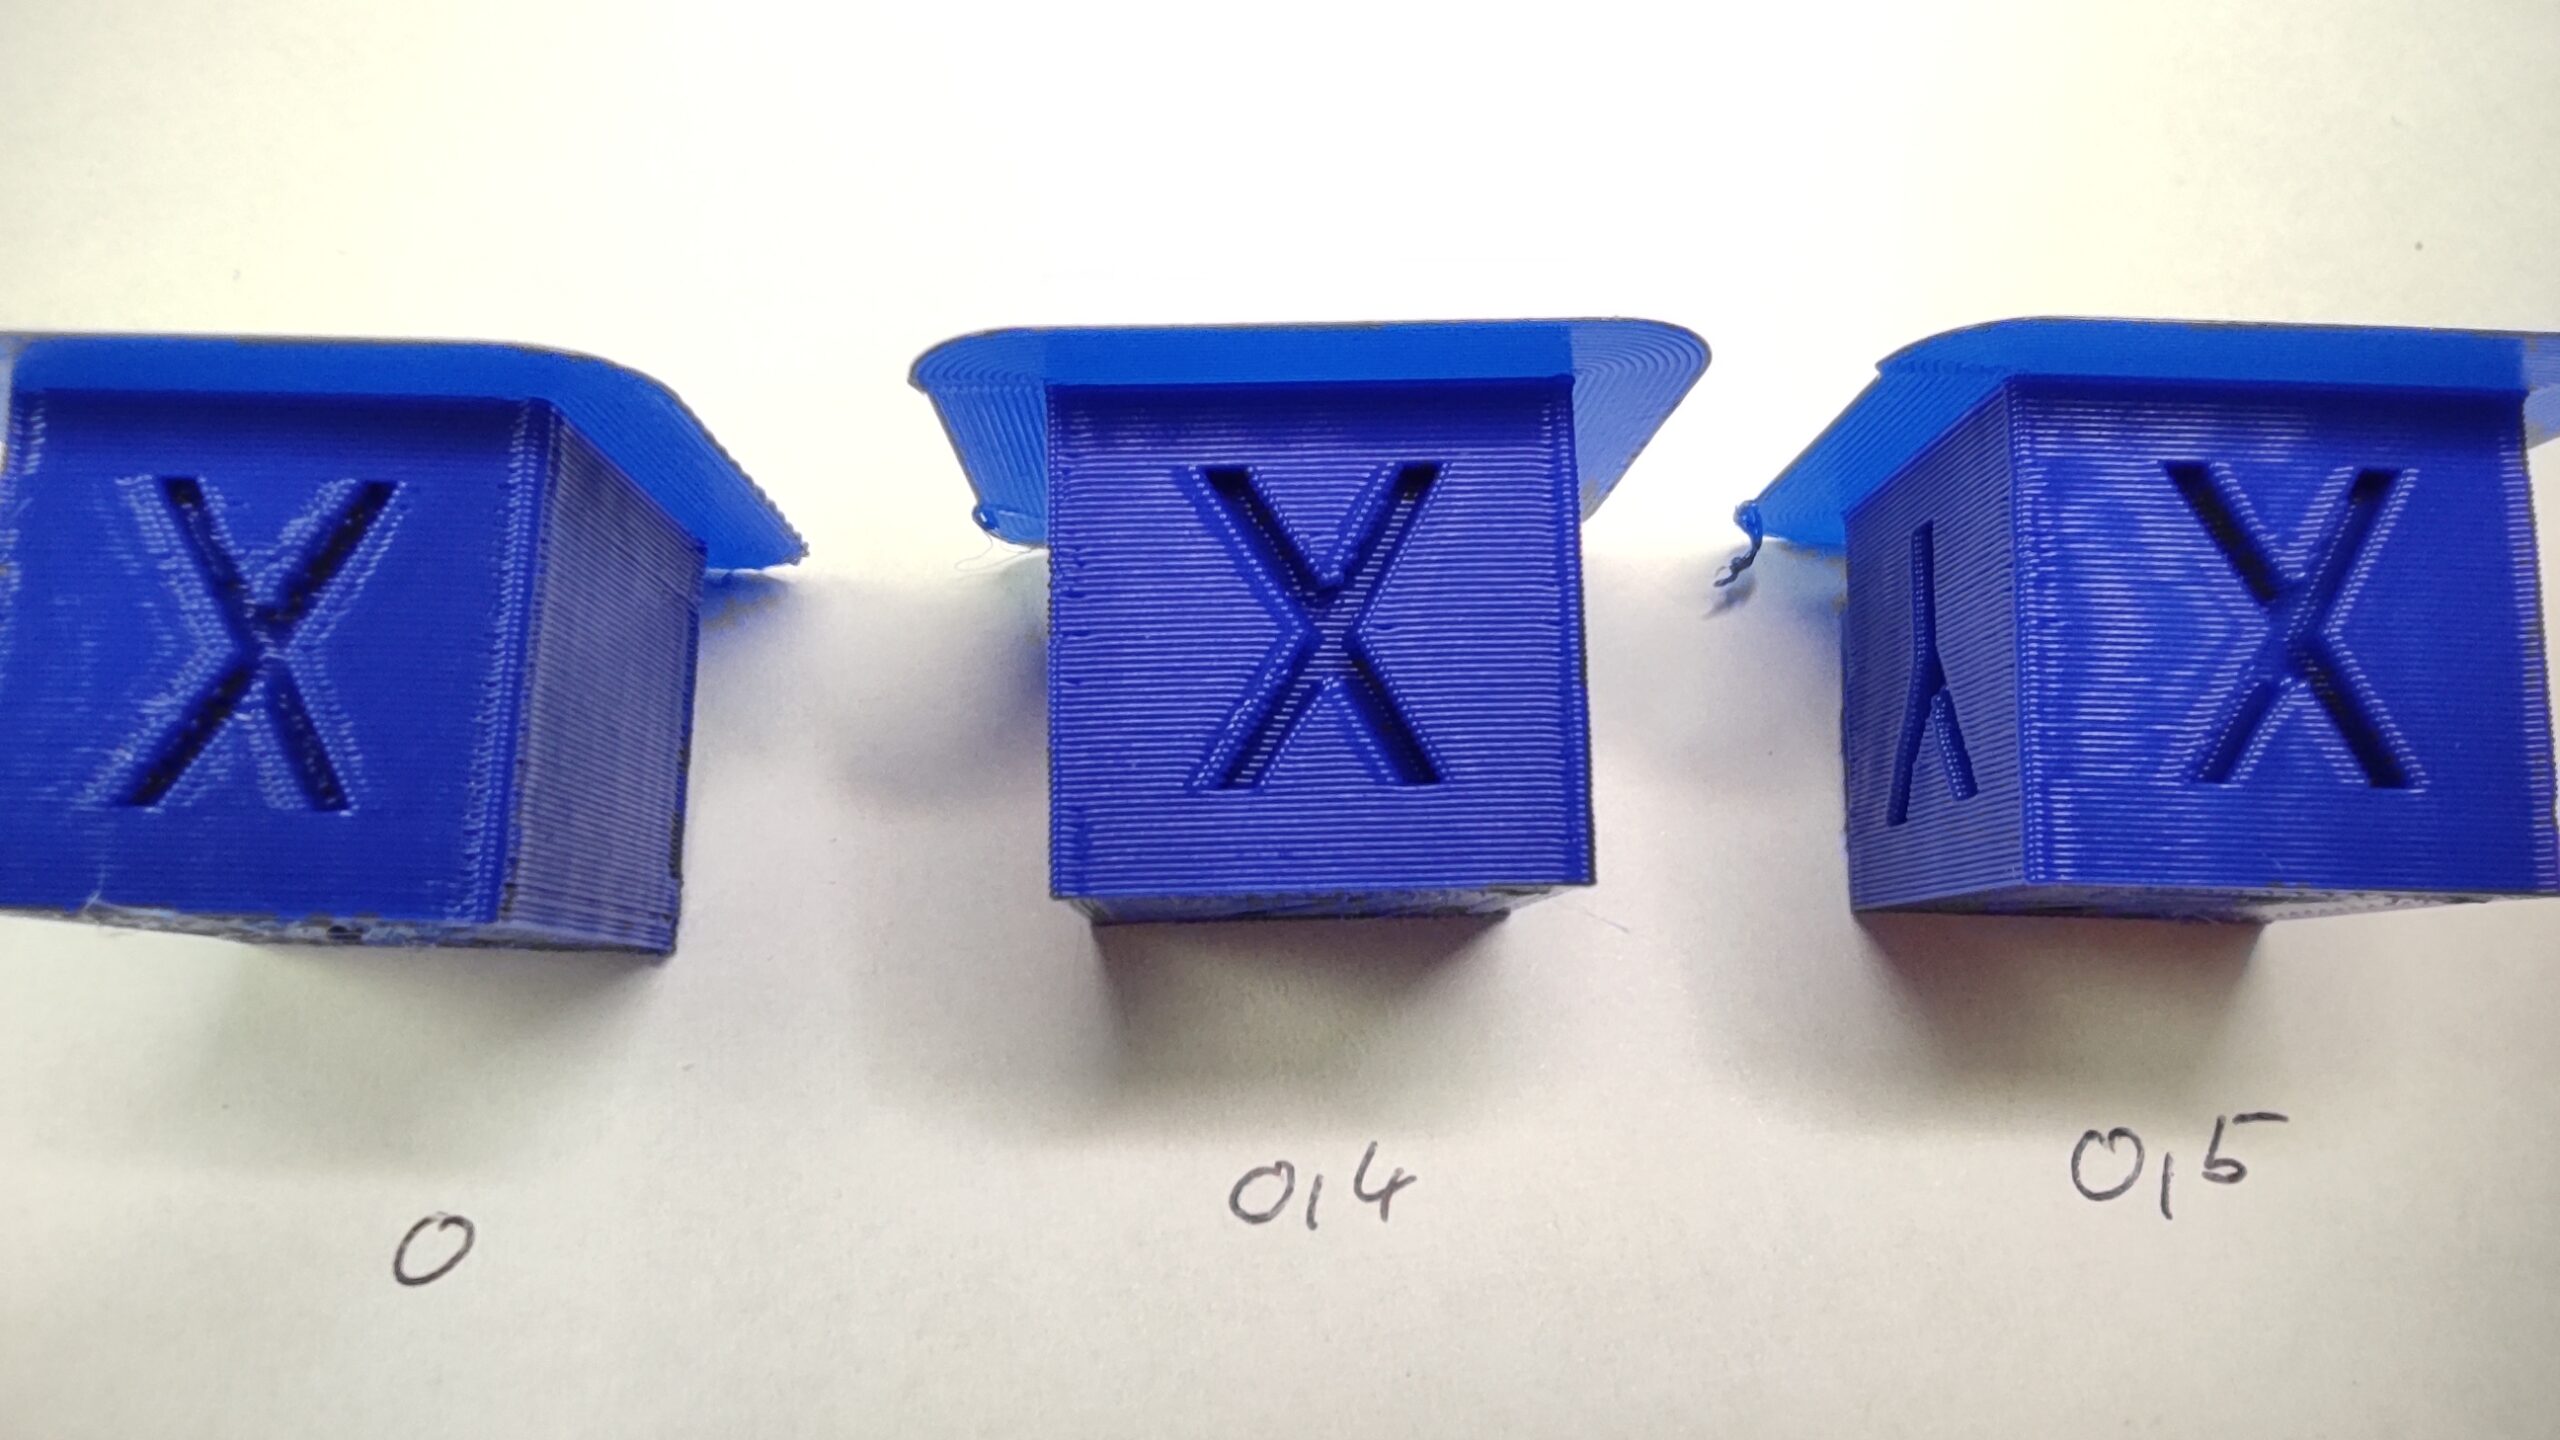
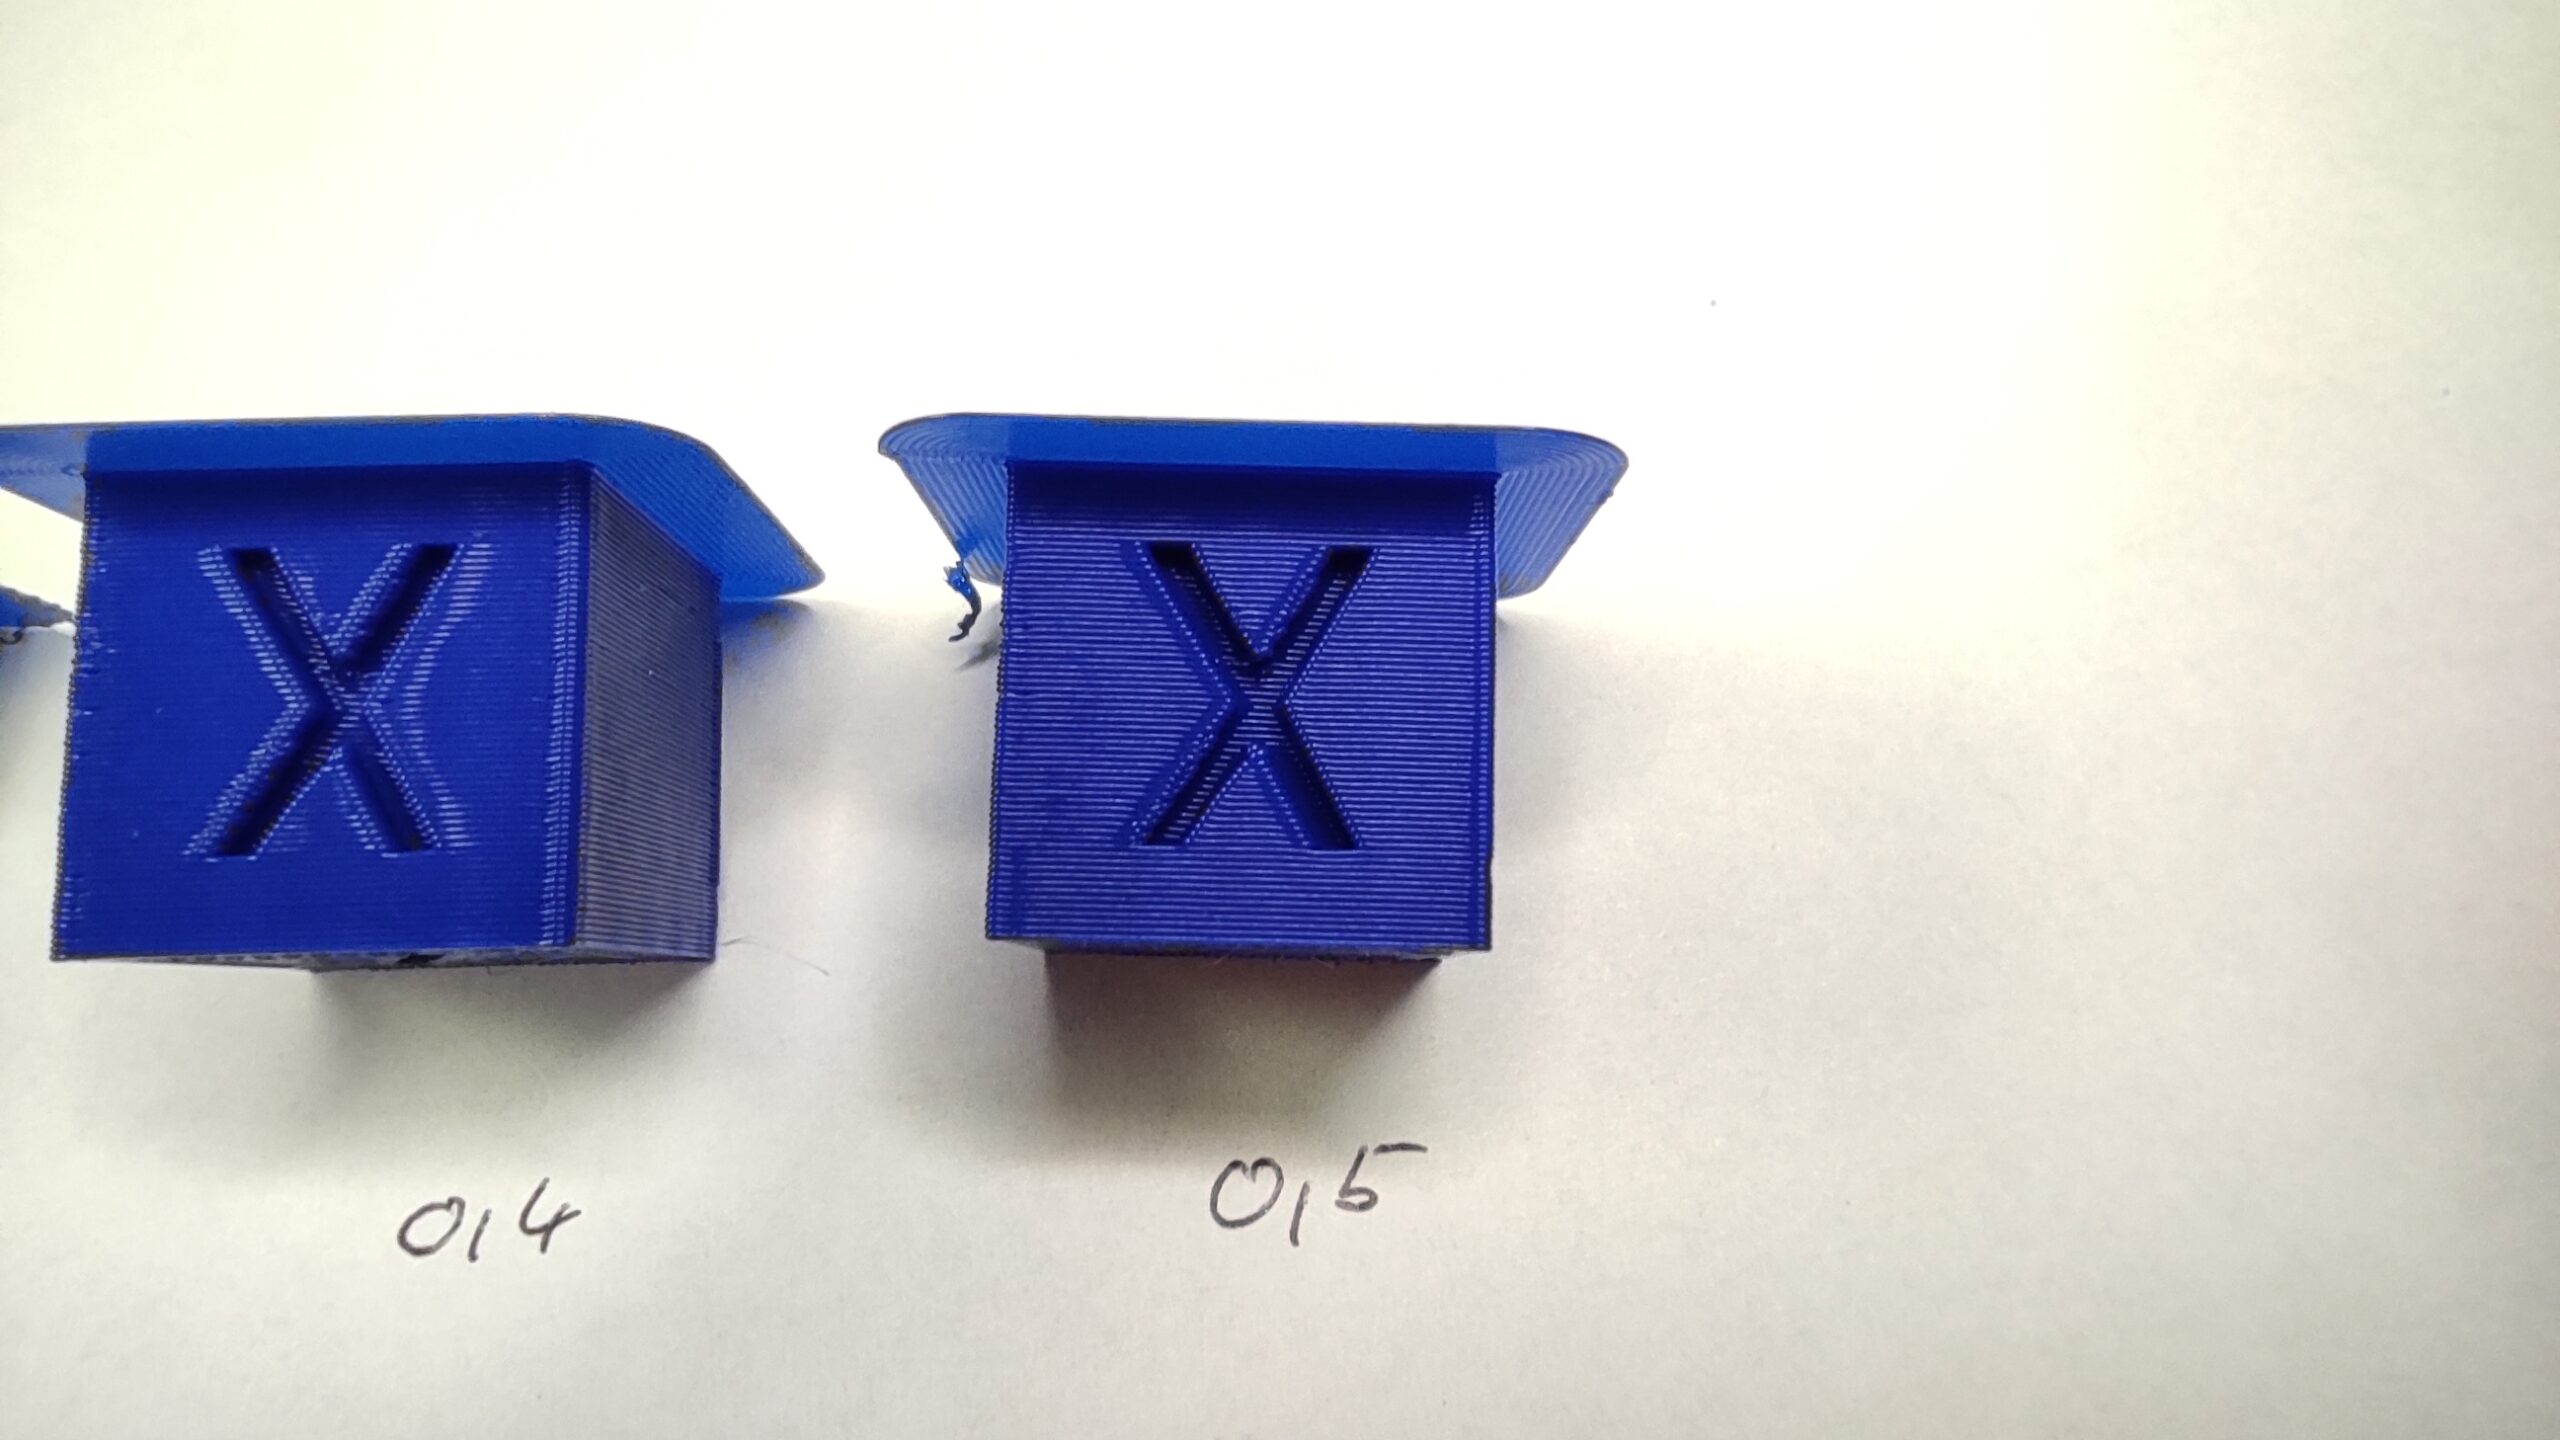
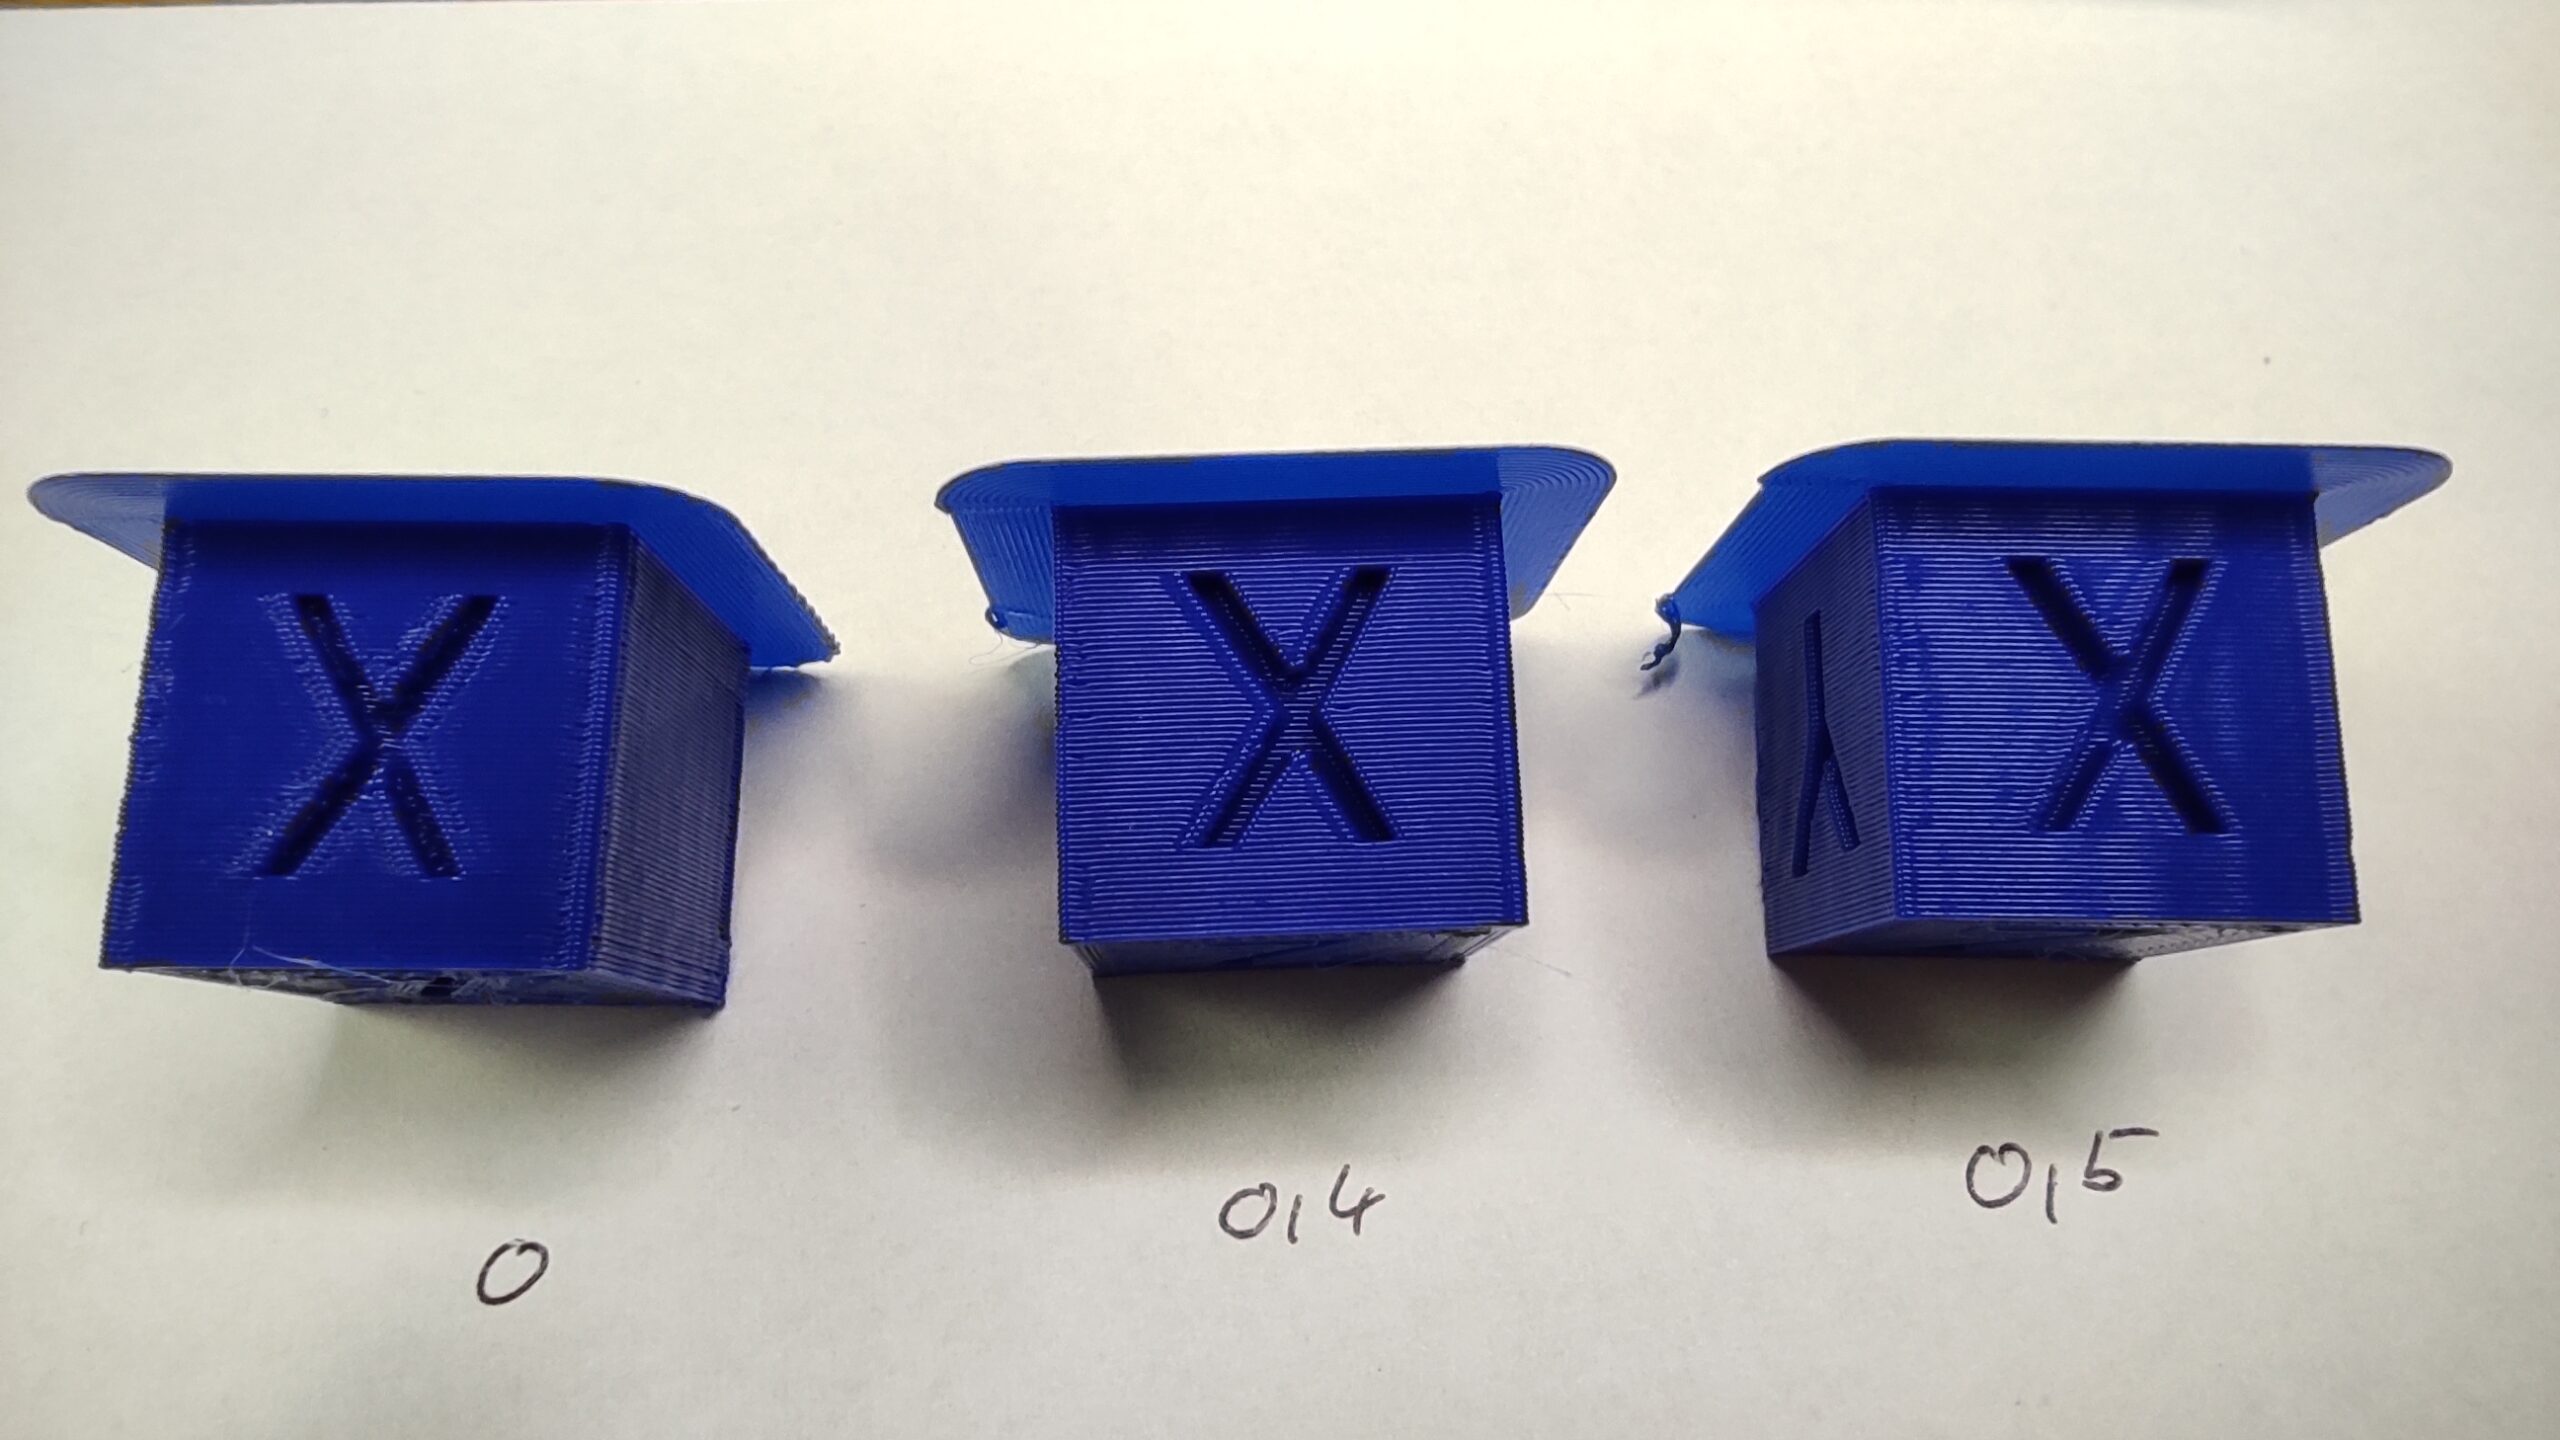
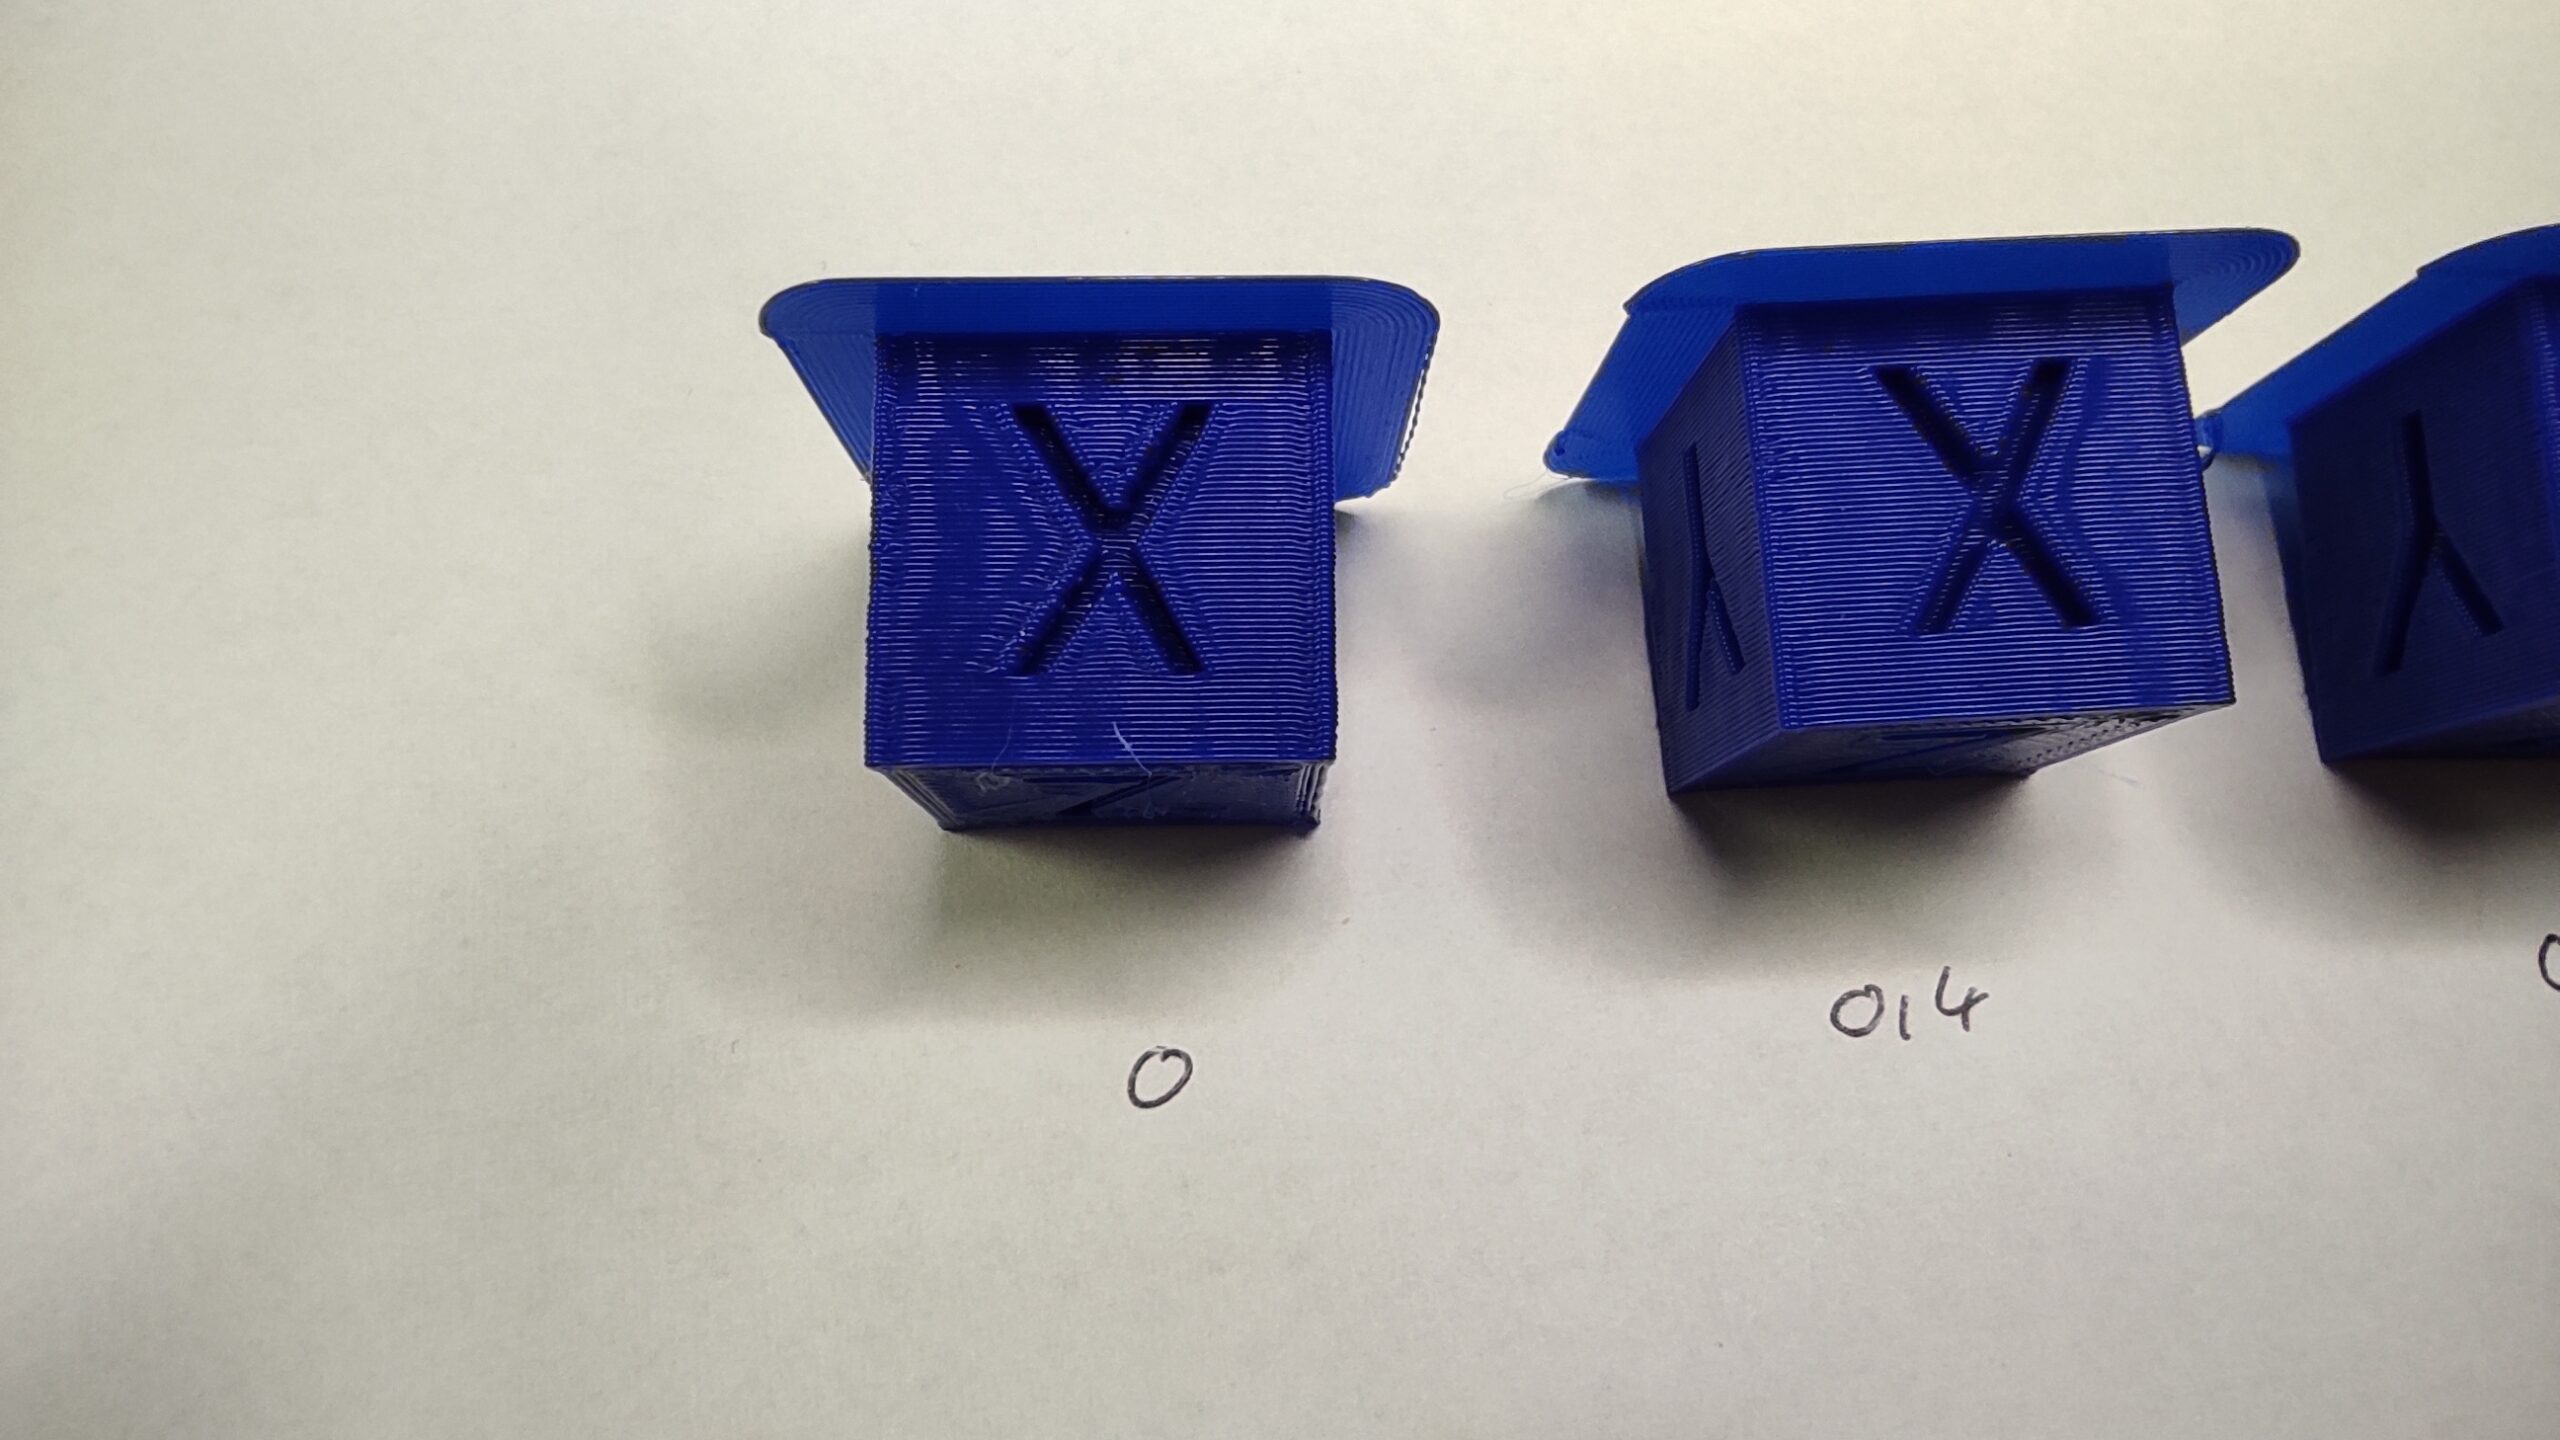
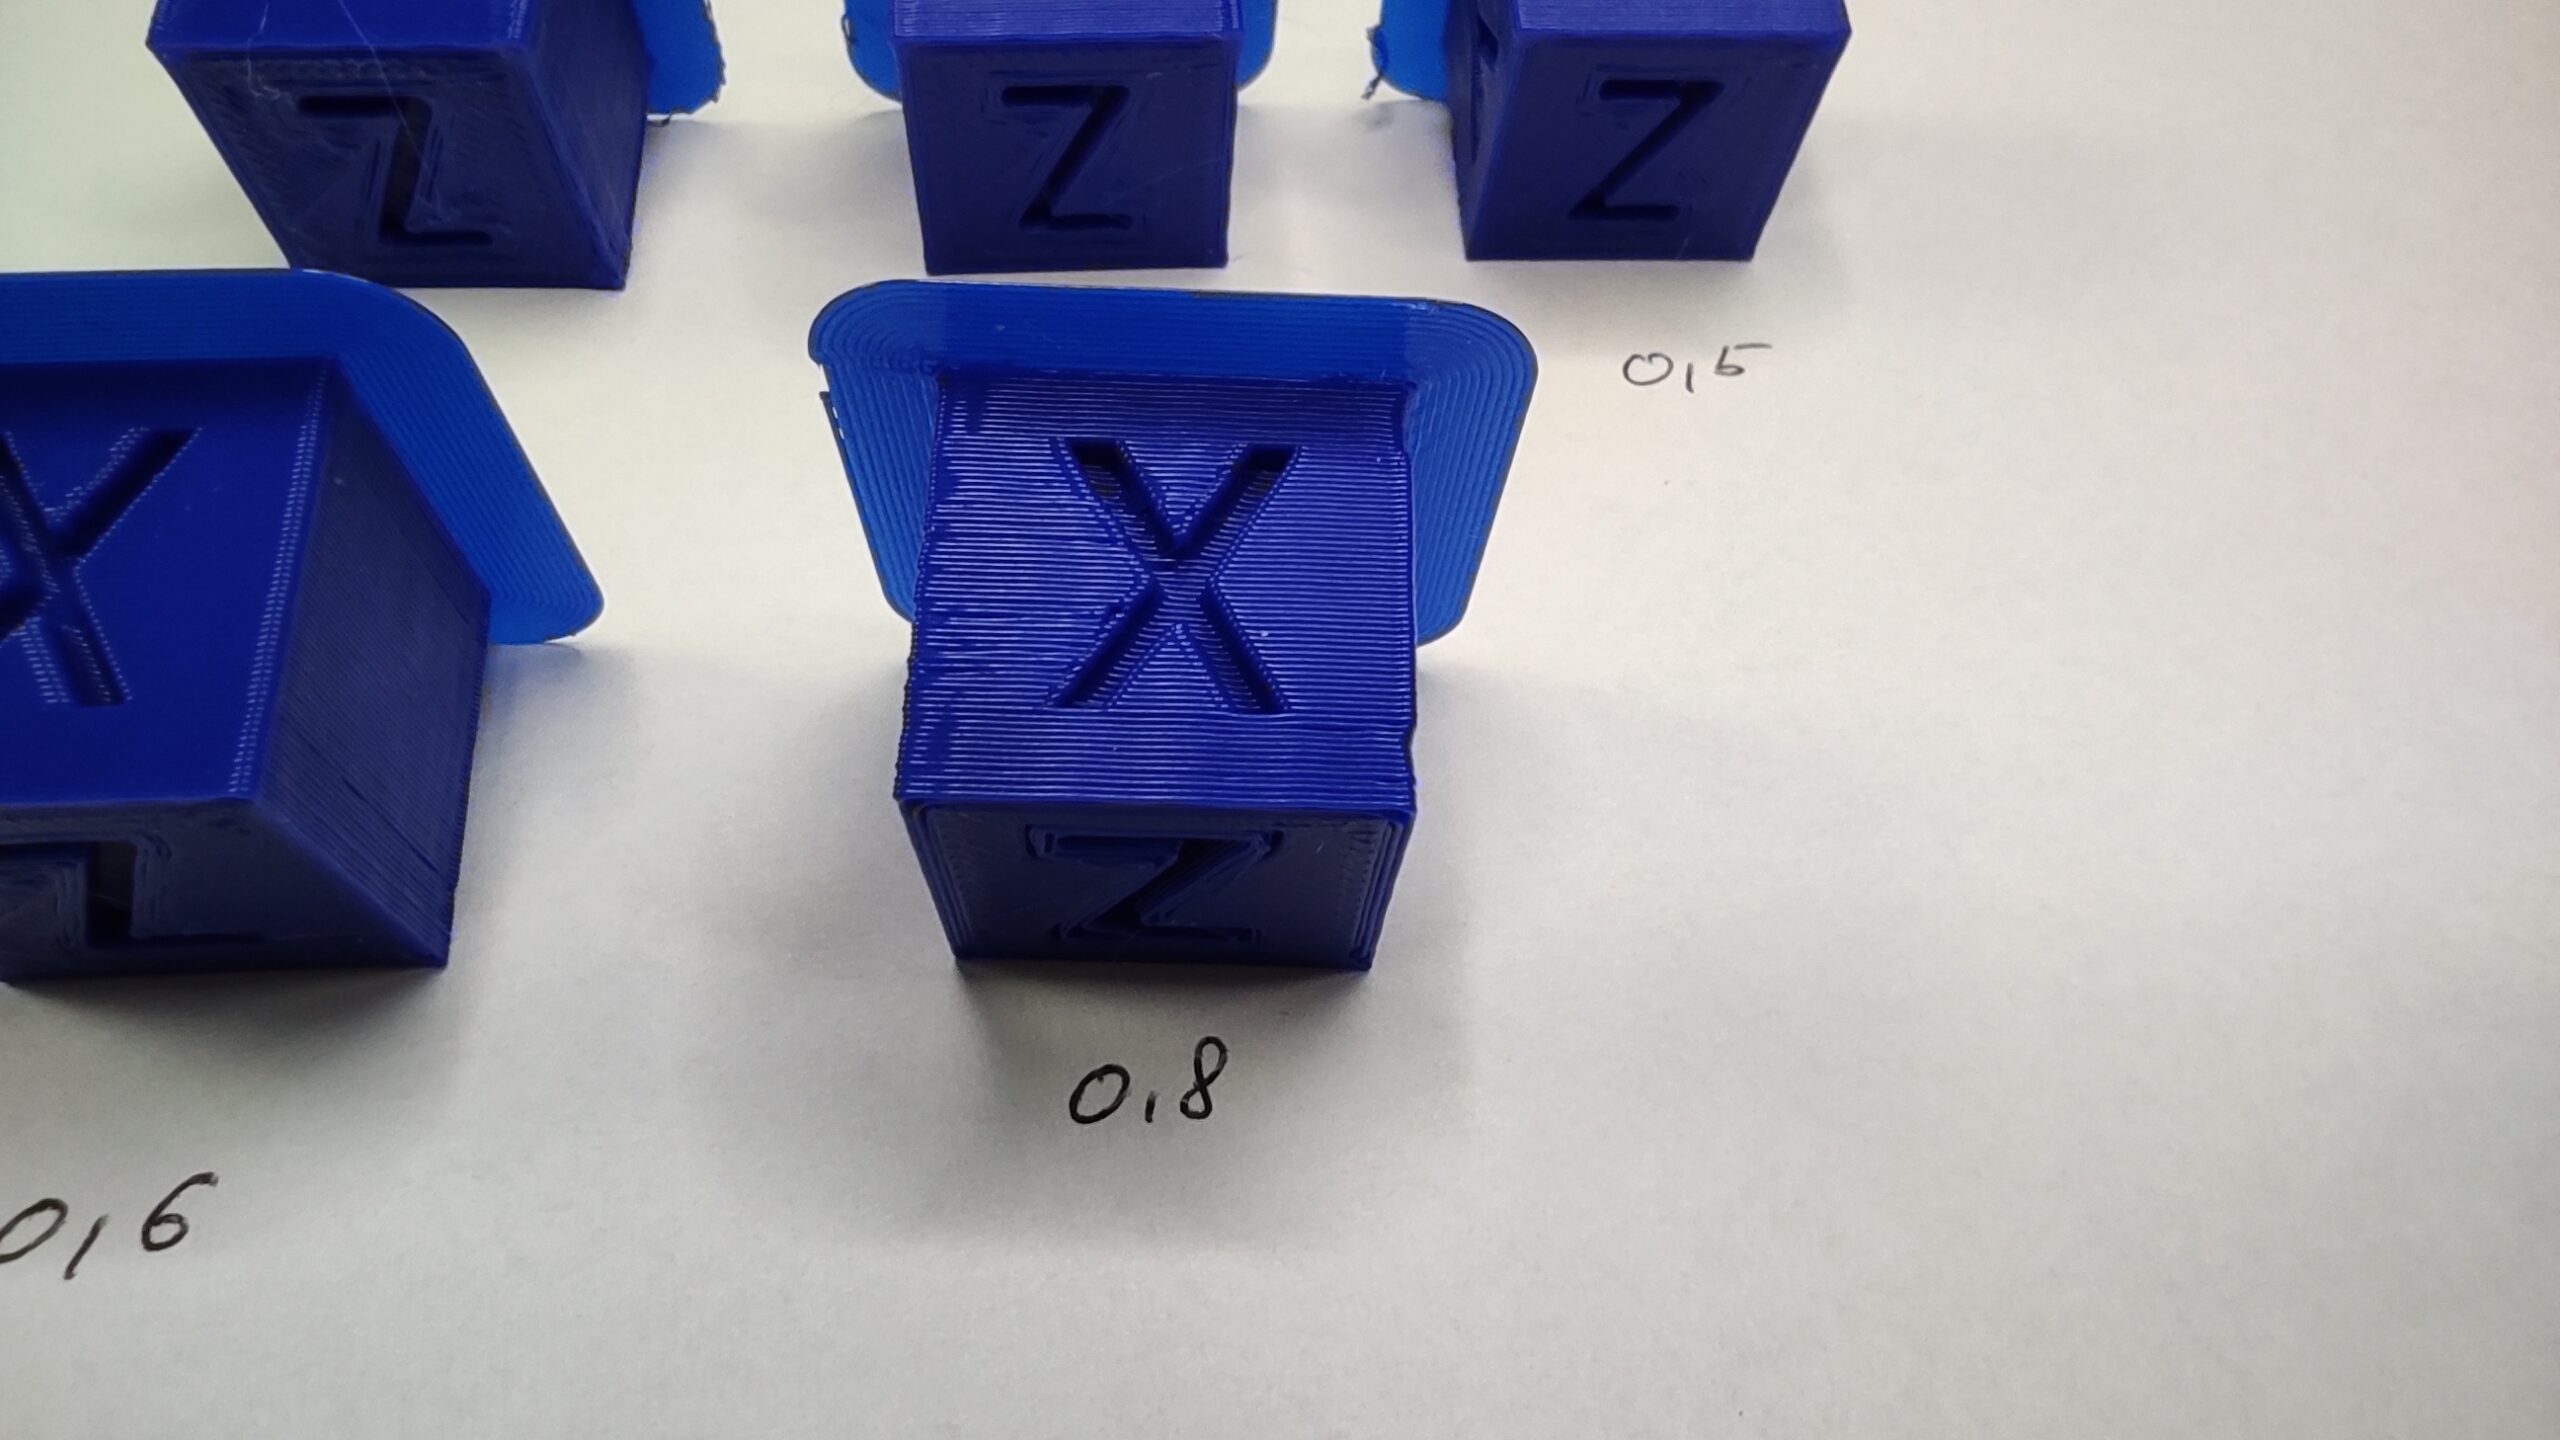
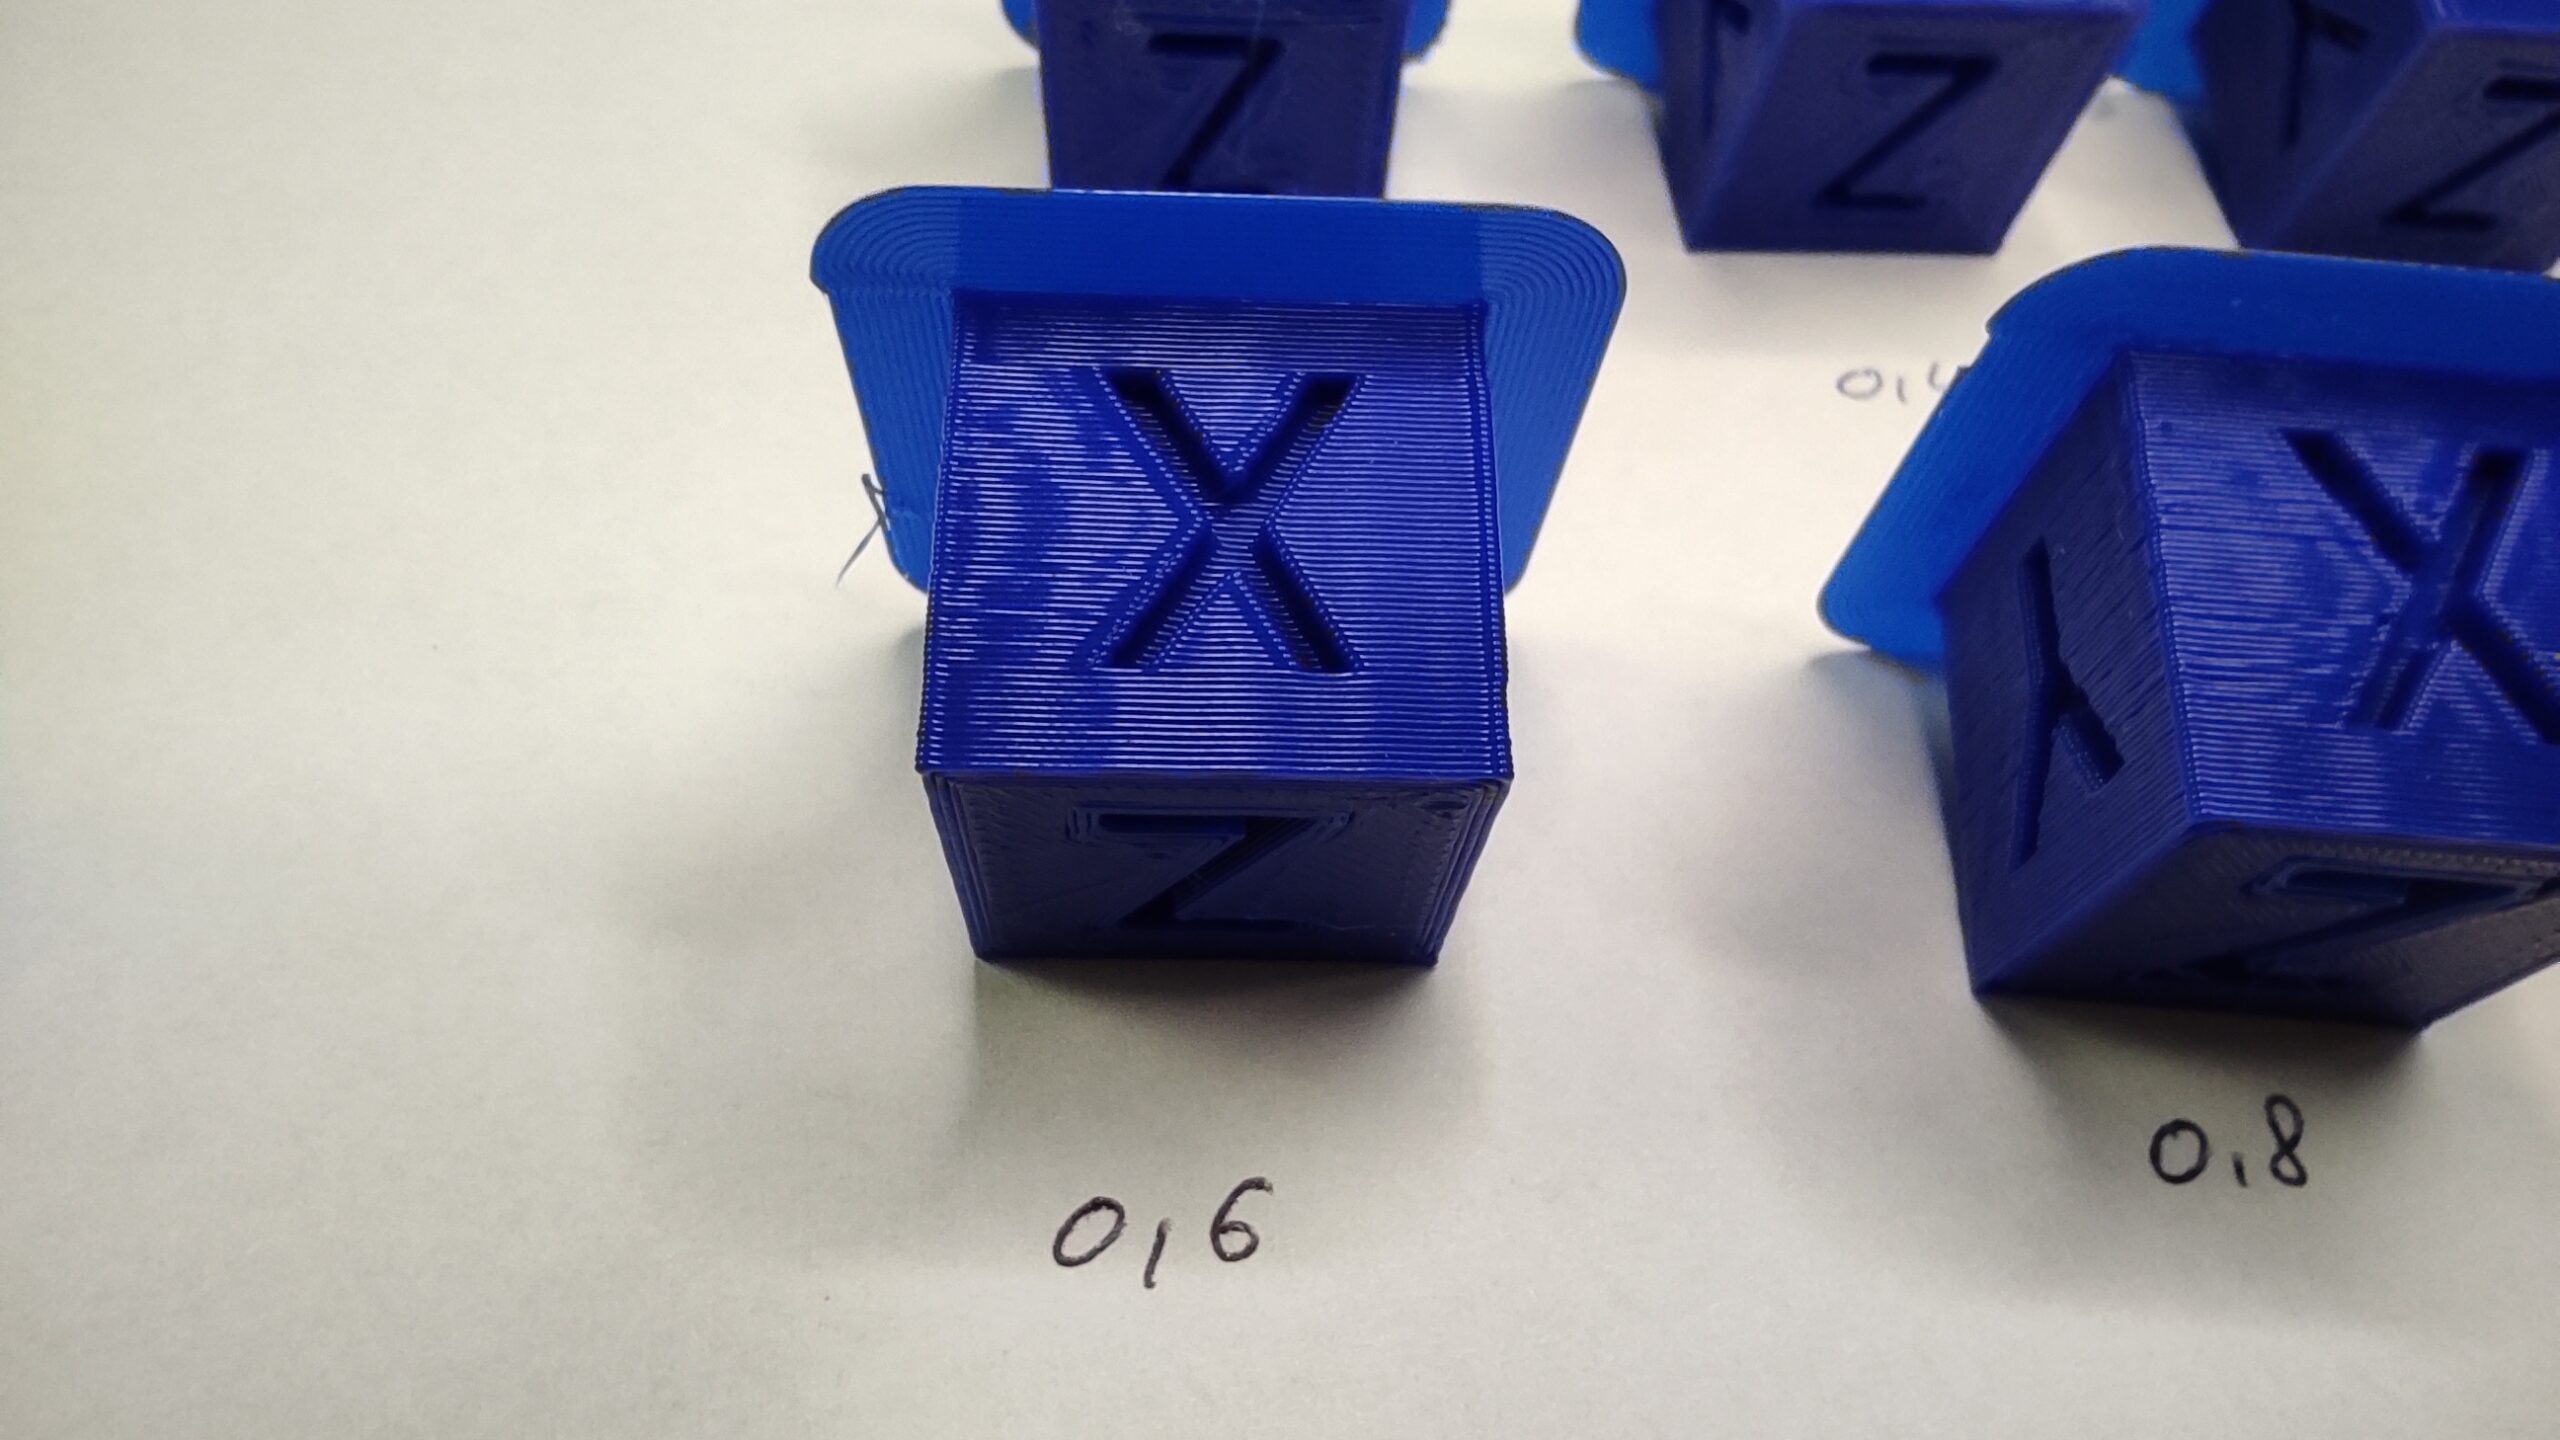
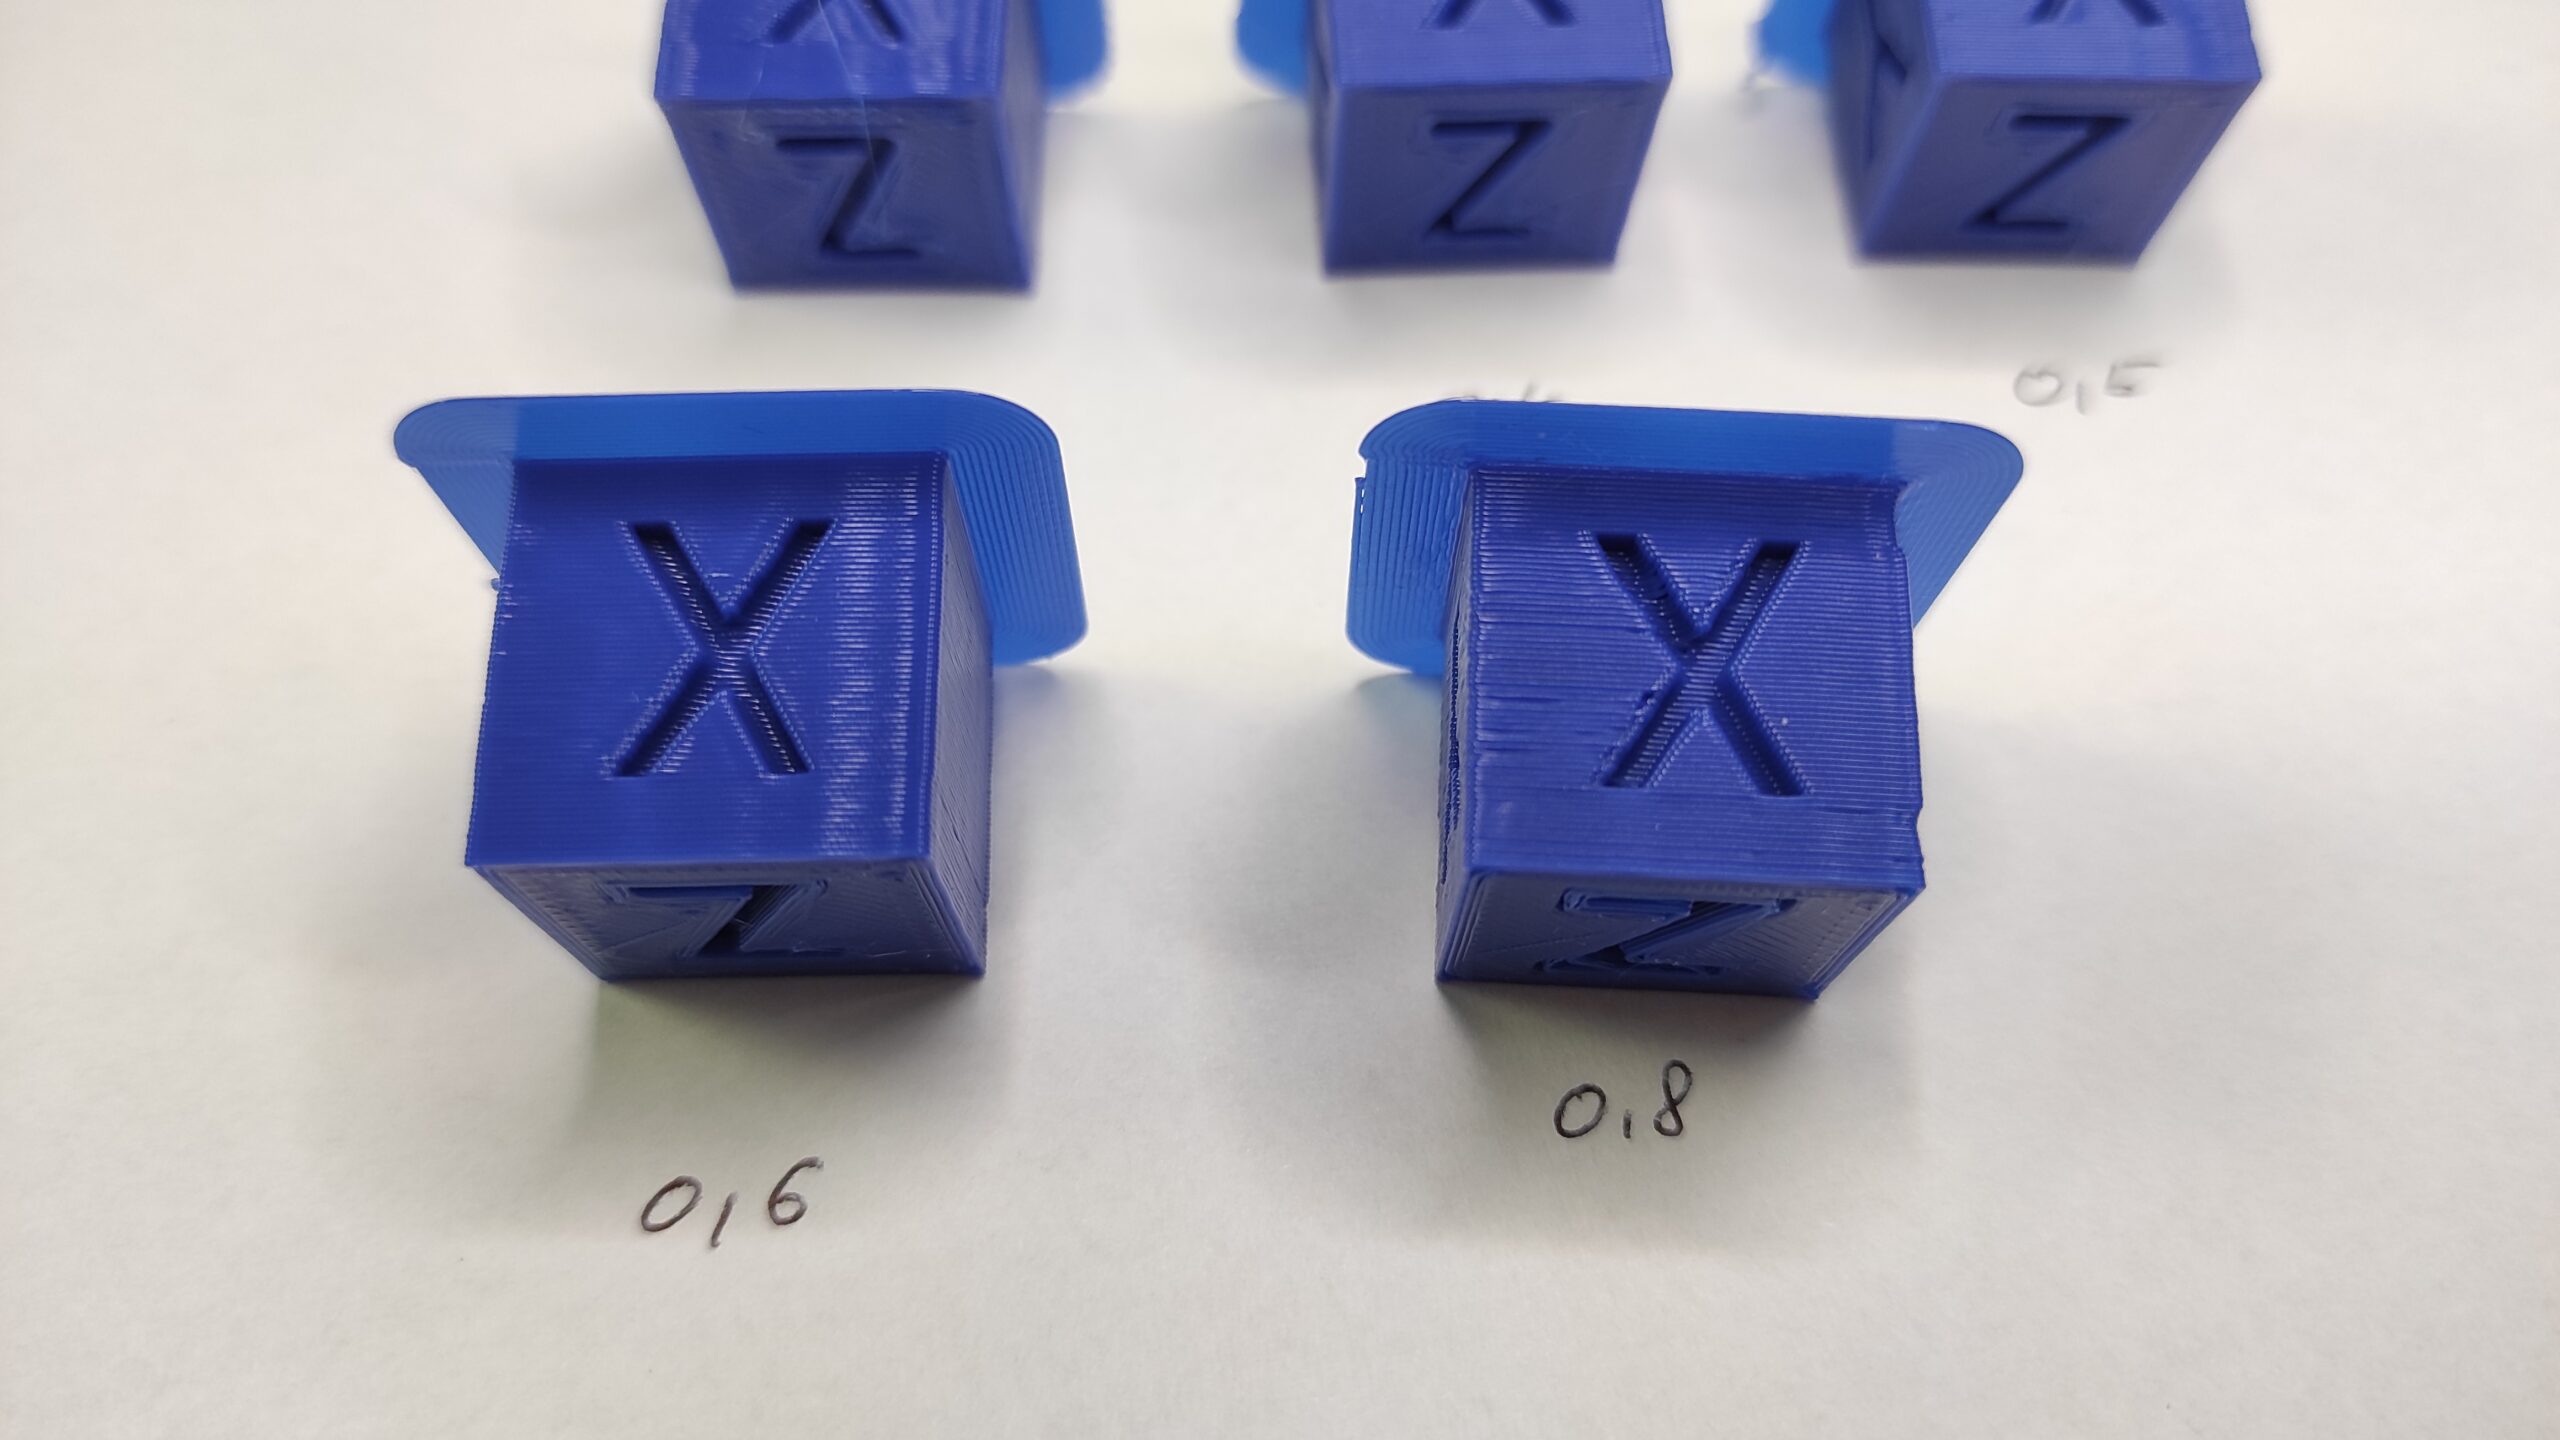
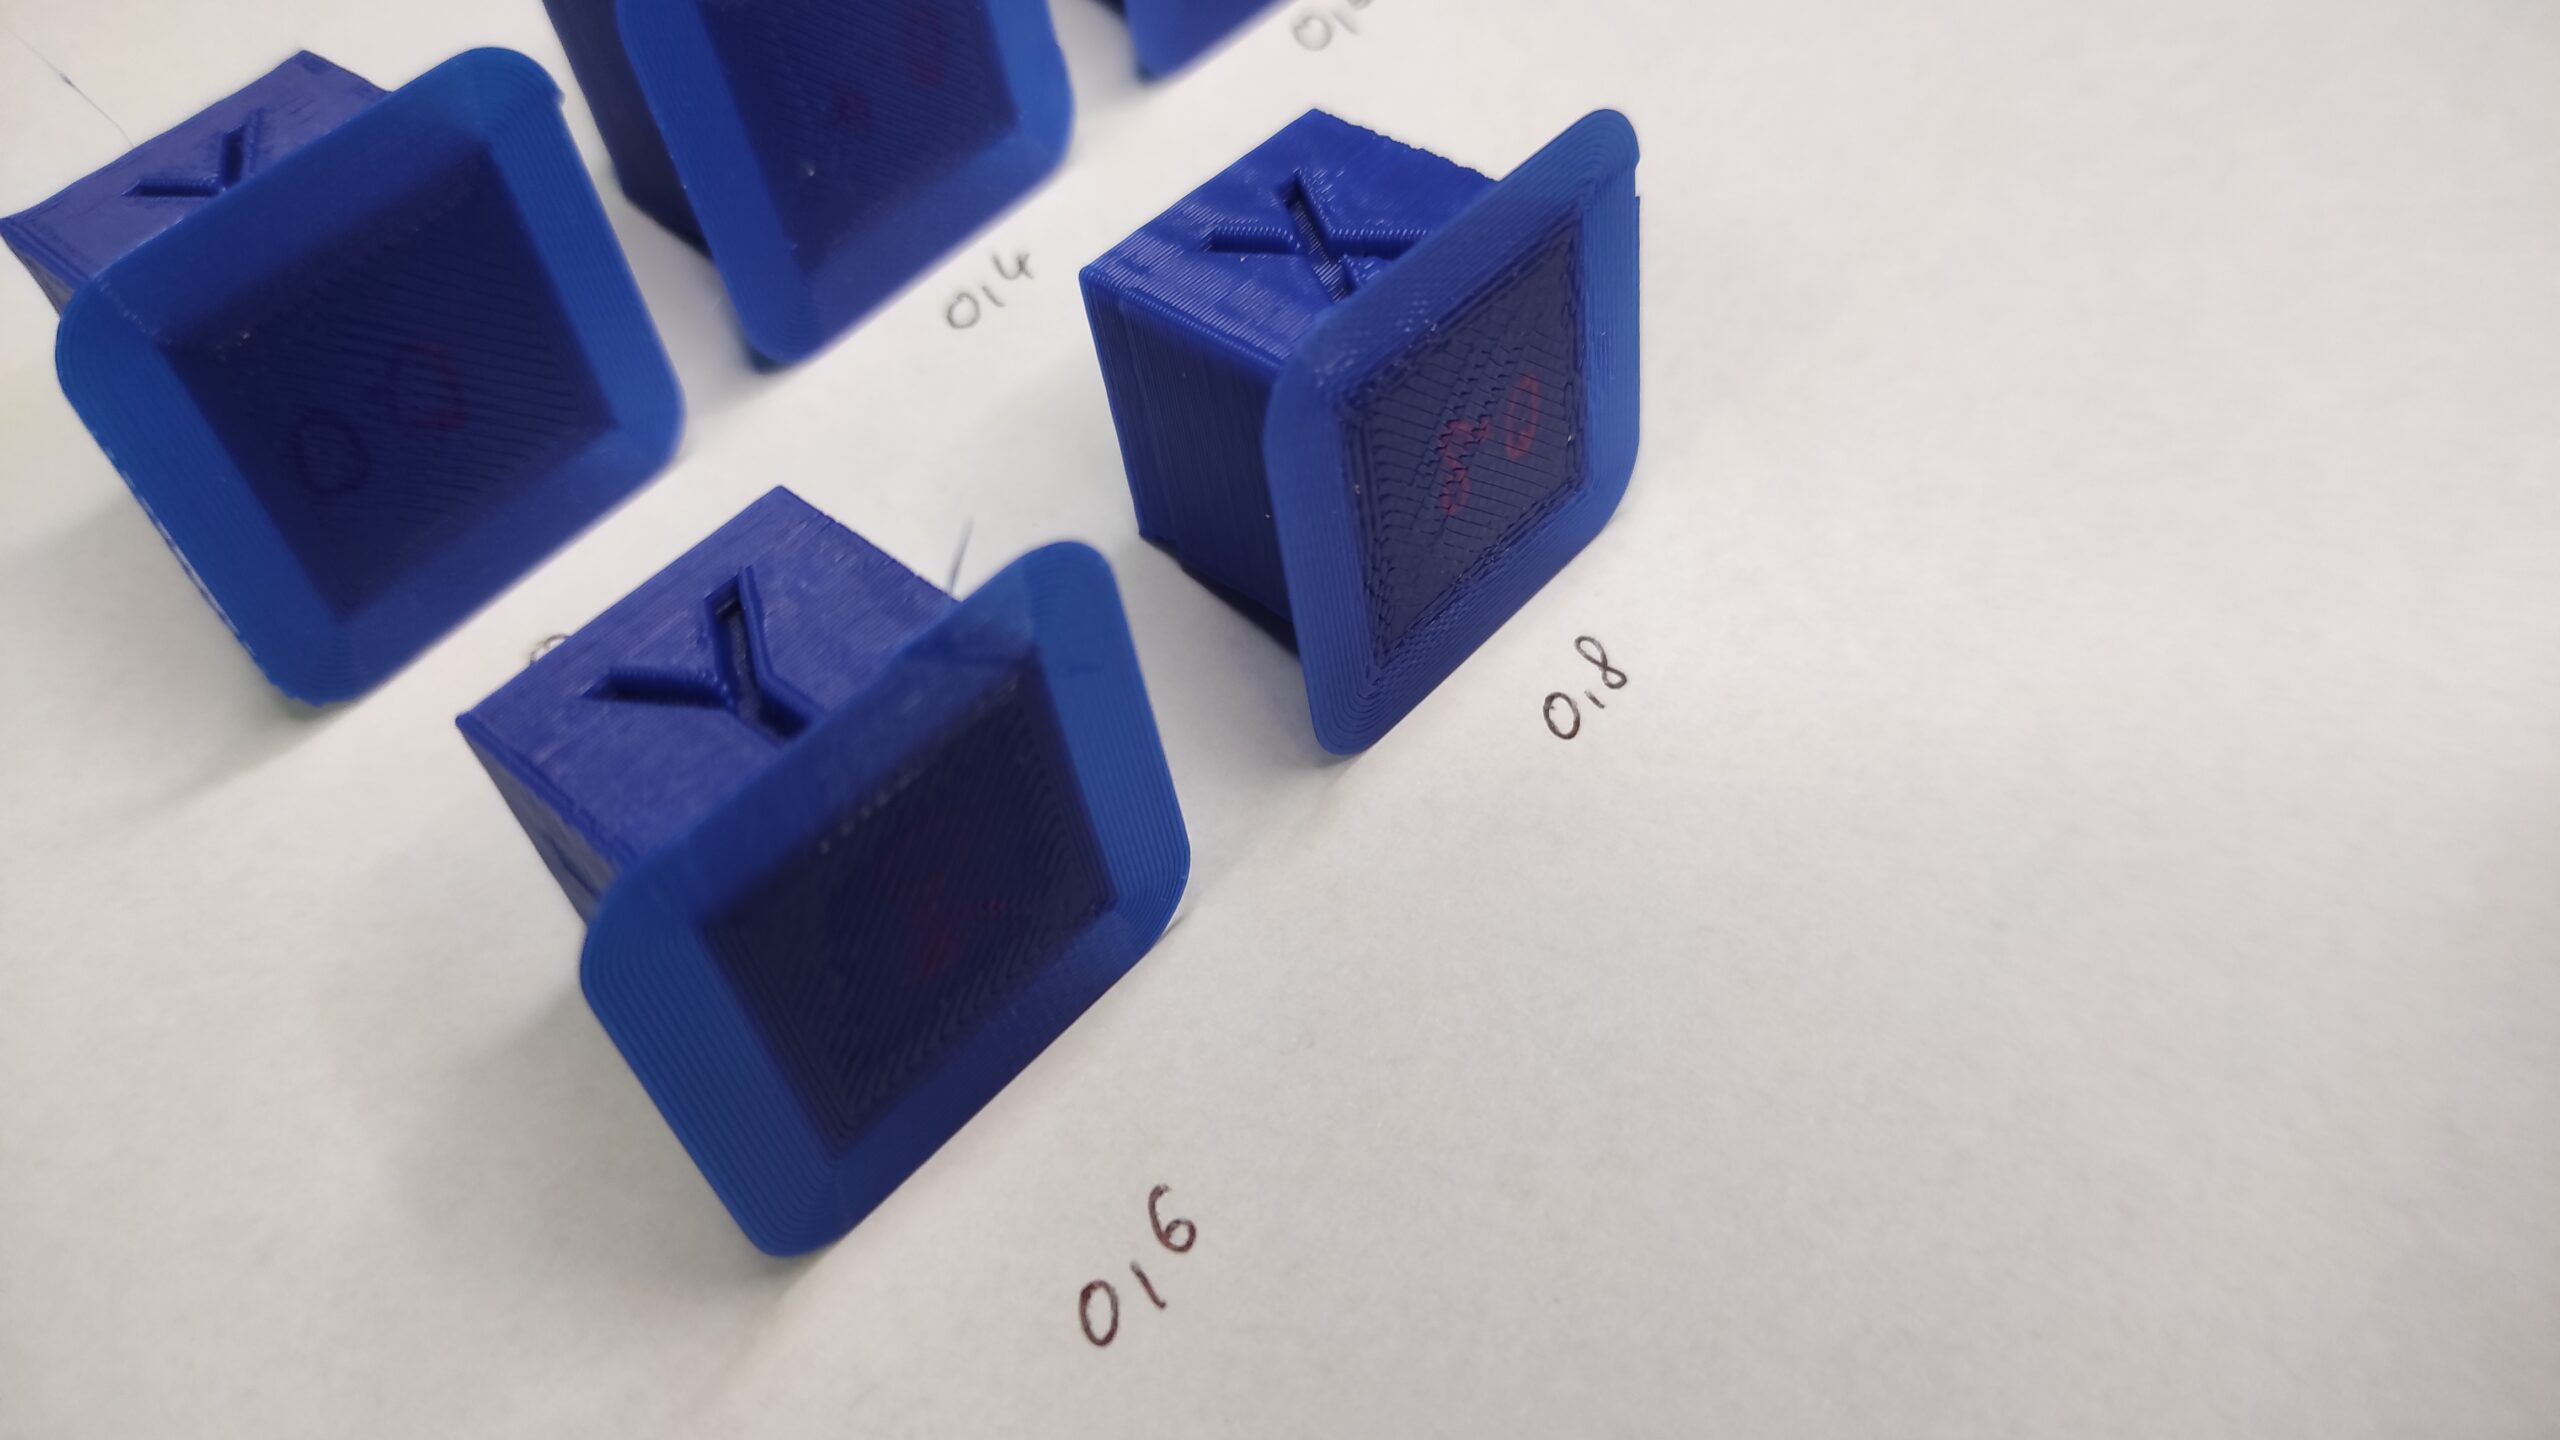
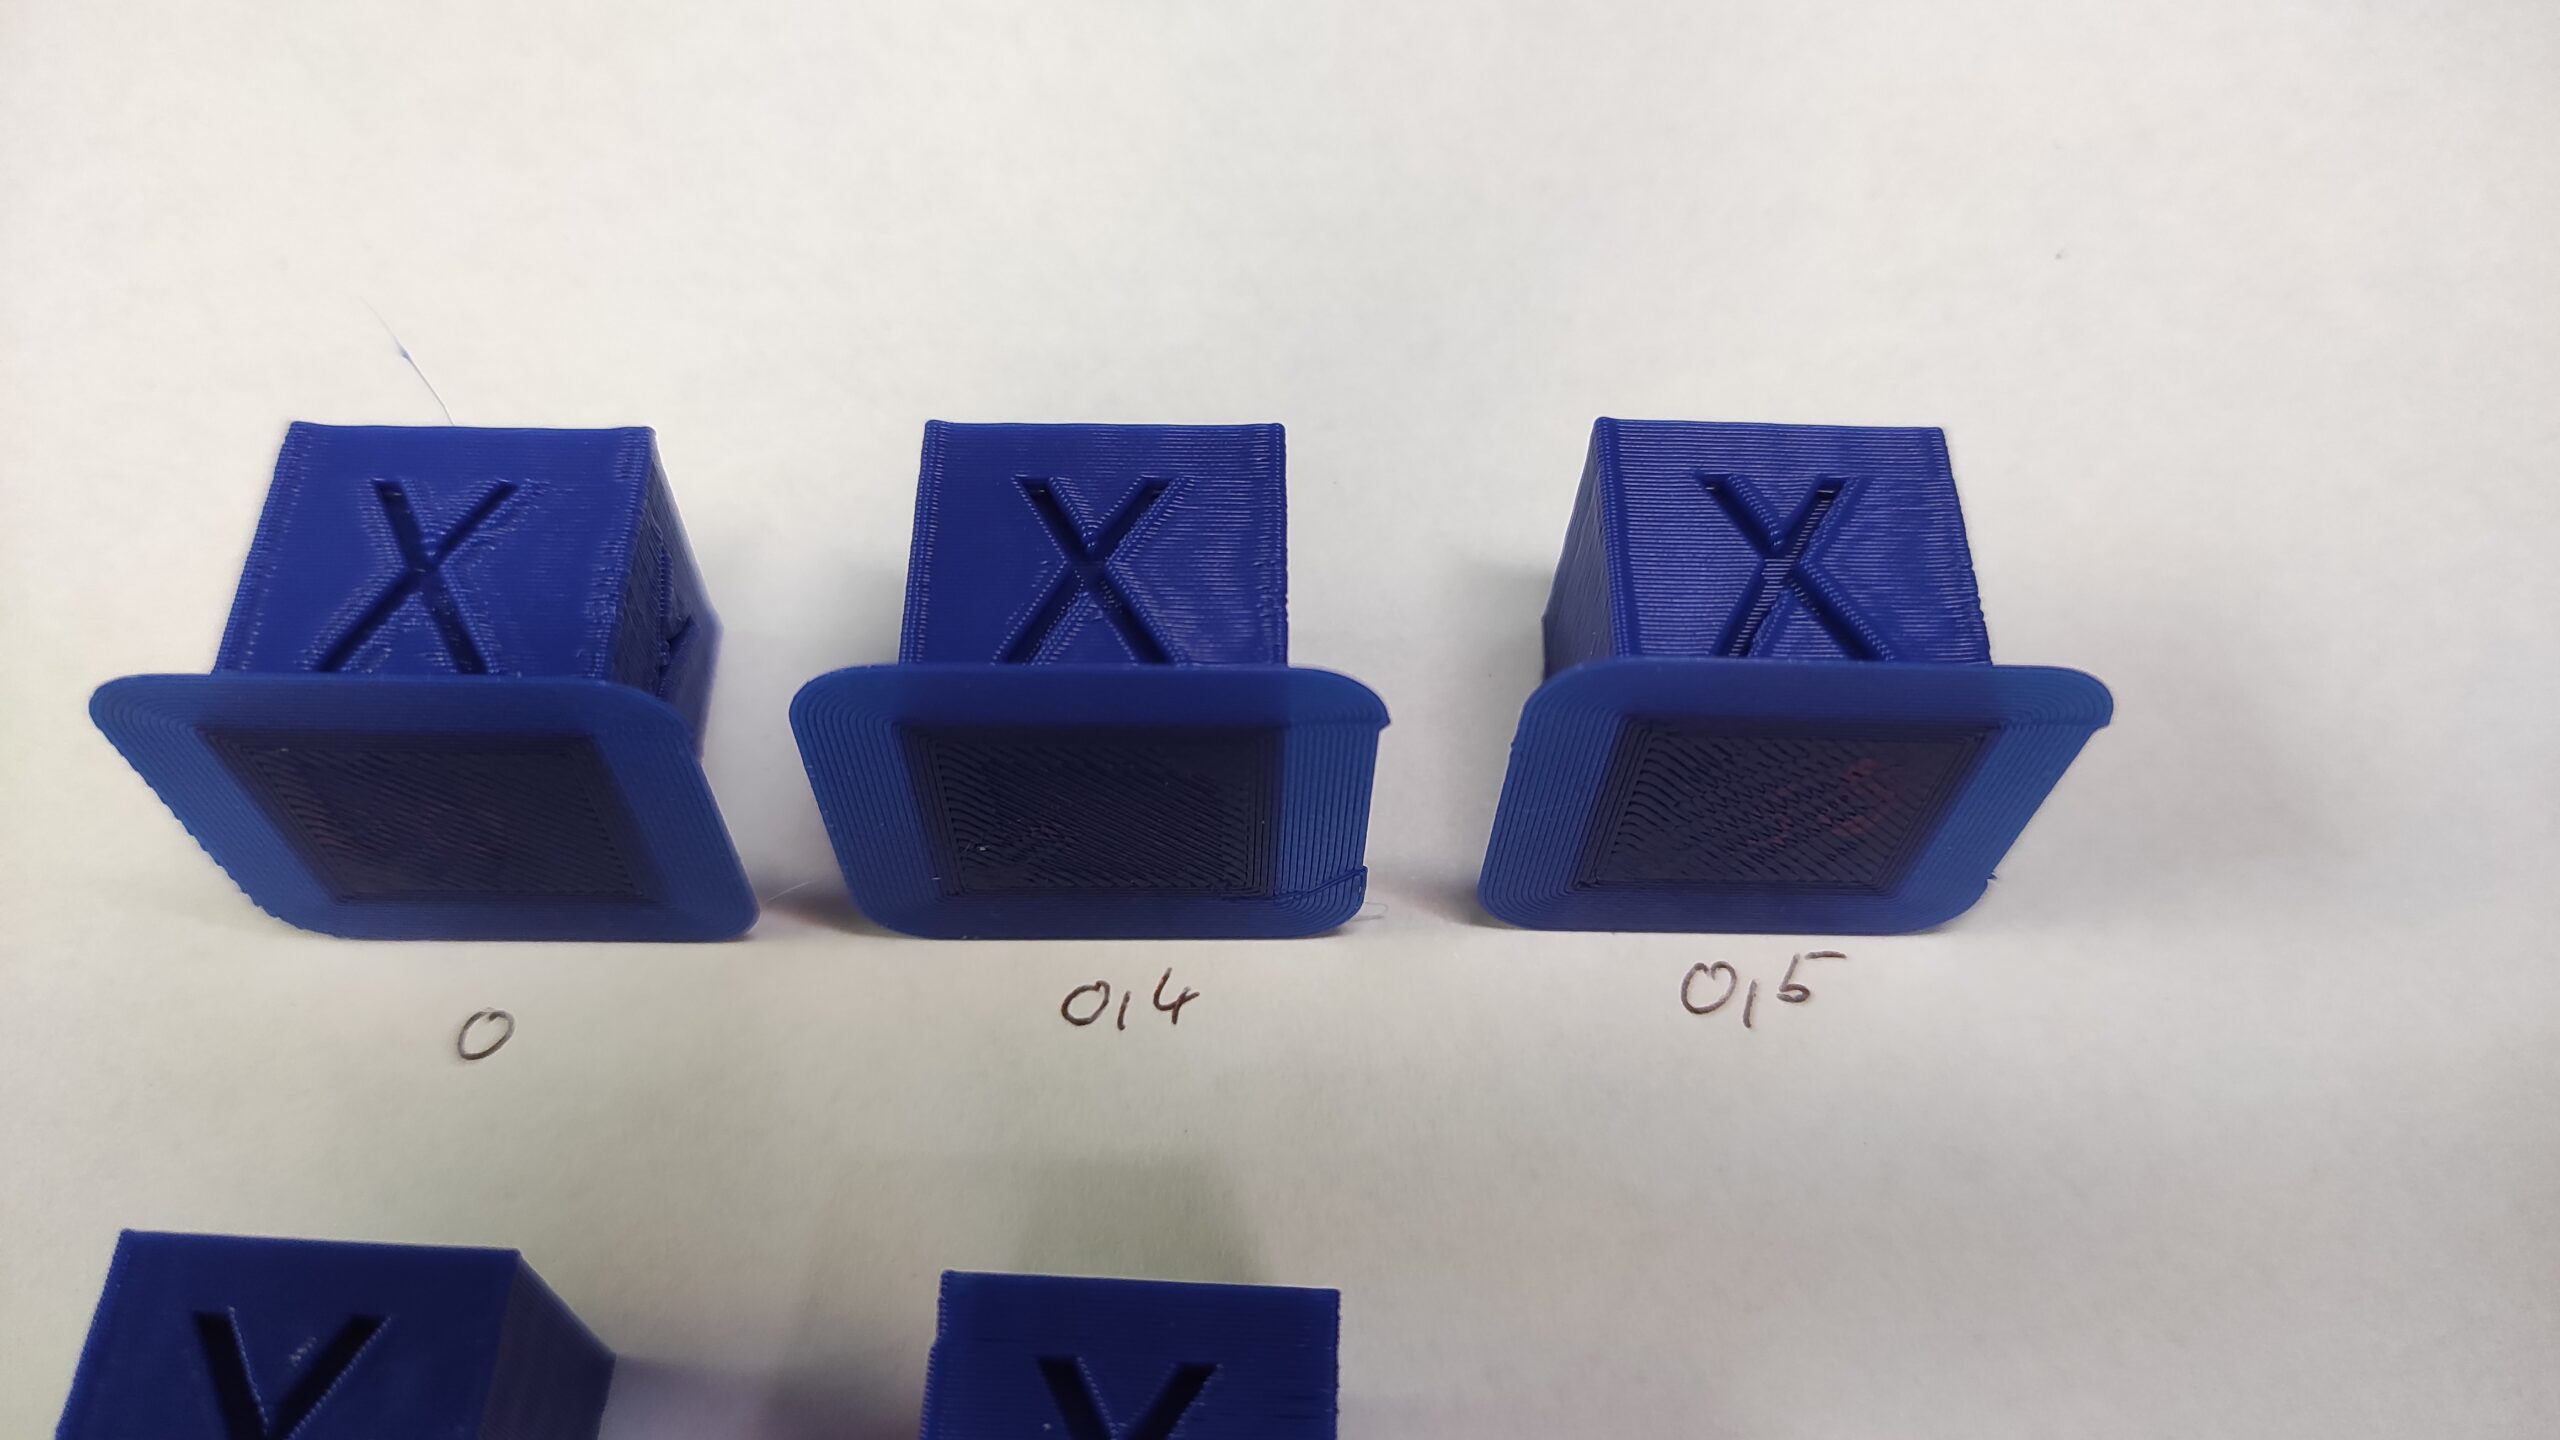
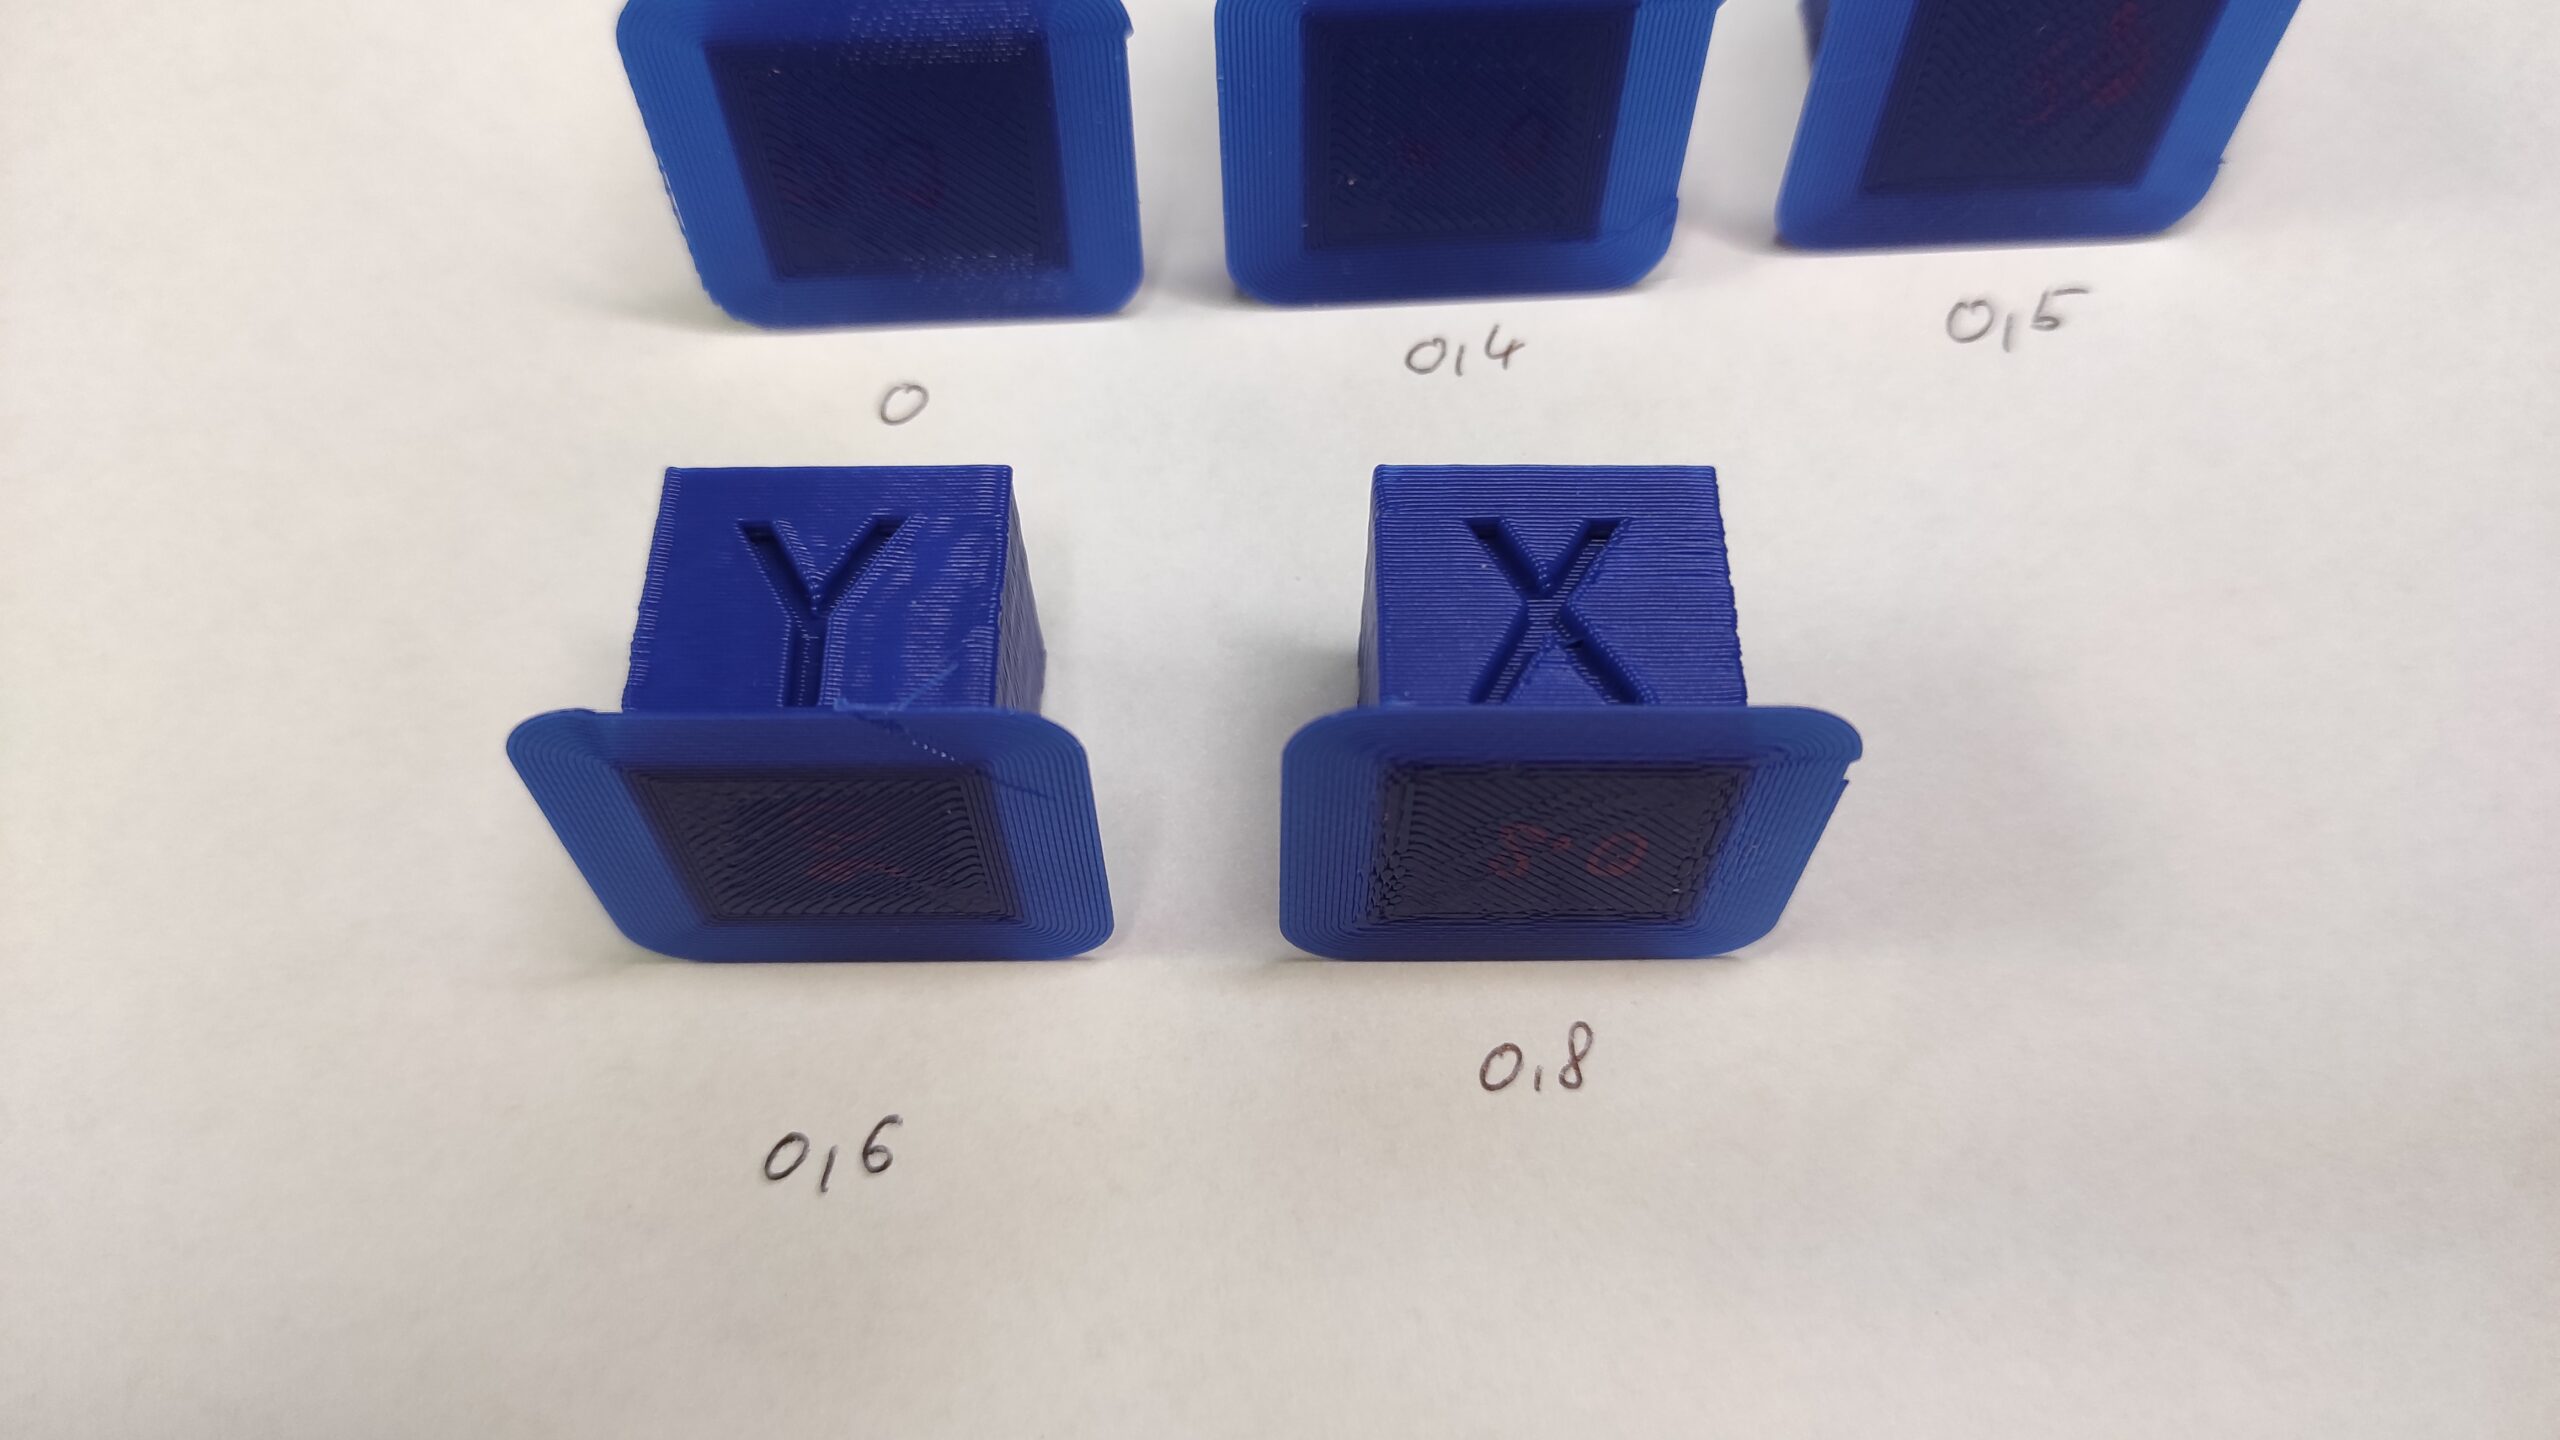
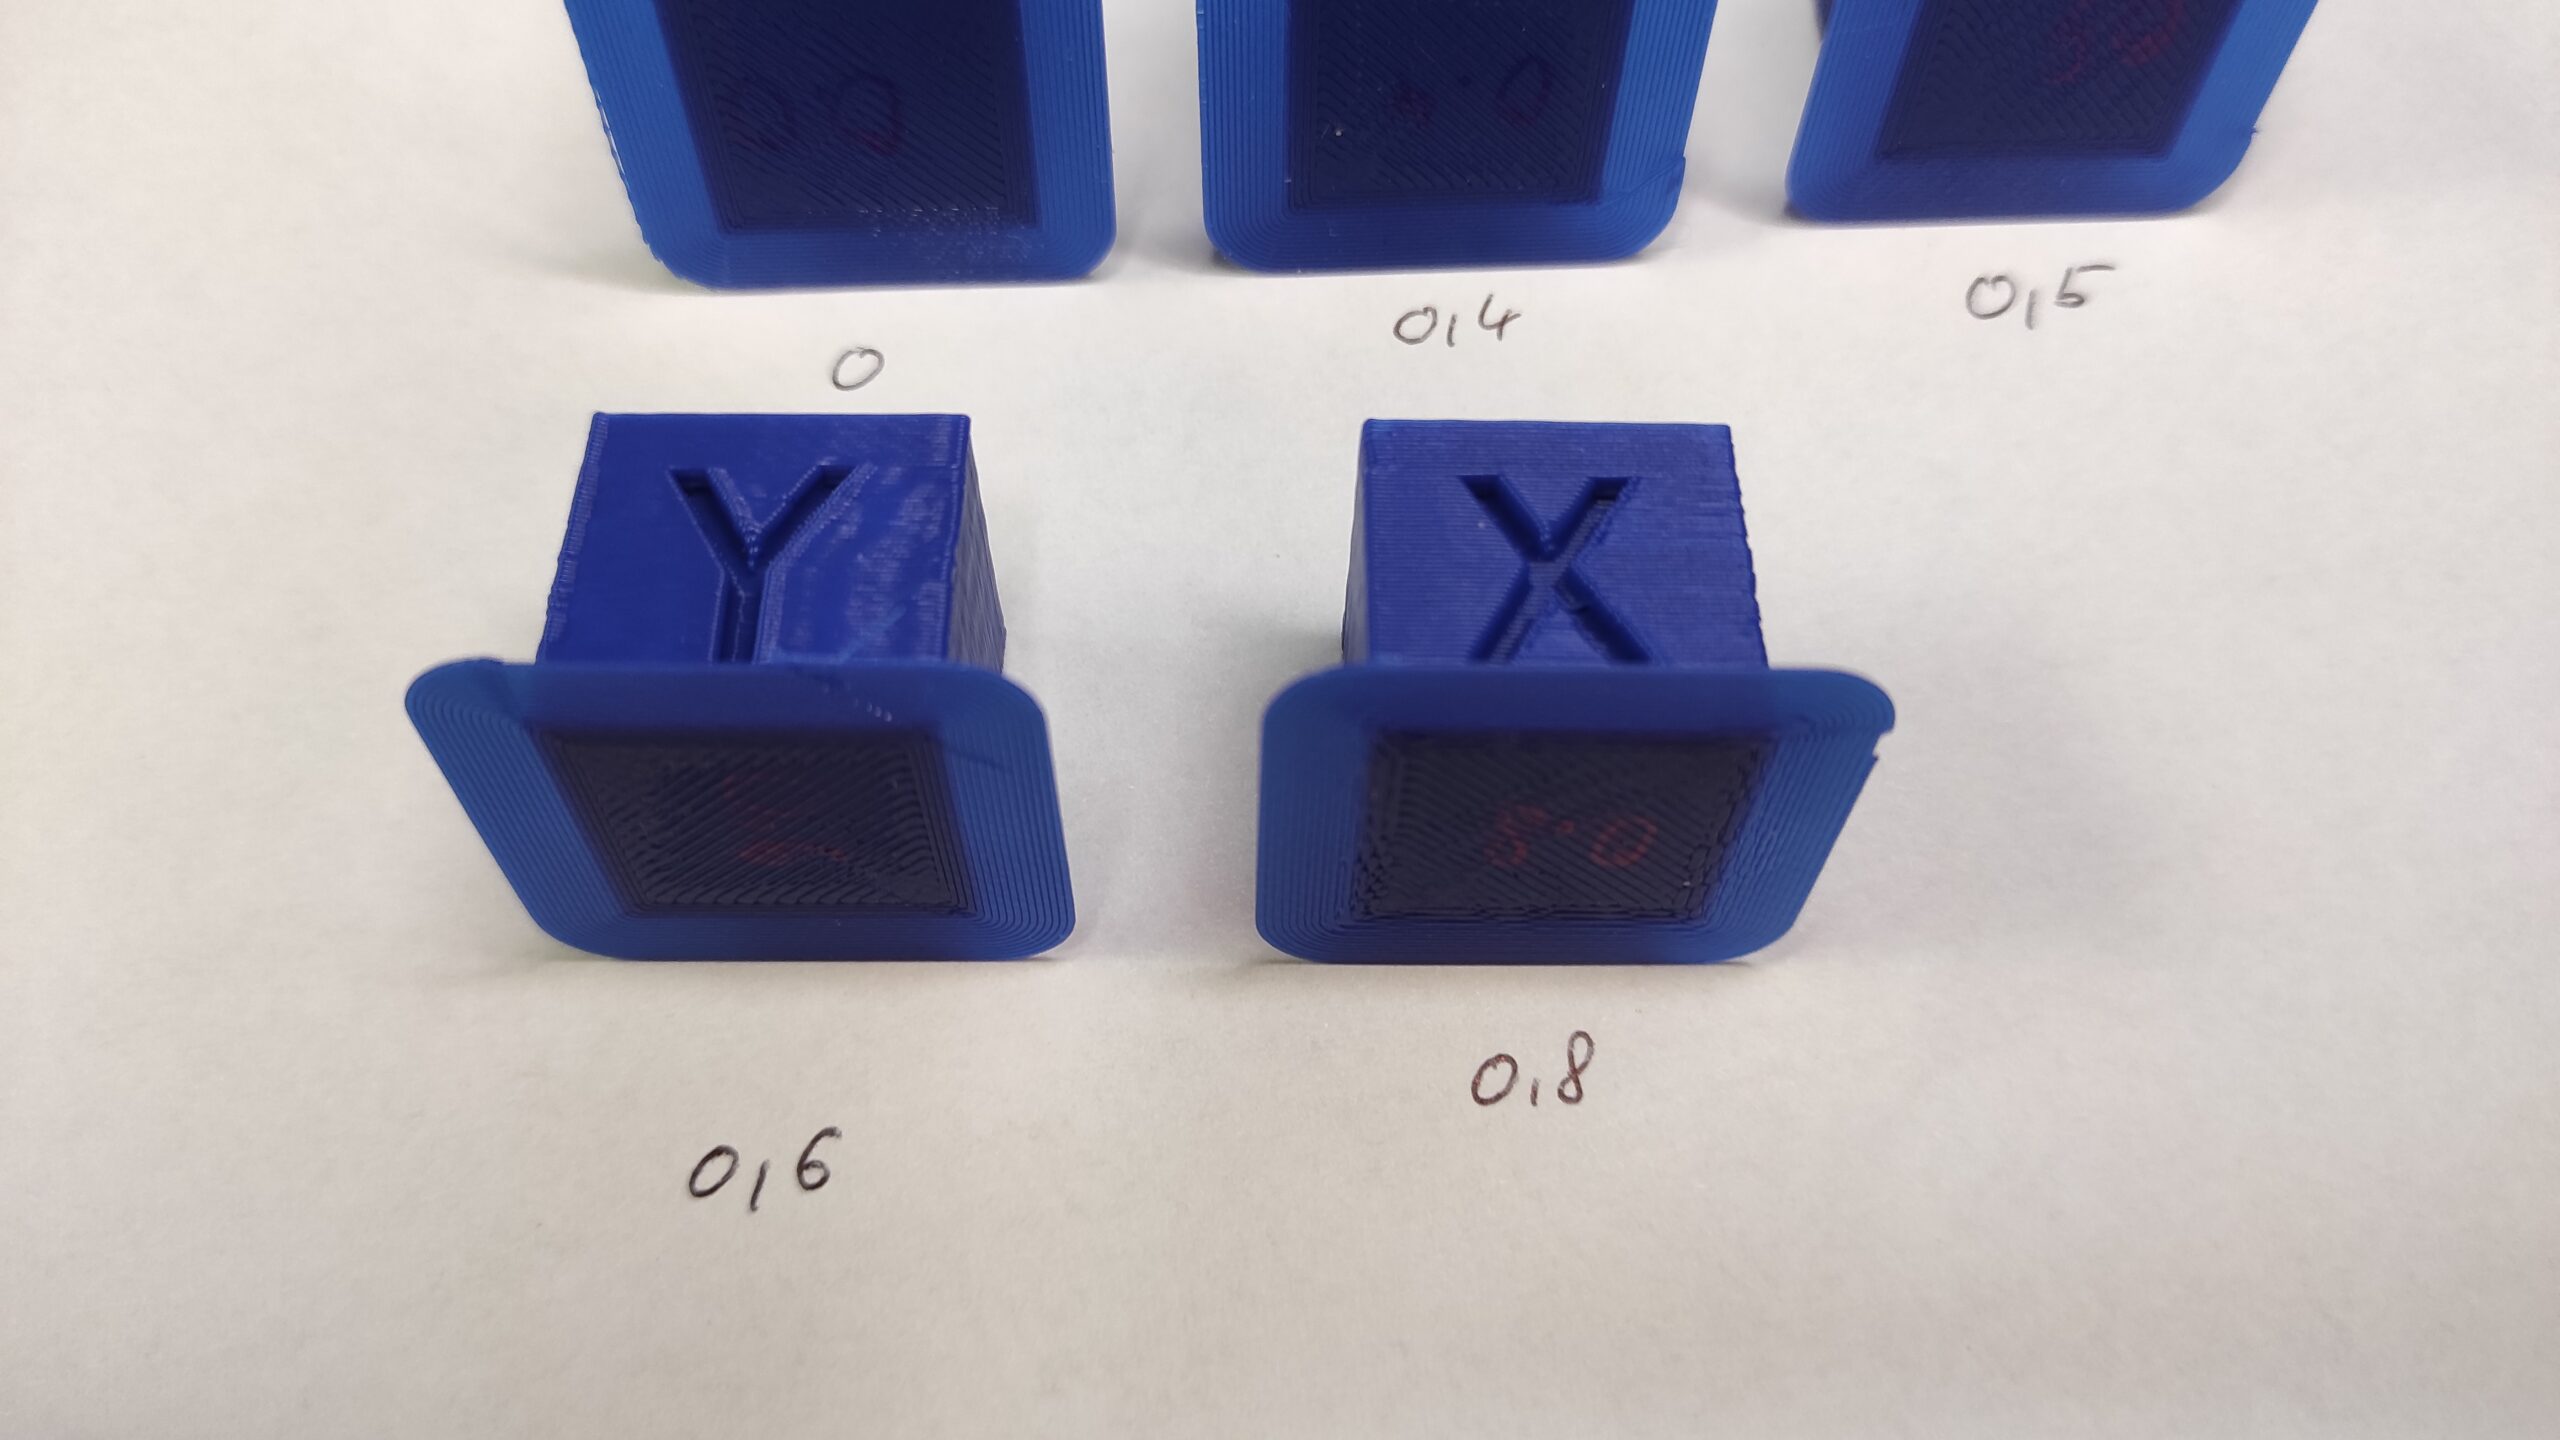
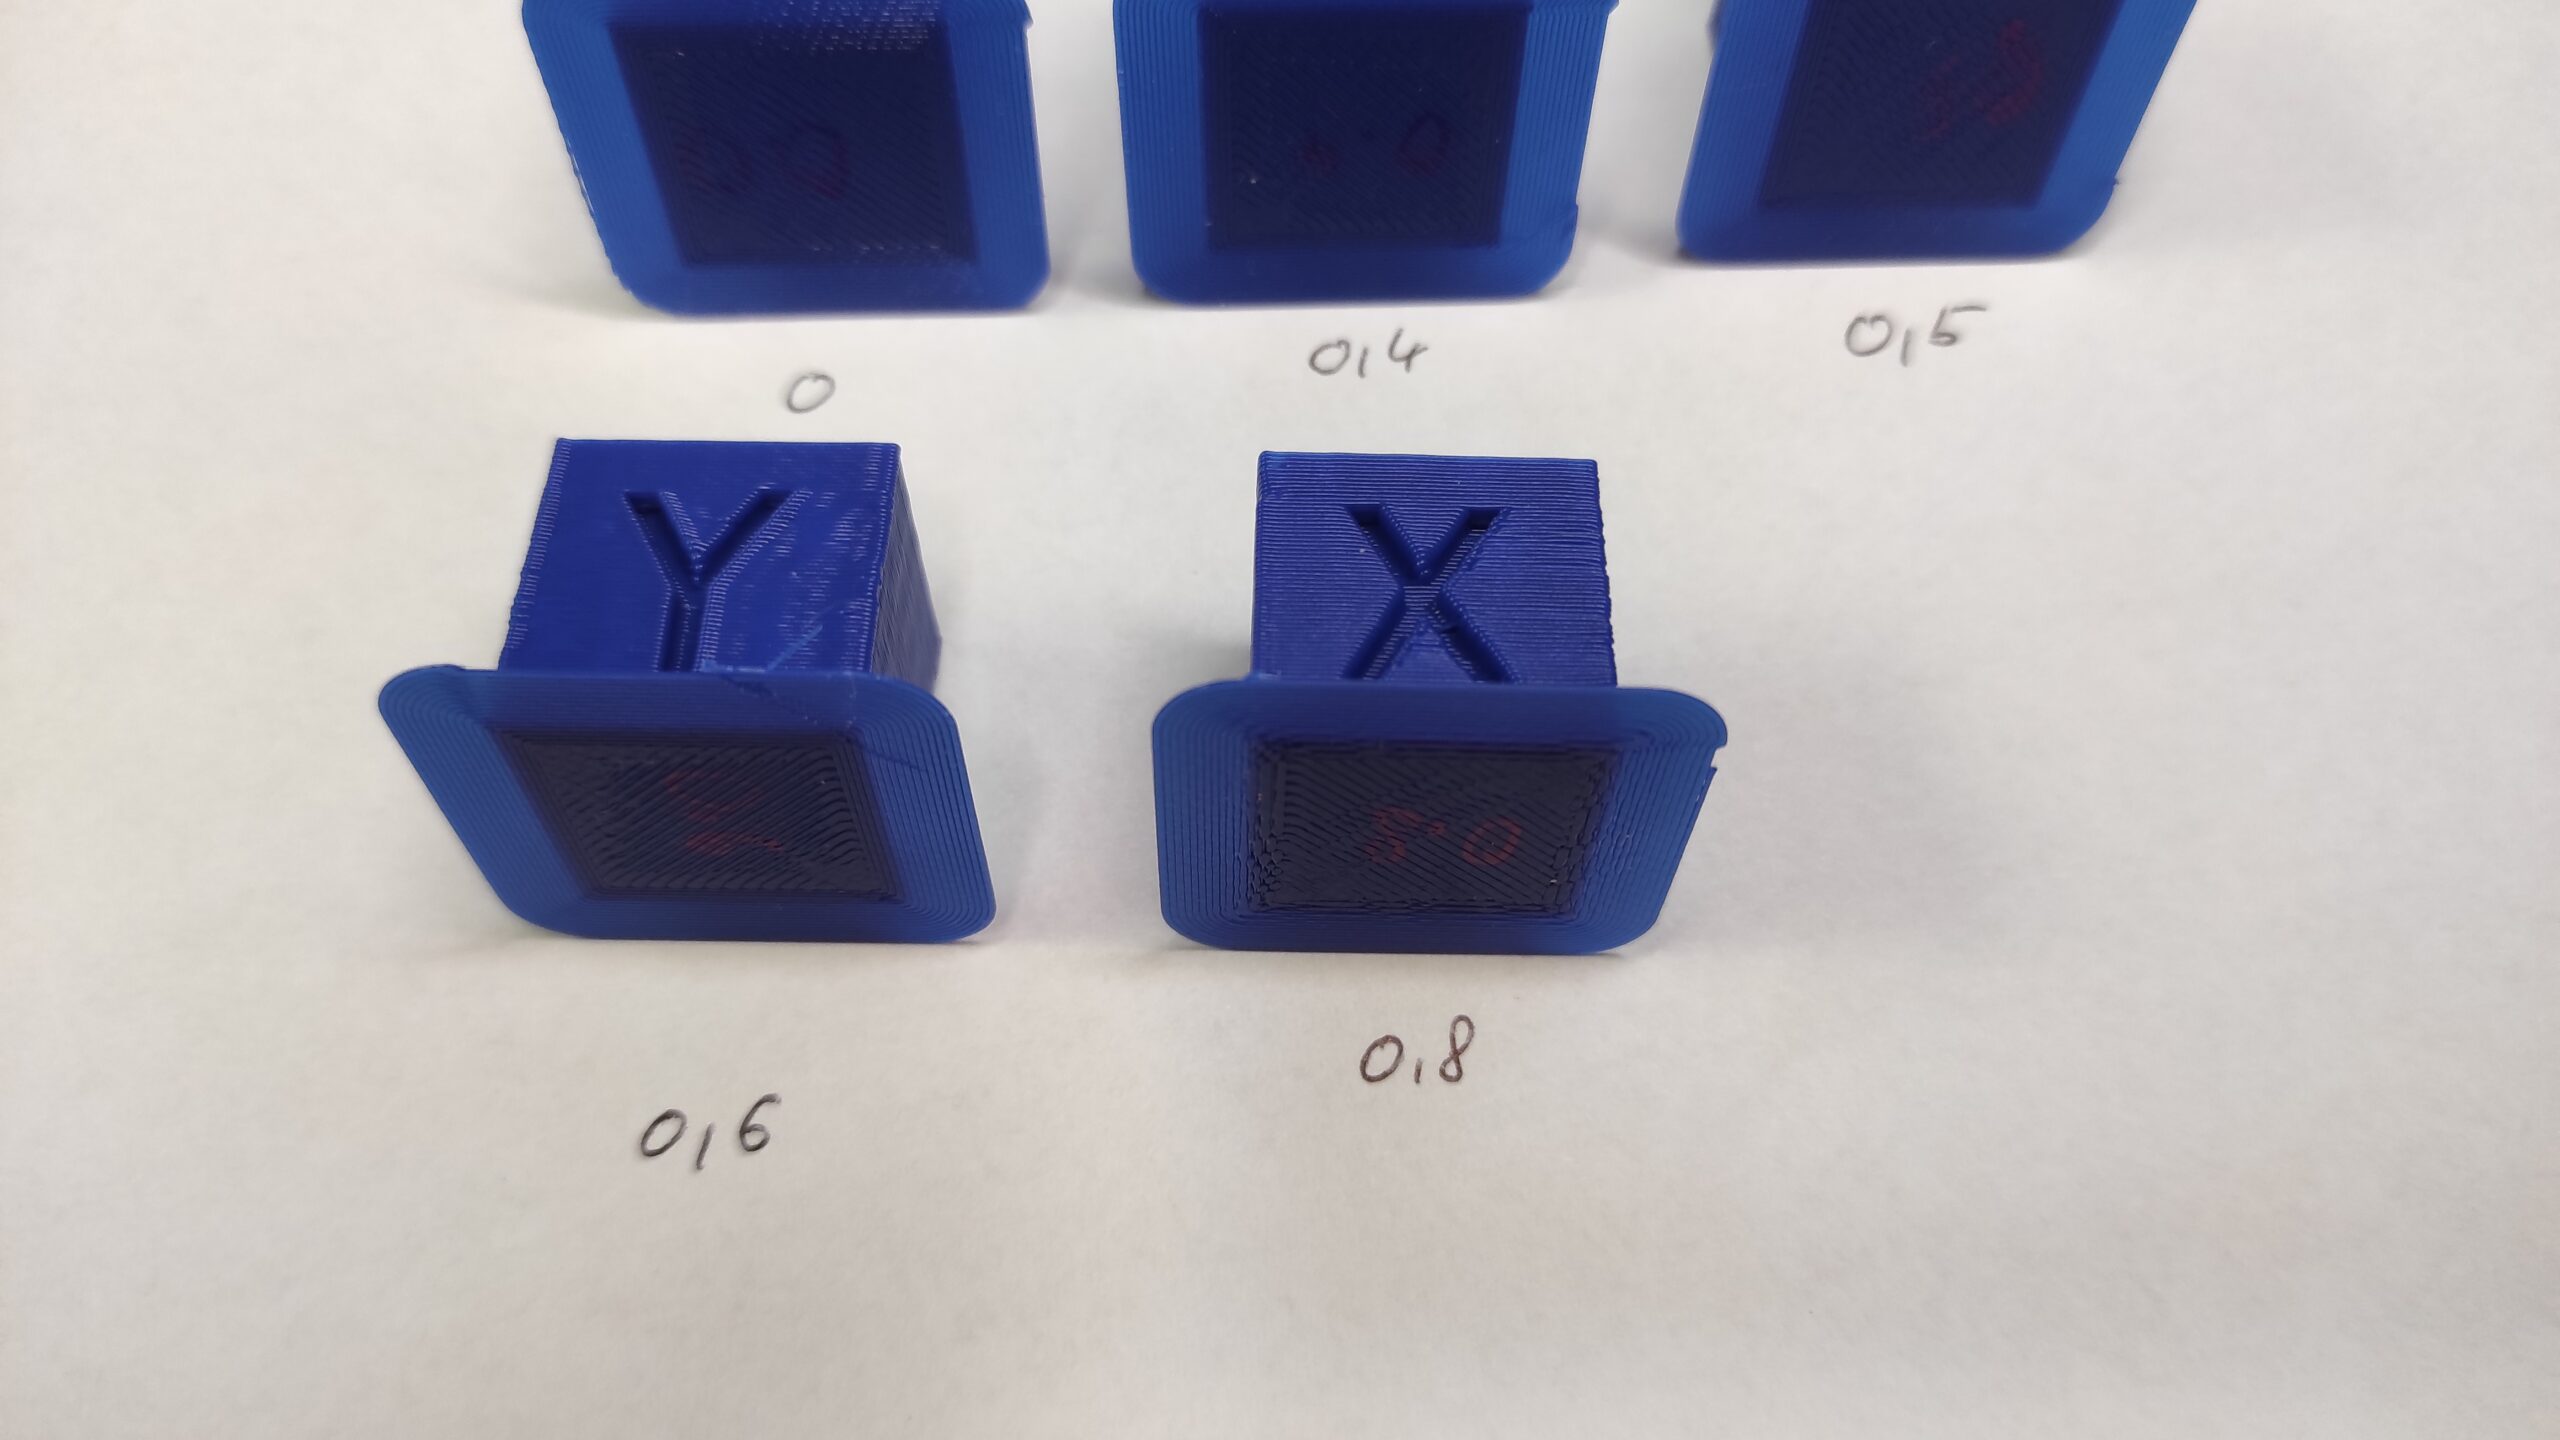
These standard XYZ calibration cubes were printed with different pressure advance values from 0 to 0.8. You can easily see the difference in the corners.
Please note that these cubes were printed with a 0.3mm layer, 120 mm/s speed, 3000 mm/s^2 acceleration and 15mm/s jerk with a 1m bowden setup.
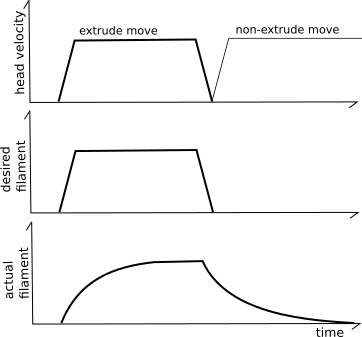
You can see in the pictures below that the difference between a theoretical, calculated extruder movement (filament flow in this case) and the real filament flow is different.
This is caused by many factors such as filament viscosity, gravity, friction, retraction.
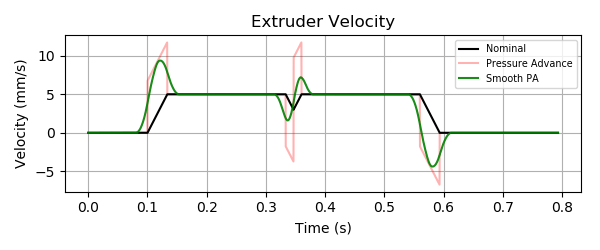
There are three different Velocity x time charasteristics in this graph.
Nominal as a standard extruder velocity movement.
Pressure advance with it’s advantages.
And a Smooth PA which is a pressure advance with a pressure_advance_smooth_time parameter.
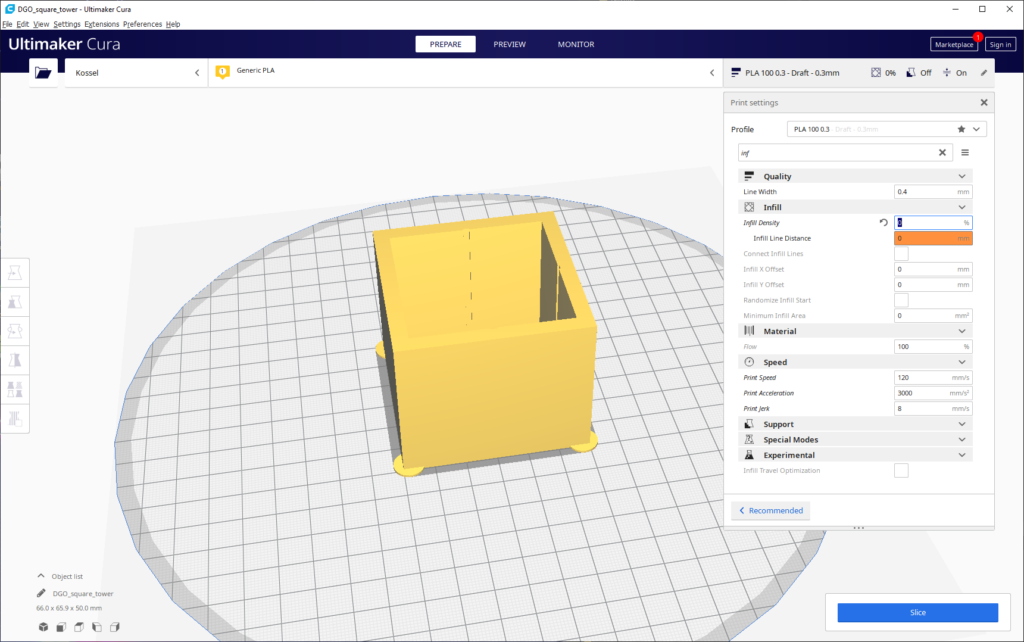
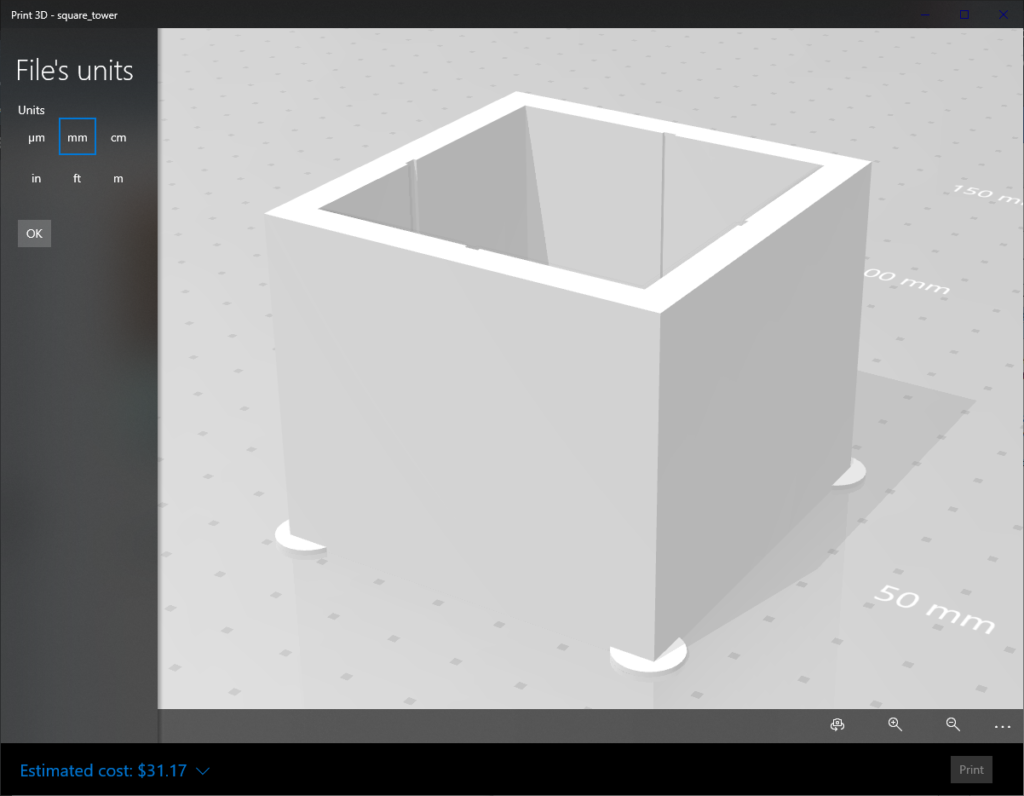
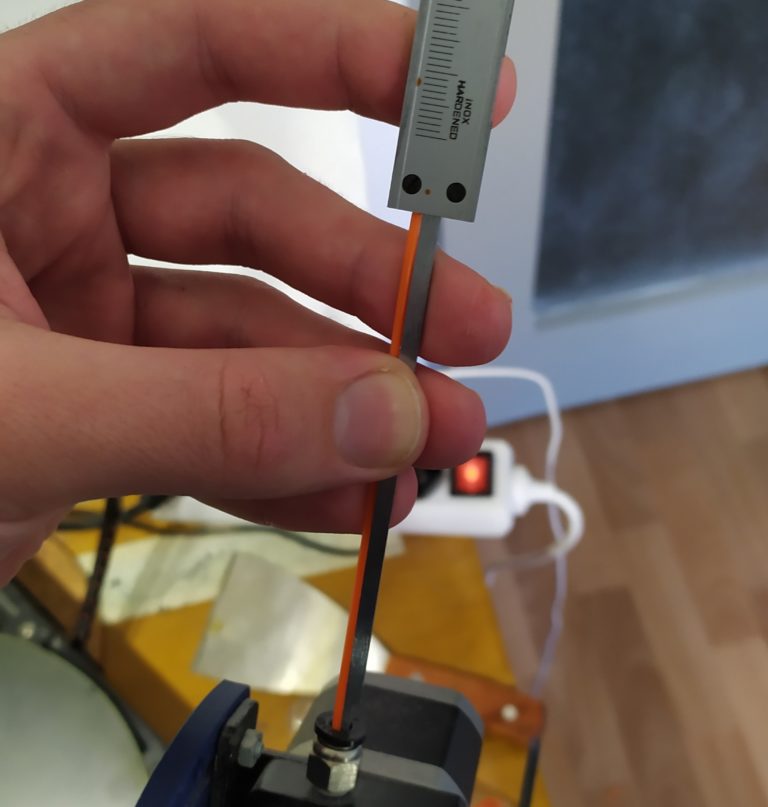
Use a high speed (in another words your desired printing speed) nad a layer height about 75% of your nozzle size – 0.3mm for a 0.4mm nozzle and zero infill density.
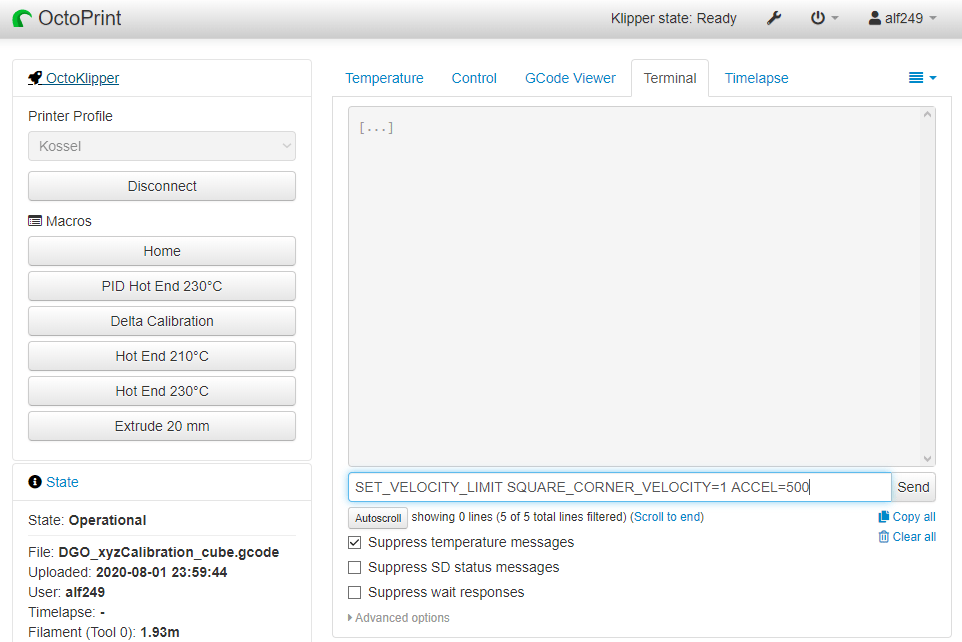
Open Octoprint/DWC2 and send this command:
SET_VELOCITY_LIMIT SQUARE_CORNER_VELOCITY=1 ACCEL=500
For a direct drive setup send this command:
TUNING_TOWER COMMAND=SET_PRESSURE_ADVANCE PARAMETER=ADVANCE START=0 FACTOR=.005
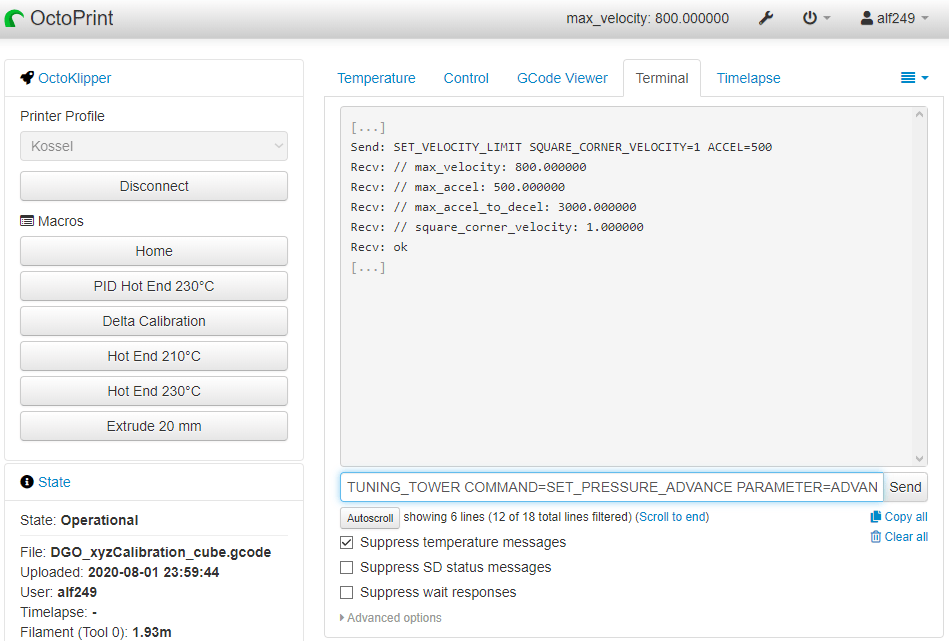
For a bowden setup send this command:
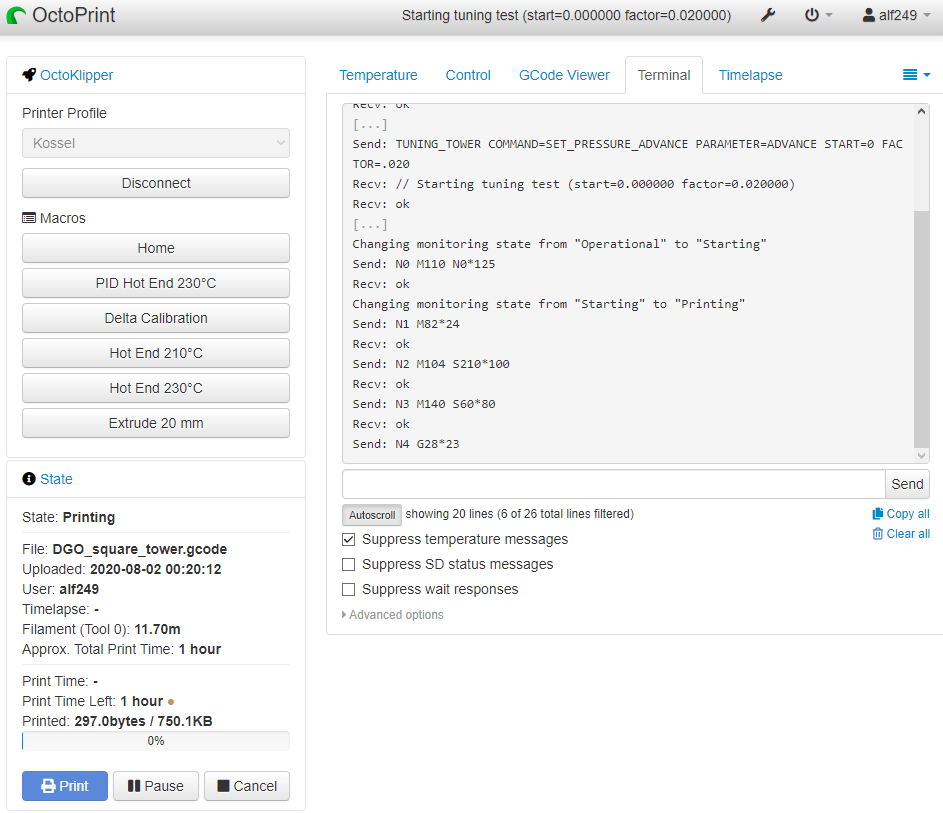
TUNING_TOWER COMMAND=SET_PRESSURE_ADVANCE PARAMETER=ADVANCE START=0 FACTOR=.020
Print it!
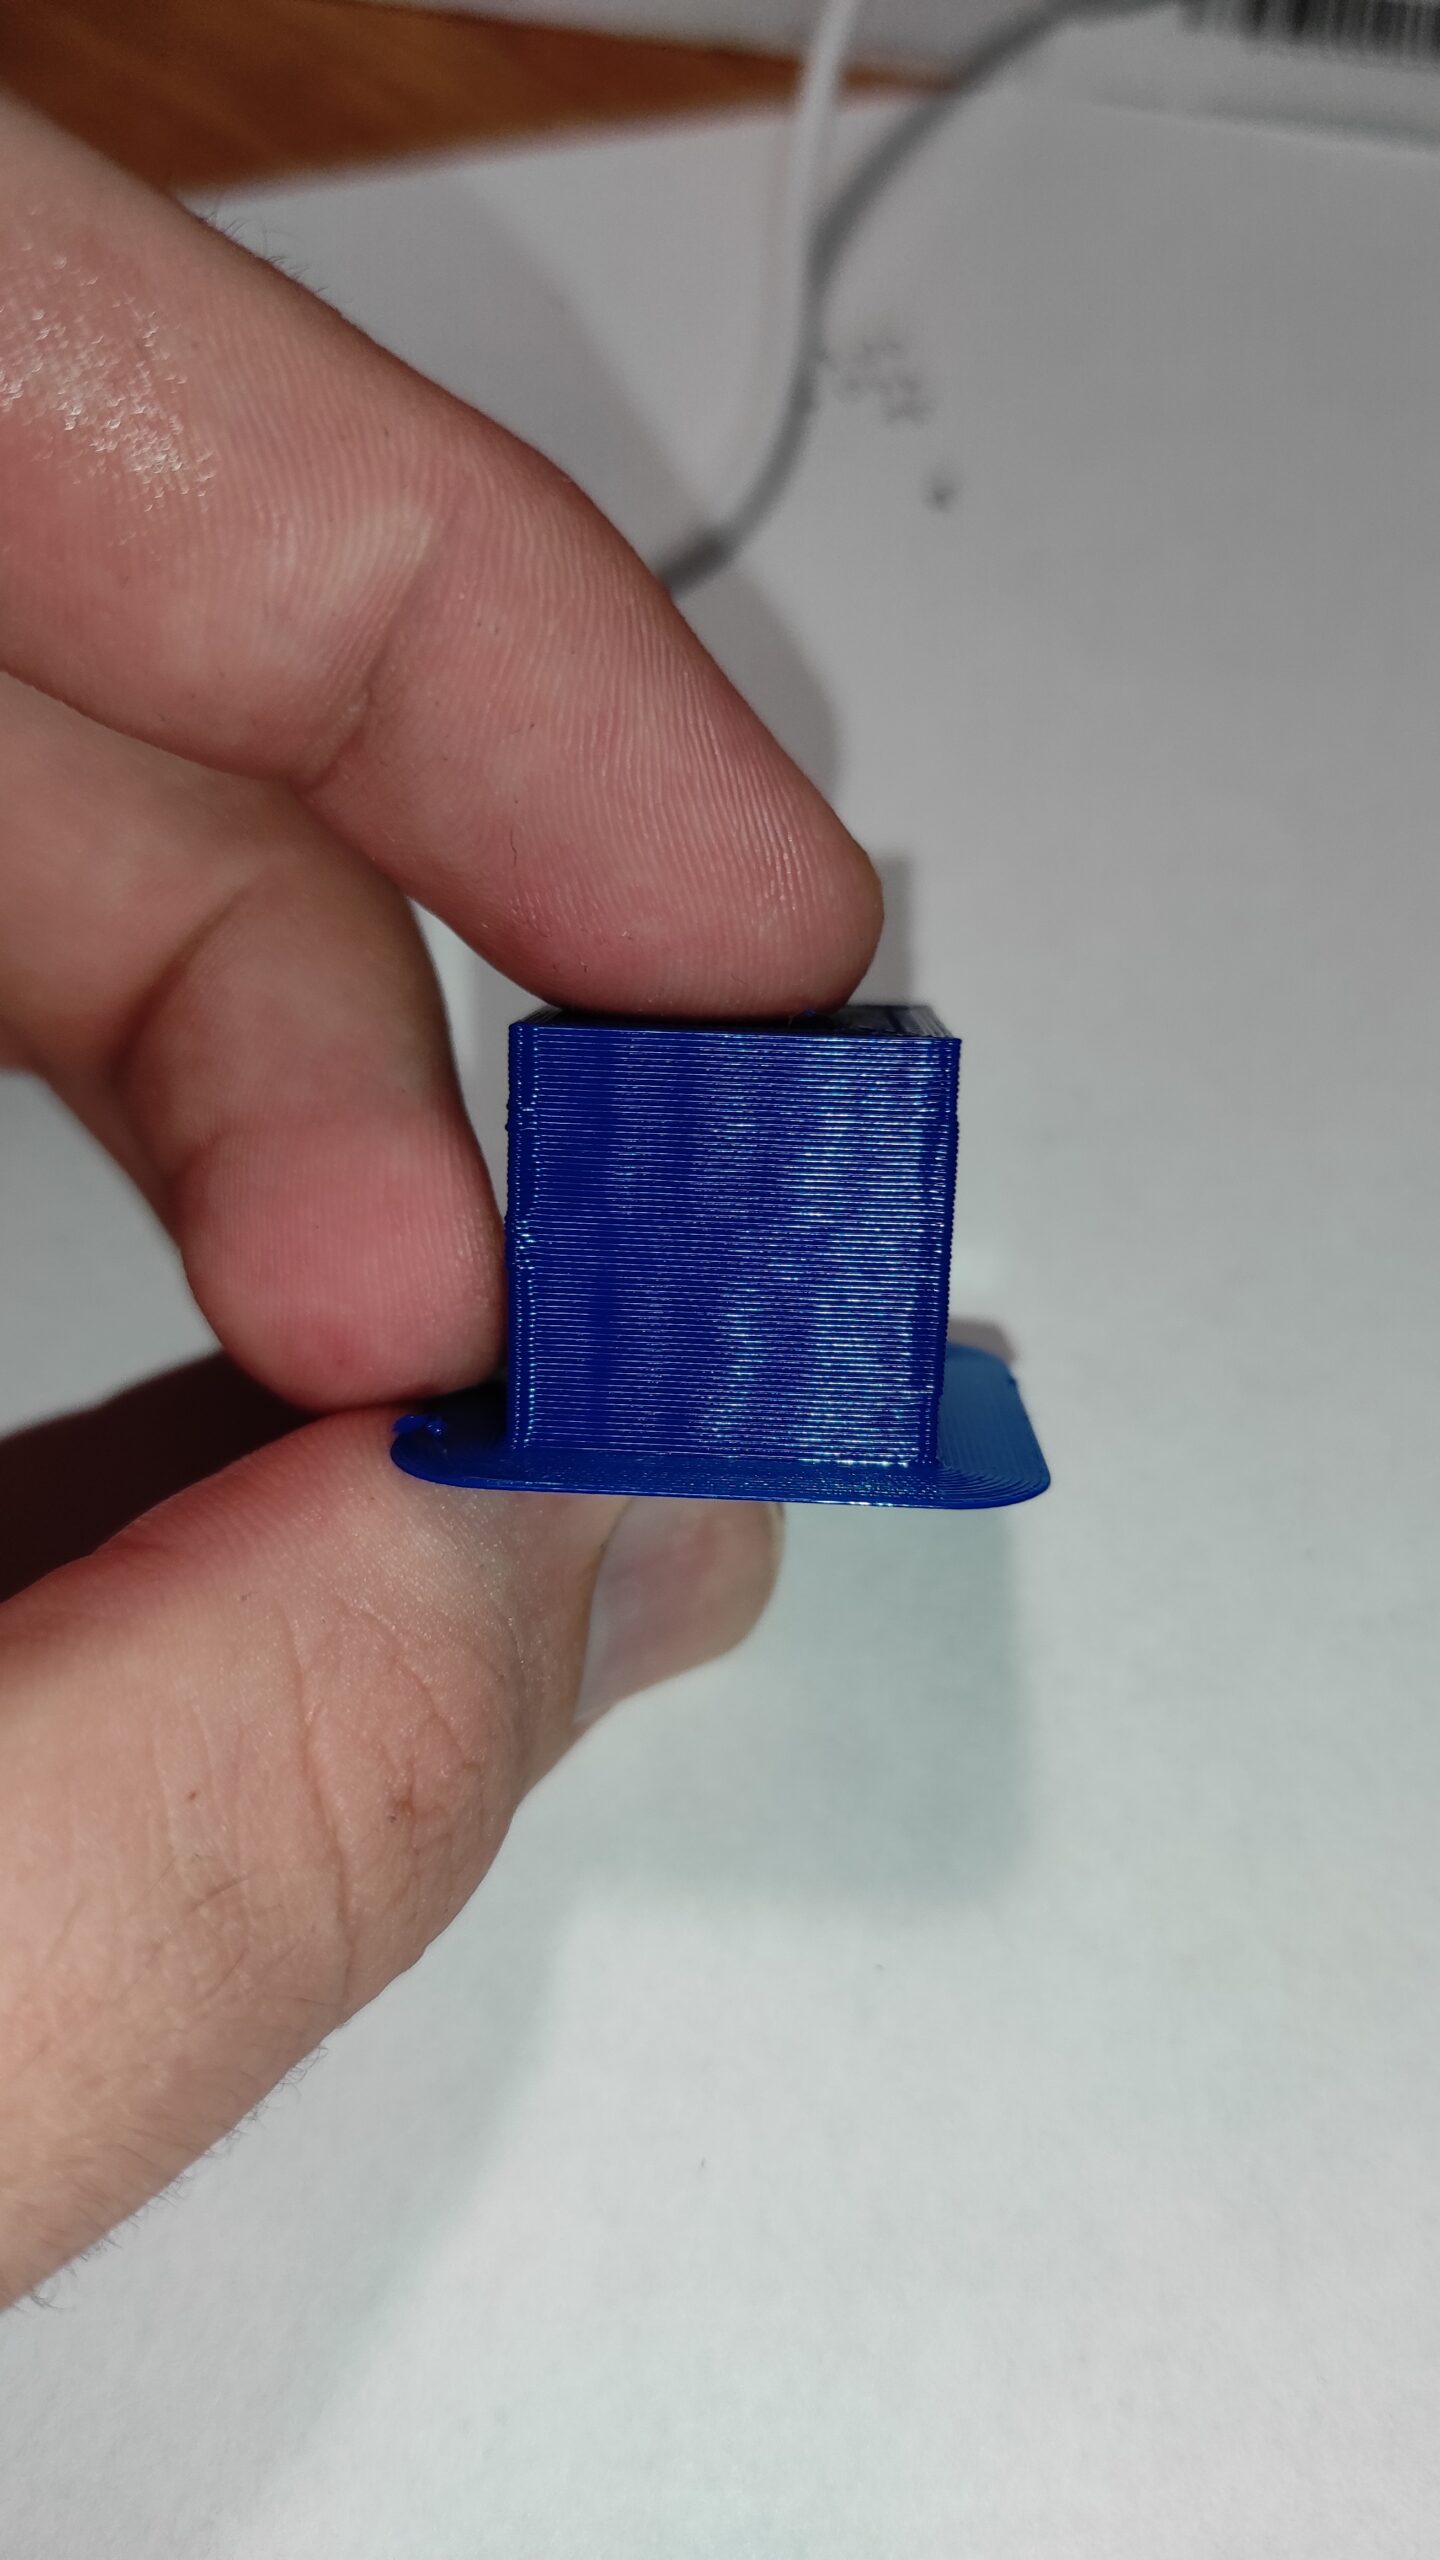
This is your result (with a brim which you do not have to use)
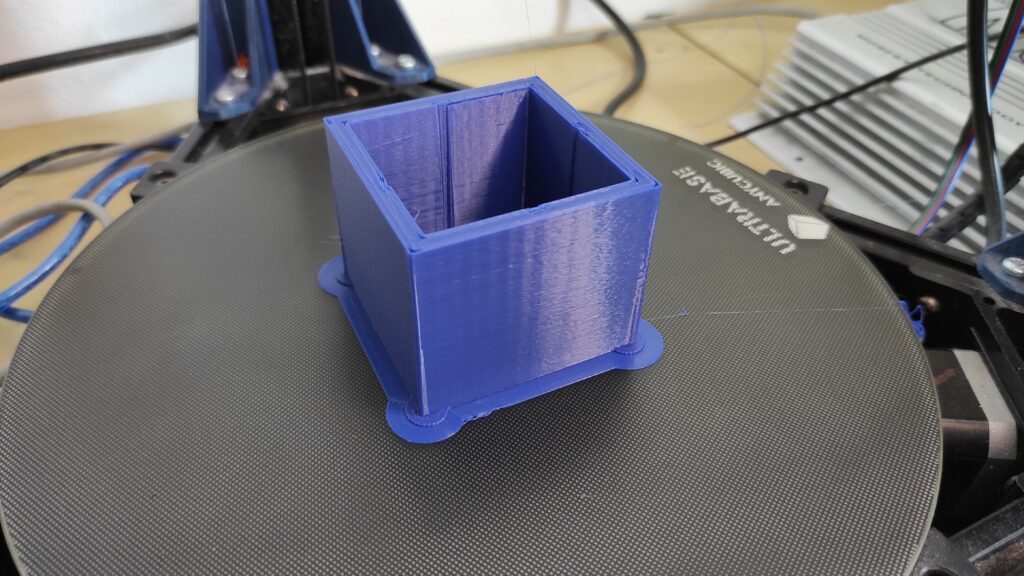
Klipper GIT says this:
pressure_advance = <start> + <measured_height> * <factor>
<start> = Z offset
<measured_height> = distance between botton and the best corner spot
<factor> = factor in a pressure advance command before printing the model
In your case with a bowden setup it will be:
pressure_advance = 0 + 25 * 0.02
pressure_advance = 0.5
Open your printer.cfg configuration via OctoKlipper plugin in Octoprint or via SFTP, it does not matter.
Locate [extuder] and add this line with your pressure_advance value:
pressure_advance = 0.5
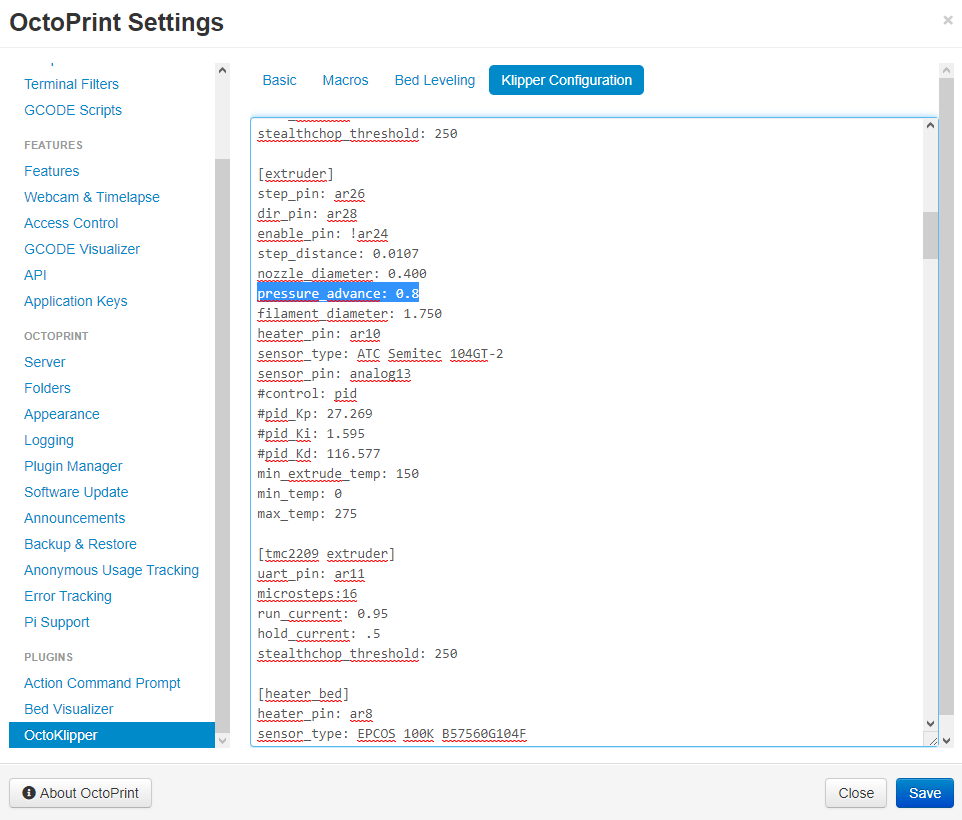
If you are wondering why the value in the config is 0.8… I was calibrating multiple 3D printers.
Just use your calculated value and you are good to go.
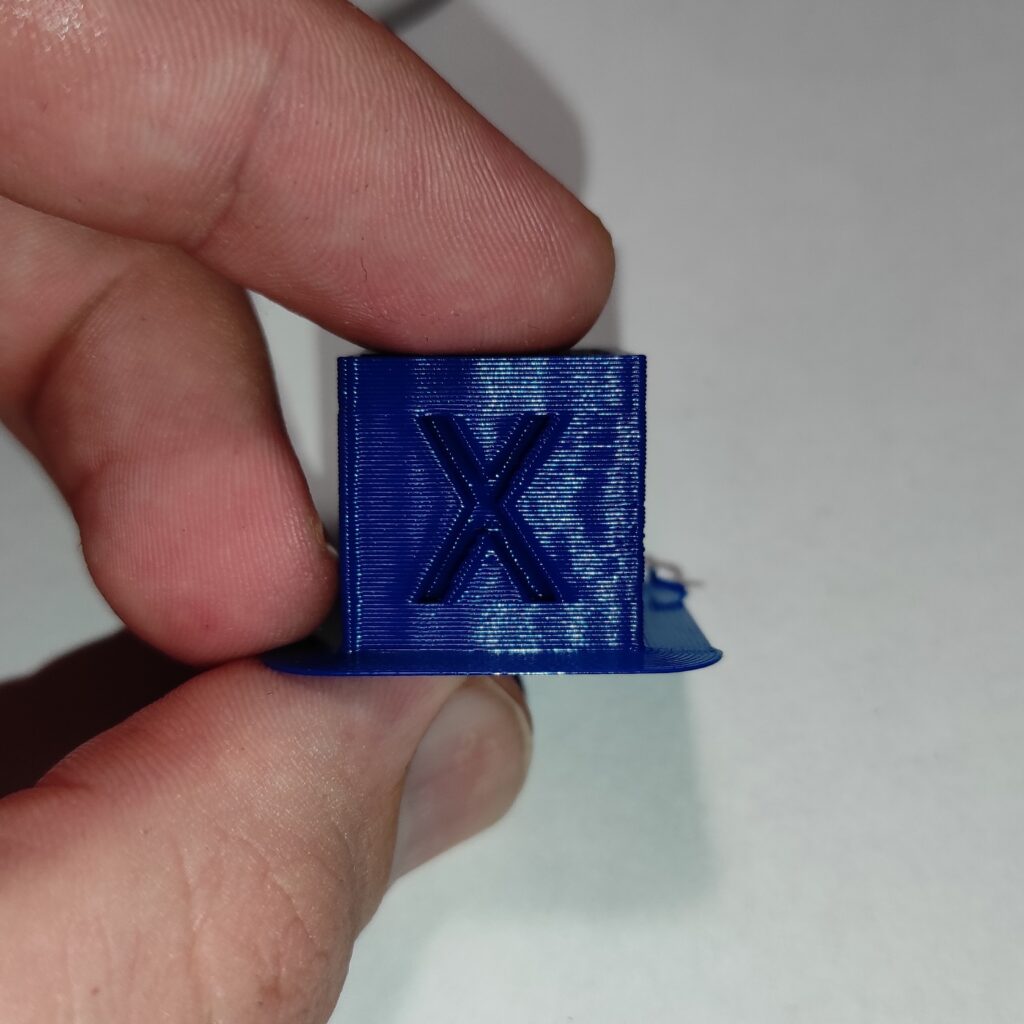
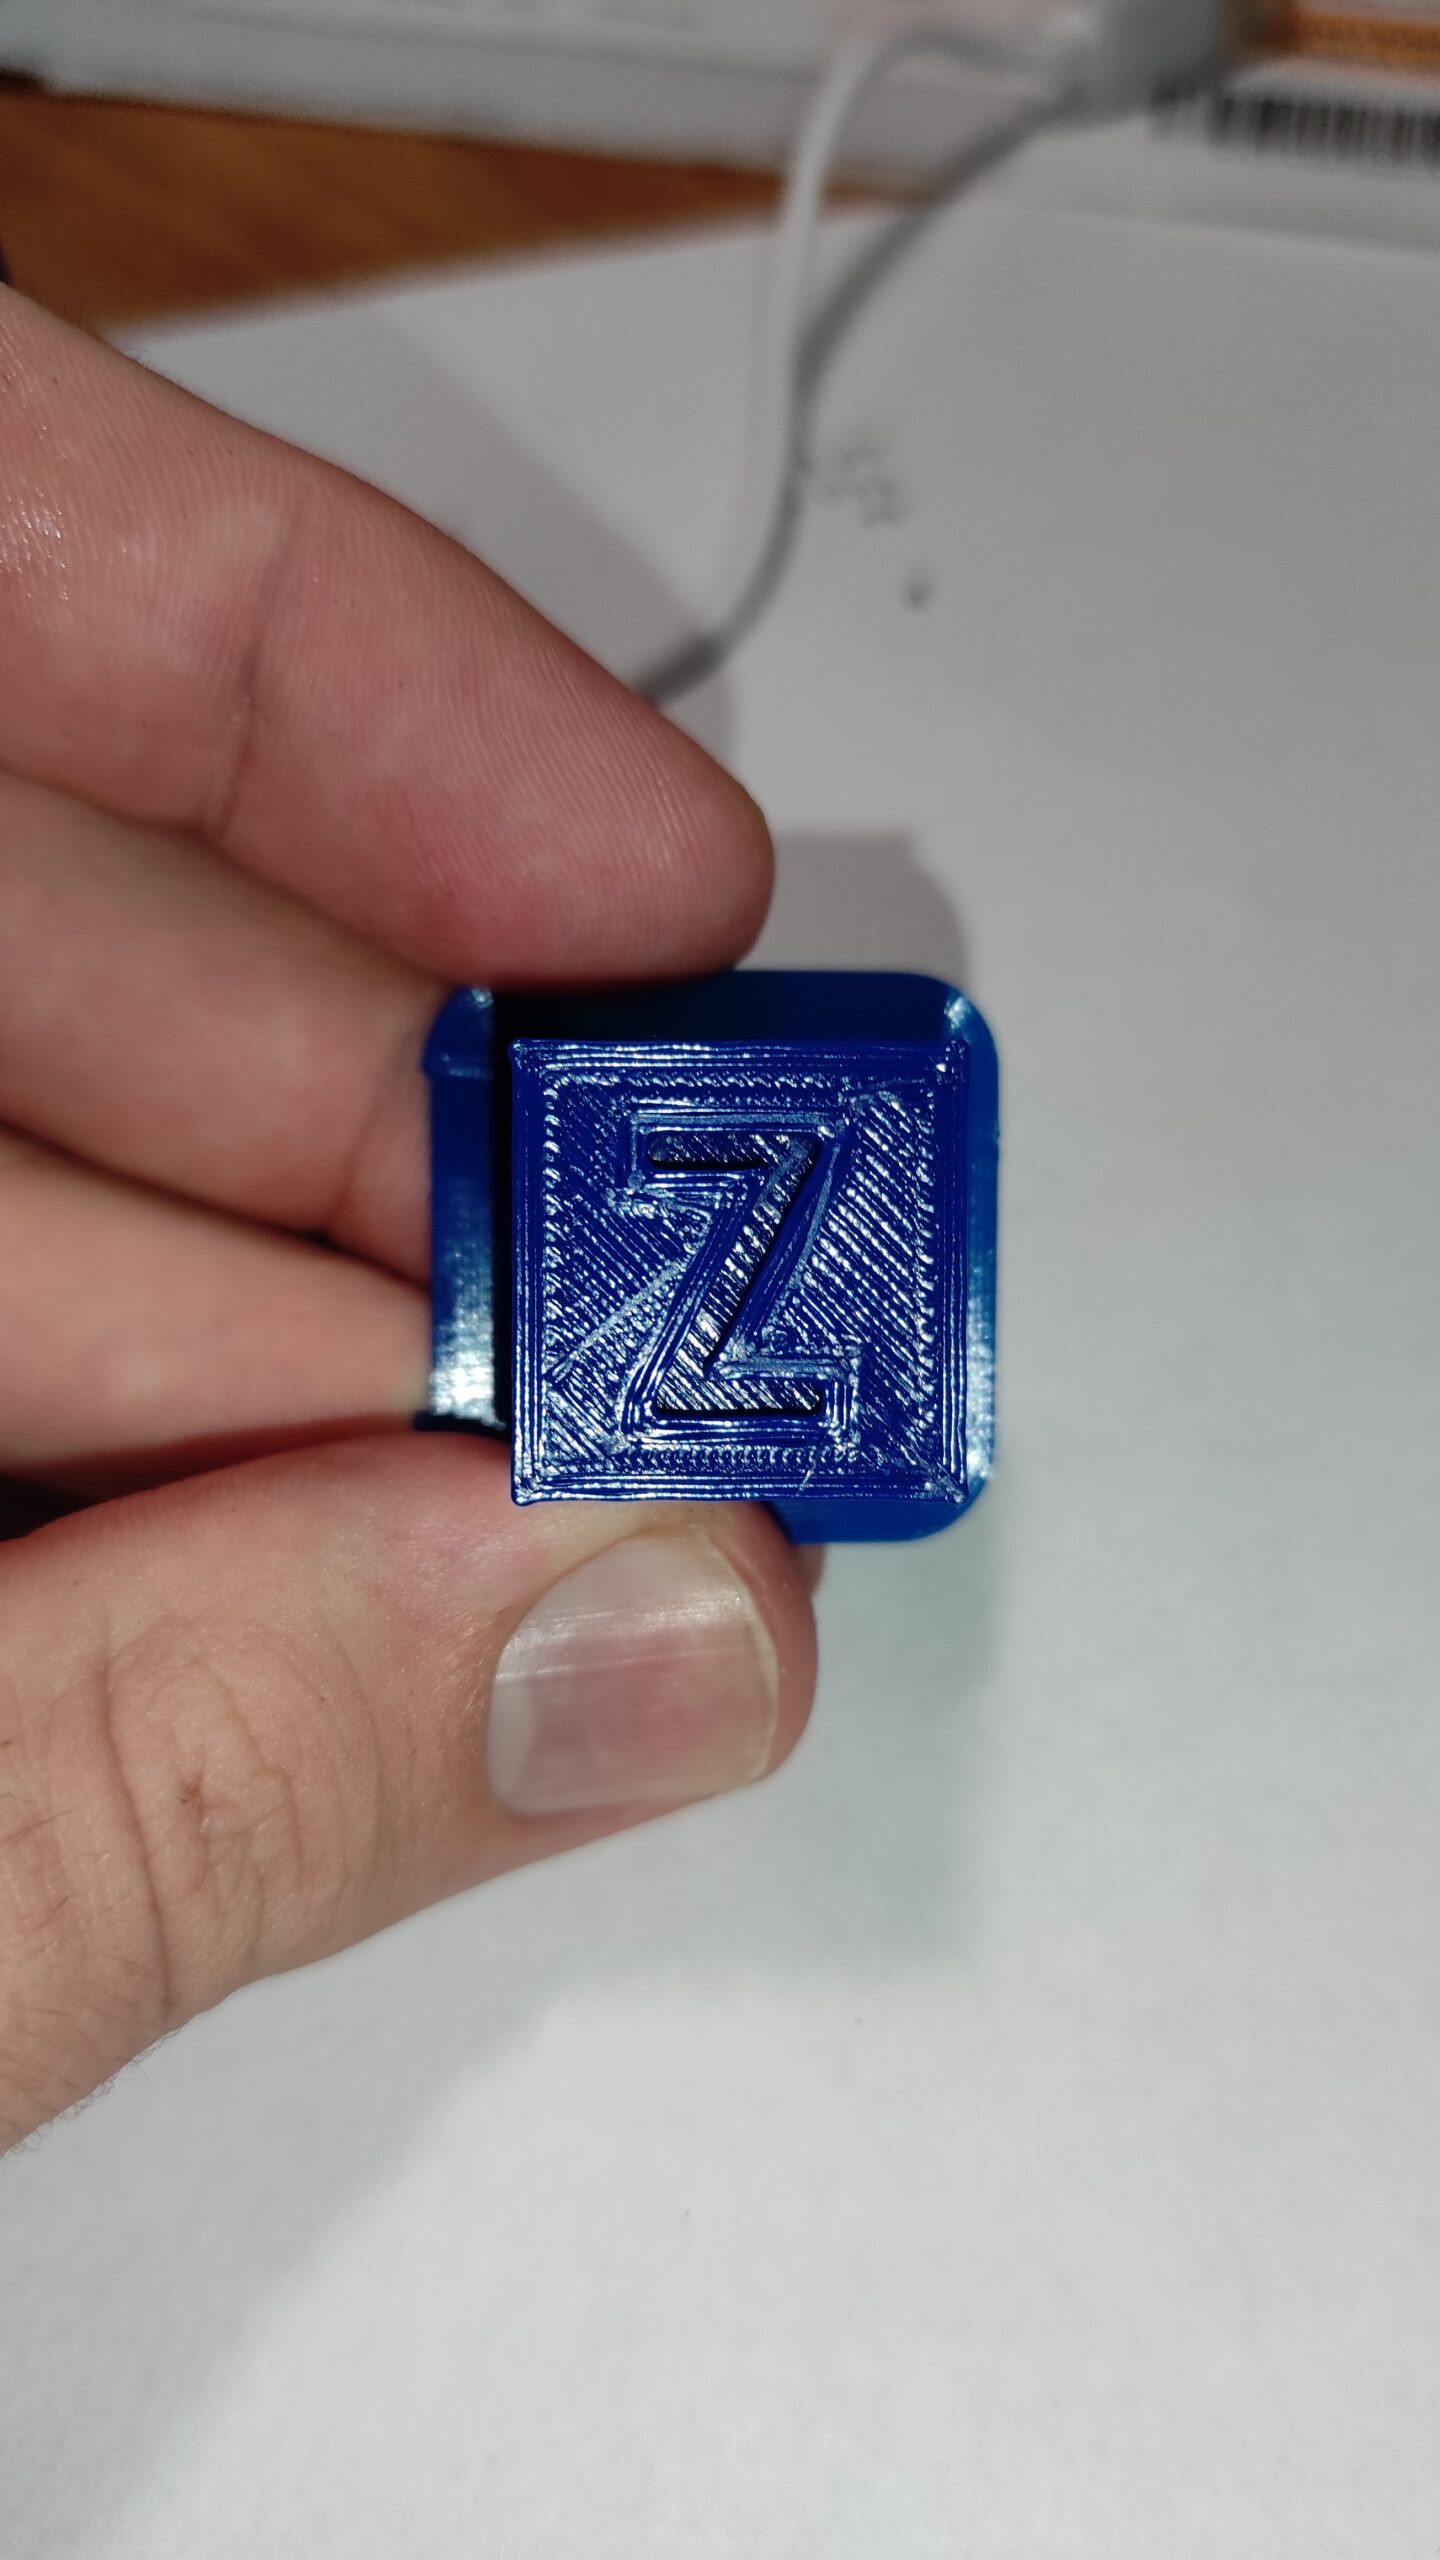
Print a calibration model such as this cube with a lot of sharp edges.
Click on the picture or on the button to download this stl file.
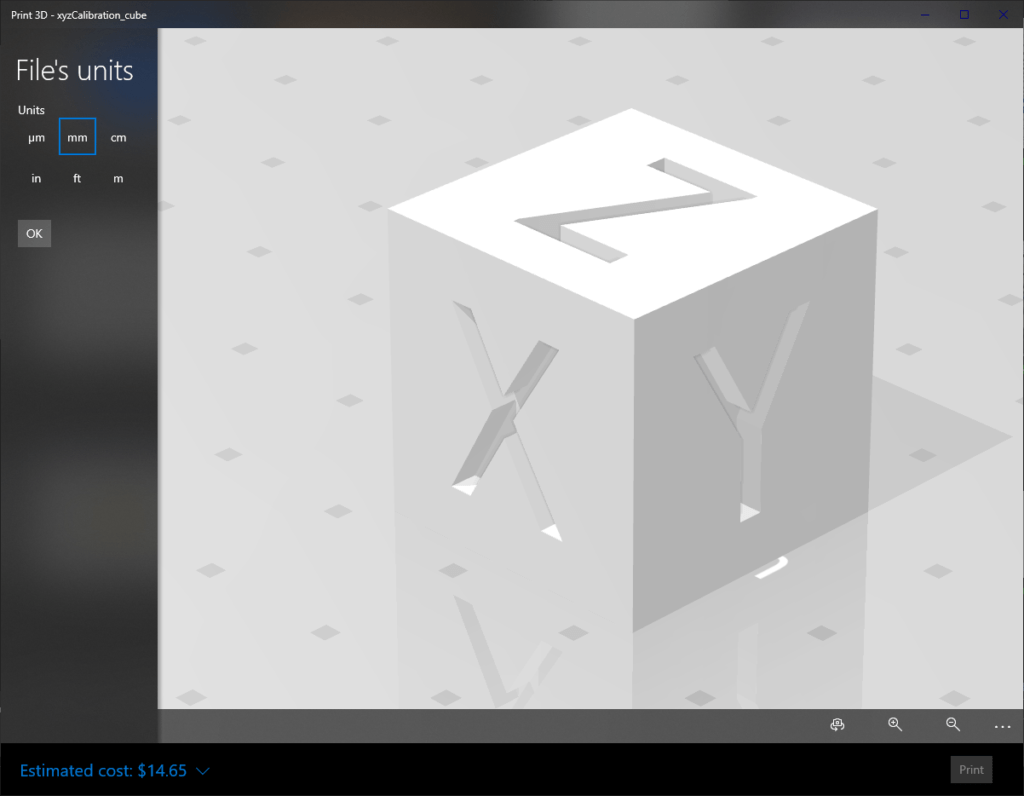
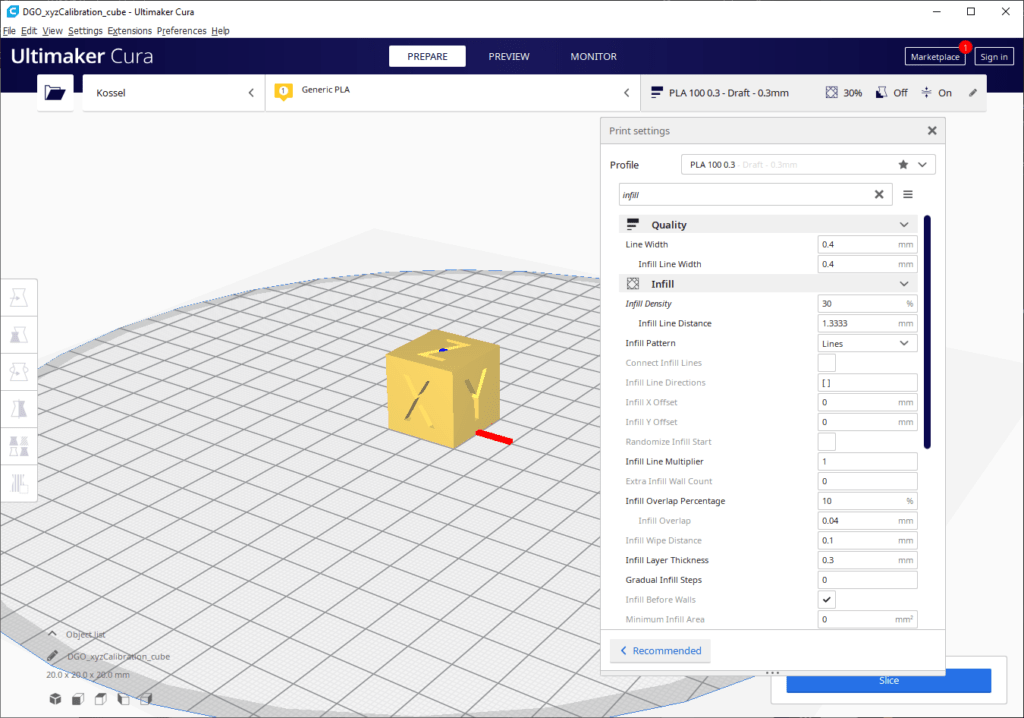
Do not forget to change the infill density to your usual value.
I personally use about 30% for standard 3D models.
If you are not satisfied with your results, you can mess with the pressure_advance value.
The usual value for a bowden setup should be about +- 0.2 your calculated value.
I wanted to show you how much your printing results depend on the value, so have a look at these pictures one by one.
And how to calibrate it?
That is simple….
Just change the value in your configuration file, send it to the printer with a save button in OctoKlipper plugin or with a Firmware button in a case of modifying the file via SFTP.
Print the cube again and check the results.

Why so big numbers?
My printers have for PLA 0.06 Kingroon KP3S Pro S1, 0.08 Kingron KP5L, 0.10 Ender 3 V2 Neo with Titan+E3D hotend.
For PETG add 0.04.
hello again lukas.
i have a question. after upgating to tmc 2209 and BMG Dual Driver Extruder {the one you suggest), printed an one wall calibration cube and i found that i have to put 40% flow in order to print 0.4mm wall (whith 0.4 nozzle).i also made extruder calibration before measuring the fillament etc.
i fount that strange . do you thing is normal?
also i have to mention that i checked your guide for instaalling the bgm extruder and i noticed that if you want to use the original motor with the bgm you have to put the brass gear of the original motor the oposite way because if ton the gear (brass and mlastic) doesnt mess well.(just to inform you )
thanks a lot for all your help again
Hi Lukas,
i ran into a problem with my printer and had strange under extrusion problems at the top layer (gaps between the wall and the skin). I remembered you had similar problems.
Well, i found the reason for my troubles and wanted to share it with you (if your problem still exists):
two screw holder at the upper belt rolls were broken. The anycubic contruction is terrible: the screw head of the roll holder sits too deep inside the ABS frame holder and slowly cracks the plastic of the screw holder. The screw (and the belt roll) gets pushed down on fast moves then.
I fixed it with some old damper collars (Tamiya truck spare parts 😉 ) and 25mm M3s. (here is a picture with the fix: https://imgur.com/rIT1V2G )
Hi there!
Thanks (again) for your great tutorial! I am running a 0.63 PA now. 🙂 You should also give the resonance compensation a try ( https://www.klipper3d.org/Resonance_Compensation.html ). It is a great feature in Klipper.
BTW: You got one typo under the “Modify configuration file”: the cfg line should be called “pressure_advance: 0.5” (“:” instead of “=”). Oh and “Jerk” doesnt work with Klipper.
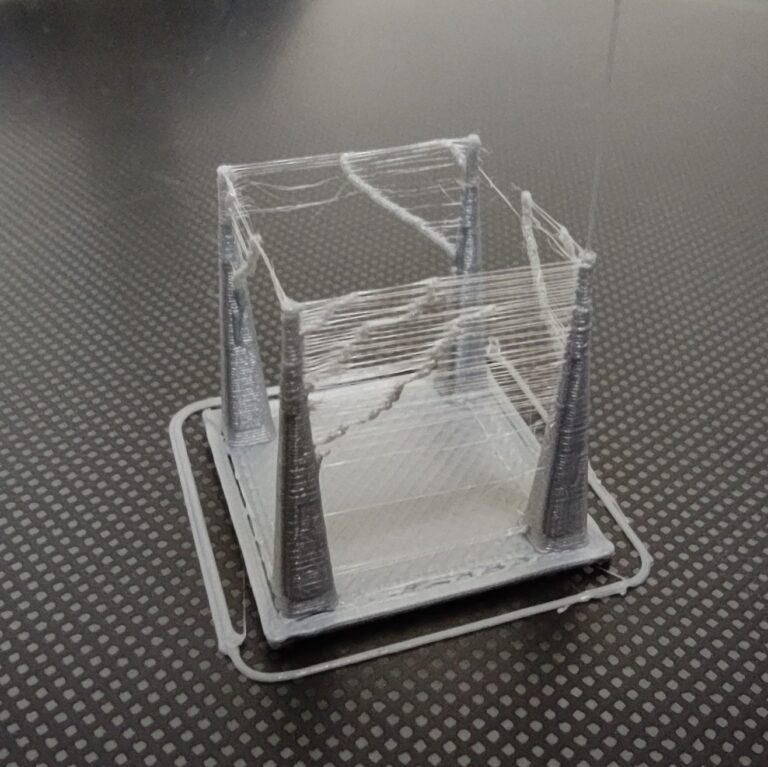
Did you do some testing on the pressure_advance_smooth_time value? I still cant find the right value for my kossel. I print perfect XYZ-Cubes but i have some random extrusion holes in the support structure.
Keep up the great tutorials!
Hi, thank you!
I will edit that typo.
I saw that resonance compensation a few months ago, but I did not have time to make a guide about that, but I will as I see it.
Have you tried it?
I was messing with the smooth time values but not with a good success.
I still had some under extrusion problems between top layer and hole walls 🙁
Hi, thanks for the fast reply!
I use resonance compensation. My values are:
[input_shaper]
shaper_freq_x: 41.8
shaper_freq_y: 54.3
shaper_type: ei
The results were very good. The ringing on clean surfaces is almost gone. I noticed also some ringing on the y-side of your cubes – so give it a try 🙂
Your trouble with the top layer might be a bridging problem (too fast speeds). Turn on the “bridge settings” in cura under the experimental branch and give it a try.
Thanks for the values!
Btw I think that the problem is caused by Volcano + longer bowden tube.
I use 0.8 mm nozzle and it is really hard to calibrate retraction or pressure advance.
Longer and larger nozzle than standard V6 has much higher volume of melted plastic inside 🙁
It was not about bridges, it was a flat surface… Imagine something like a standard cube with a hole from top to bottom.
I could not calibrate pressure advance to work well – it solved issues at the corners, but it created a problem with a missing material between hole walls and the top surface.
I will give it a try on different delta and we will see.
Hi there,
i just wanted to give you a small update on my tests with pa. I ran into a similar problem with a slightly underextrusion on a single wall on a cube with a hole. I did some testing and a small Z-Hop (about 0.5mm) fixed it.
Give it a try 🙂
Thank you!
I will give it a try.