Anycubic Kossel Klipper installation

Anycubic Kossel Octoprint installation
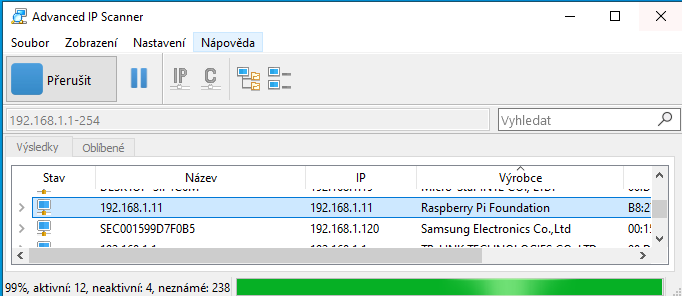
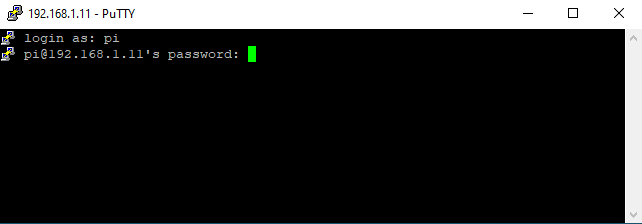
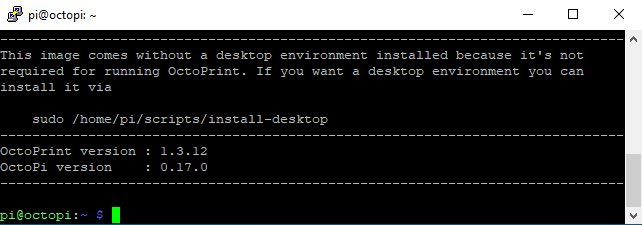
Requirements You will need to buy a Raspberry and get a USB cable to make it work.I recommend buying this set, because it has all you need. ALIEXPRESS CLICK HERE Or you can order just a board and get the ramaining parts elsewhere. ALIEXPRESS CLICK HERE ALIEXPRESS CLICK HERE 1. Download Octoprint First step is installing OctoPi which is a

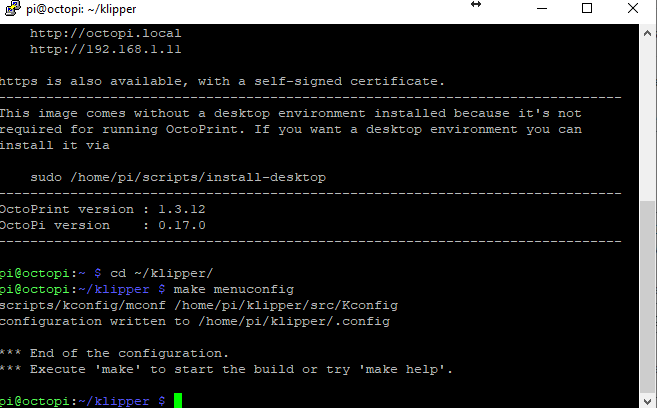
Anycubic Kossel Klipper configuration
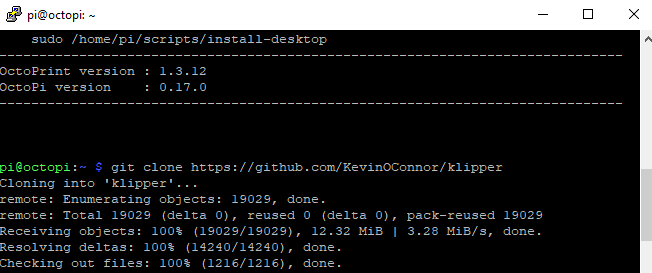
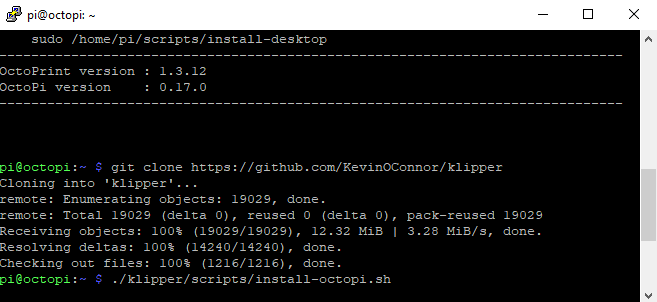
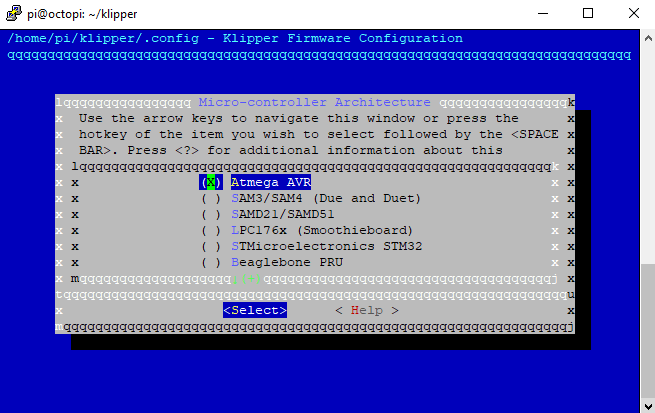
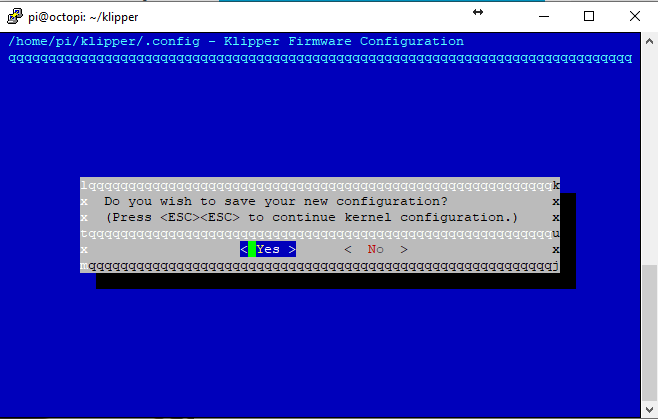
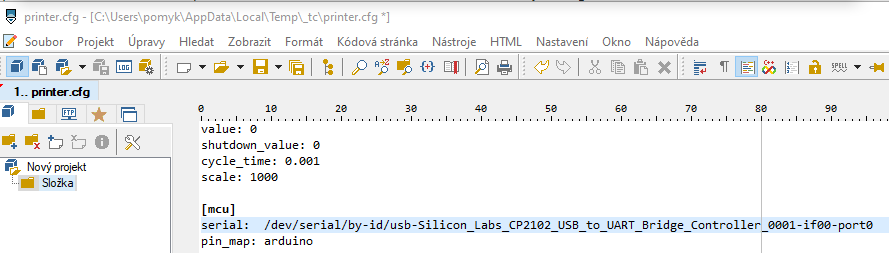
This article will guide you through Anycubic Kossel Klipper configuration. Follow the steps and create your own configuration.Klipper uses printer.cfg configuration file which is something similar to Marlin configuration and configuration_adv files.This file can be easily modified with text editors, such as Pspad, or NotePad and uploaded to Raspberry via SFTP in Total Commander. This article is about stock setup
Anycubic Kossel Klipper upload printer.cfg
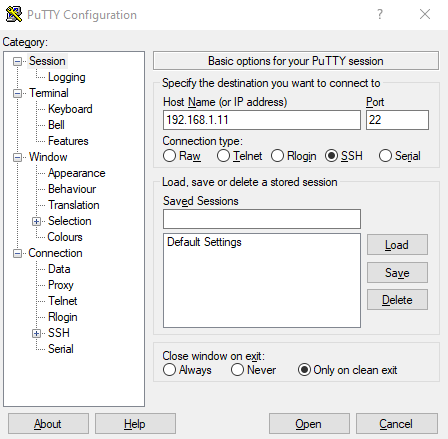
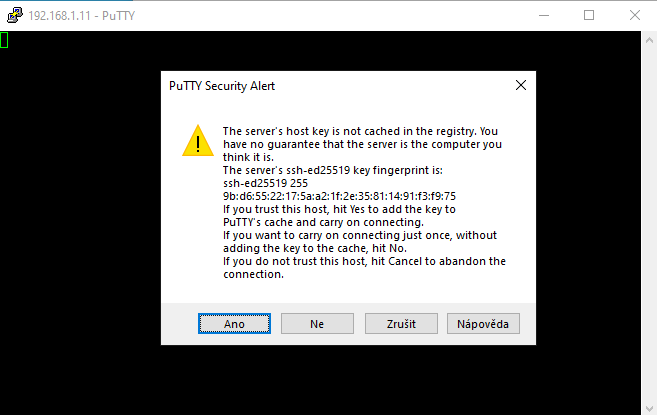
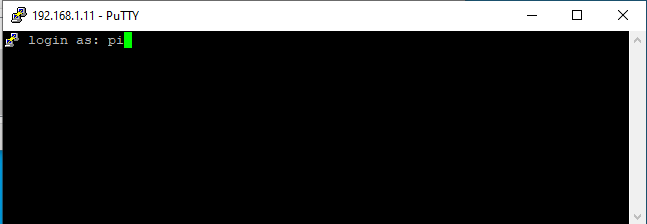
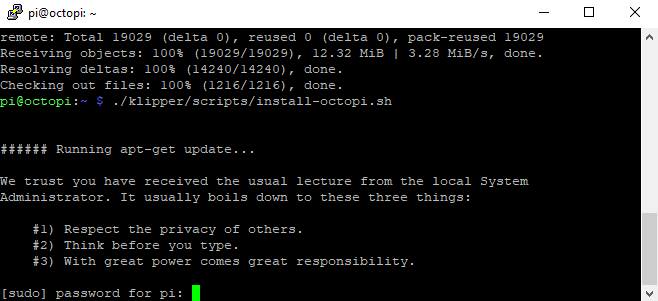
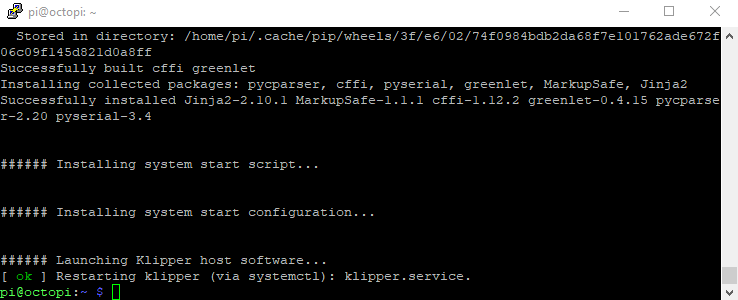
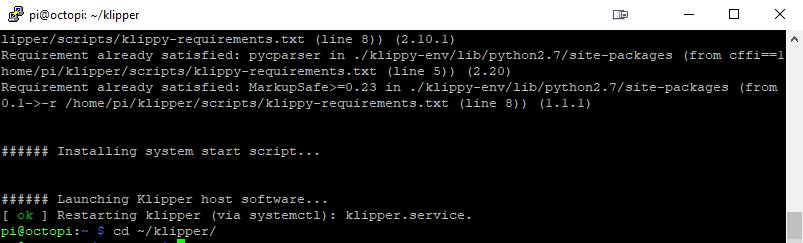
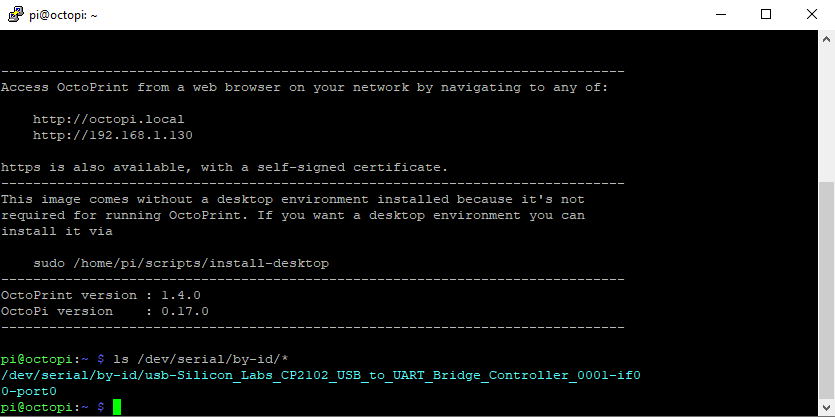
It can be tricky, to upload a Klipper printer.cfg to a Raspberry for those, who have no experience with SFTP. This guide will tell you what you should install, use and how to do that. https://www.klipper3d.org/Installation.html 1. Download and install Total Commander Go to the official Total Commander page and download version for your operating system. DOWNLOAD HERE 2. Install and download


Lukas,
Install Complete. after lots of trial and error I have the mojority of the configuration file put together. I used the CFG file you gave me and corrected all the pin numbers per the pin out found here
https://raw.githubusercontent.com/bigtreetech/BIGTREETECH-SKR-V1.3/master/BTT%20SKR%20V1.4/Hardware/SKR-V1.4-Turbo-pinout.jpg
I connected the Probe to pin P0.10 (Please confirm if that is the correct pin)
the following needs to be corrected. I get errors when it is in the firmware.
[gcode_macro M300]
default_parameter_S=1000
default_parameter_P=100
gcode: SET_PIN PIN=BEEPER_pin VALUE={S}
G4 P{P}
SET_PIN PIN=BEEPER_pin VALUE=0
[gcode_macro dcalibrate]
gcode:
M300
G28
DELTA_CALIBRATE
G28
BED_MESH_CALIBRATE
SAVE_CONFIG
[verify_heater heater_bed]
check_gain_time: 500
[verify_heater extruder]
check_gain_time: 500
max_error: 140
Example of error:
” Option ‘default_parameter_s’ is not valid in section ‘gcode_macro m300’
04:07:18 Option ‘default_parameter_s’ is not valid in section ‘gcode_macro m300’
Once the underlying issue is corrected, use the “RESTART”
command to reload the config and restart the host software.
Printer is halted”
Please advise so I can run Delta Caliberation with Z Probe.
Thanks for your time.
Hi Mario, great job!
Just delete those macros.
Those parameters are only for beeping and delays.
You can still use the commands:
G28
DELTA_CALIBRATE
G28
BED_MESH_CALIBRATE
SAVE_CONFIG
Lukas,
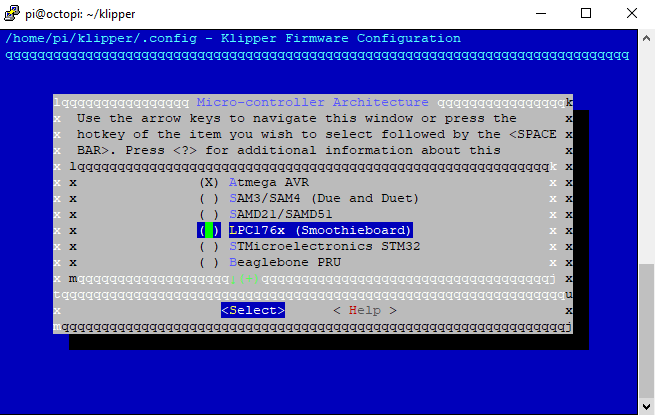
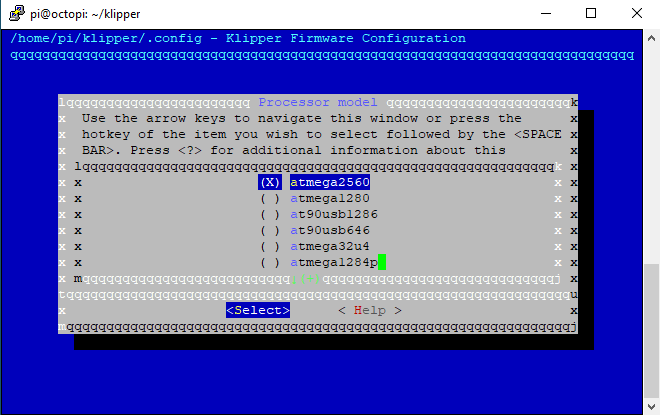
I changed my mind on the Duet Board because I couldn’t find enough info to create a config file for it since it was the original version. I ordered a SKR 1.4 Turbo (Couldn’t find a 1.3). I have a set of Eryone TMC2209 V3.0 Drivers. do I have to modify them the same as the Bigtreetech’s and remove one Pin? also I want to run Klipper. Do I follow the same guide for the Trigorilla besides the selection of board and processor in the make menuconfig?
Hi, follow this guide:
https://www.lpomykal.cz/anycubic-kossel-skr-1-3-upgrade/
And use this configuration file (it is kind of obsolete regarding the rotation distance, so use it from yours.
https://www.lpomykal.cz/download/kossel/Klipper/SKR-TMC2208.zip
Try the same drivers.
just followed the guides you gave me. on my board SKR 1.4 Turbo. do the X,Y,Z endstops and probe connect to the same place as the 1.3?
Do you have a better CFG file that works? if i try and home or anything i get Option ‘rotation_distance’ in section ‘stepper_a’ must be specified
Also The screen on the Printer shows no info.
There is a large difference in the Klipper installation.
SKR cannot be flashed from USB, you have to use the microSD card as can be seen here:
https://www.lpomykal.cz/mellow-flyboard-flyf407zg-klipper-guide/
Thank you. I will follow that guide and install Marlin? Please Clarify try same drivers.
Same that where on Trigorilla with the 3 pins removed (Biigtree TMC2209 V 1.2)?
You can use the SKR Marlin guide for information how to use jumpers and what to do with the drivers.
Continue to the FLY guide for Klipper instalation (just use the SKR configuration I sent you, or from official Klipper GIT repository)
I have things working now for the most part. had to make some changes in the printer.cfg file. however now I am having an issue. the extruder does not respond to extrude or retract comands. I tried to print a calibration circle and right after it homes i get an error Unable to read tmc uart ‘extruder’ register IFCNT. please let me know what to do to fix this.
Hi Mario,
The issue si that there is no UART connection between your extruder stepper and motherboard.
Are you sure tehe 2209 is in an UART mode and you have connected the UART pin properly?
This was a working printer untill i installed new versions of OctoPrint OctoKlipper and reflashed firmware etc.. I will remove the bed and check wires incase something happend.
Lukas,
I tried a few things. none worked. I tried moving the drivers around and swaped wires. evrything works but the extruder. I swaped stepper motors and still nonthing. here is the cfg . do you see anything wrong?
# This file contains a configuration for the Anycubic Kossel delta
# printer from 2016.
# The Anycubic delta printers use the TriGorilla board which is an
# AVR ATmega2560 Arduino + RAMPS compatible board.
# To use this config, the firmware should be compiled for the AVR atmega2560.
# See docs/Config_Reference.md for a description of parameters.
[probe]
pin: ^PD3
z_offset: 16.35
samples: 3
speed: 5.0
sample_retract_dist: 2
[stepper_a]
step_pin: PF0
dir_pin: PF1
enable_pin: !PD7
microsteps: 16
rotation_distance: 40
endstop_pin: ^PE4
homing_speed: 20
# The next parameter needs to be adjusted for
# your printer. You may want to start with 280
# and meassure the distance from nozzle to bed.
# This value then needs to be added.
position_endstop: 290
arm_length: 266.7
[stepper_b]
step_pin: PF6
dir_pin: PF7
enable_pin: !PF2
microsteps: 16
rotation_distance: 40
endstop_pin: ^PJ0
[stepper_c]
step_pin: PL3
dir_pin: PL1
enable_pin: !PK0
microsteps: 16
rotation_distance: 40
endstop_pin: ^PD2
[extruder]
step_pin: PA4
dir_pin: PA6
enable_pin: !PA2
microsteps: 16
rotation_distance: 35.165
nozzle_diameter: 0.400
filament_diameter: 1.750
heater_pin: PB4
sensor_type: ATC Semitec 104GT-2 #EPCOS 100K B57560G104F
sensor_pin: PK5
control: pid
pid_Kp: 25.349
pid_Ki: 1.216
pid_Kd: 132.130
min_extrude_temp: 180
min_temp: 0
max_temp: 275
#if you want to use firmware retraction…
#comment it with hashtags otherwise
[firmware_retraction]
retract_length: 3.5
retract_speed: 30
#unretract_extra_length: 0.1
unretract_speed: 30
#TMC Driver settings
[tmc2209 stepper_a]
uart_pin: PG5
run_current: .8
hold_current: .4
stealthchop_threshold: 250
[tmc2209 stepper_b]
uart_pin: PE3
run_current: .8
hold_current: .4
stealthchop_threshold: 250
[tmc2209 stepper_c]
uart_pin: PH3
run_current: .8
hold_current: .4
stealthchop_threshold: 250
[tmc2209 extruder]
uart_pin: PB5
run_current: 0.95
hold_current: .5
stealthchop_threshold: 250
[heater_bed]
heater_pin: PH5
sensor_type: EPCOS 100K B57560G104F
sensor_pin: PK6
control: pid
pid_Kp: 72.885
pid_Ki: 1.376
pid_Kd: 964.814
min_temp: 0
max_temp: 130
[fan]
pin: PH6
kick_start_time: 0.200
[heater_fan extruder_cooler_fan]
pin: PL5
heater: extruder
heater_temp: 50.0
fan_speed: 1.0
[controller_fan my_controller_fan]
pin: PH4
max_power: 0.6
kick_start_time: 0.2
idle_timeout: 5
heater: extruder
[mcu]
serial: /dev/serial/by-id/usb-Silicon_Labs_CP2102_USB_to_UART_Bridge_Controller_0001-if00-port0
[printer]
kinematics: delta
max_velocity: 500
max_accel: 3000
max_z_velocity: 200
#delta_radius: 130
# if you want to DELTA_CALIBRATE you may need that
minimum_z_position: -20
[delta_calibrate]
radius: 115
speed: 30
horizontal_move_z: 20
[idle_timeout]
timeout: 360
[virtual_sdcard]
path: ~/gcode_files
[pause_resume]
[display_status]
# “RepRapDiscount 2004 Smart Controller” type displays
[display]
lcd_type: hd44780
rs_pin: PH1
e_pin: PH0
d4_pin: PA1
d5_pin: PA3
d6_pin: PA5
d7_pin: PA7
encoder_pins: ^PC6, ^PC4
click_pin: ^!PC2
kill_pin: ^!PG0
[gcode_macro START_PRINT]
gcode:
{% set BED_TEMP = params.first_layer_bed_temperature|default(60)|float %}
{% set EXTRUDER_TEMP = params.first_layer_temperature|default(190)|float %}
M140 S{BED_TEMP} ; set bed temp
M104 S{EXTRUDER_TEMP} ; set extruder temp
# Use absolute coordinates
G90
# Reset the G-Code Z offset (adjust Z offset if needed)
SET_GCODE_OFFSET Z=0.25
G28
#BED_MESH_PROFILE LOAD=default
# Move the nozzle near the bed
G1 Z5 F3000
# Move the nozzle very close to the bed
G1 Z0.15 F300
# Wait for bed to reach temperature
M190 S{BED_TEMP}
# Set and wait for nozzle to reach temperature
M109 S{EXTRUDER_TEMP}
G92 E0
G1 E-4 F1200
G1 E4 F1200
G92 E0
[gcode_macro END_PRINT]
gcode:
G92 E0
G1 E-3 F600
# Turn off bed, extruder, and fan
M140 S0
M104 S0
M106 S0
# Move nozzle away from print while retracting
#G91
#G1 X-2 Y-2 E-3 F300
# Raise nozzle by 10mm
#G1 Z10 F3000
#G90
#Home it
G28
# Disable steppers
M84
[gcode_macro PAUSE]
rename_existing: BASE_PAUSE
gcode:
SAVE_GCODE_STATE NAME=PAUSE_state
BASE_PAUSE
G91
G1 E-{E} F2100
G1 Z{Z}
G90
G1 X{X} Y{Y} F6000
[gcode_macro RESUME]
rename_existing: BASE_RESUME
gcode:
G91
G1 E{E} F2100
G90
RESTORE_GCODE_STATE NAME=PAUSE_state MOVE=1
BASE_RESUME
[gcode_macro CANCEL_PRINT]
rename_existing: BASE_CANCEL_PRINT
gcode:
G92 E0
G1 E-3 F600
# Turn off bed, extruder, and fan
M140 S0
M104 S0
M106 S0
#Home it
G28
# Disable steppers
M84
TURN_OFF_HEATERS
CLEAR_PAUSE
SDCARD_RESET_FILE
BASE_CANCEL_PRINT
########################################
# Home and Calibrating Macros
########################################
[gcode_macro MacroHome]
gcode: G28
#M300
[gcode_macro MovTest]
gcode: g28
G91
G1 Z-1000 F46000
G90
G91
G1 Y+100 F46000
G90
G91
G1 X+100 F46000
G90
G91
G1 Y-200 F46000
G90
G91
G1 X-200 F46000
G90
G91
G1 Z+900 F46000
G90
G91
G1 Z-900 F46000
G90
[gcode_macro DeltaCalibration]
gcode:
M104 S200 ; set extruder temp
M140 S60 ; set bed temp
G28
M109 S200 ; wait for extruder tempG28
M190 S60 ; wait for bed temp
#M300
DELTA_CALIBRATE
#M300
SAVE_CONFIG
#M300
G28
#M300
#M300
[gcode_macro BedMesh]
gcode:
M104 S200 ; set extruder temp
M140 S60 ; set bed temp
G28
M109 S200 ; wait for extruder tempG28
M190 S60 ; wait for bed temp
#M300
BED_MESH_CALIBRATE
#M300
SAVE_CONFIG
#M300
G28
#M300
#M300
[gcode_macro PIDEFanON200]
gcode: G28
#M300
G1 X0 Y0 Z2 F 3000
#M300
M106
PID_CALIBRATE HEATER=extruder TARGET=200
#M300
G28
SAVE_CONFIG
#M300
#M300
########################################
# Nozzle Wipe Macro
########################################
[gcode_macro WIPE]
gcode:
# Use absolute coordinates
#G90
# Reset the G-Code Z offset (adjust Z offset if needed)
#SET_GCODE_OFFSET Z=0.4
# Home the printer
#G28
# Wipe routine
G1 X115 Y-50 Z0.2 F 6000
G92 E0
G4 P2000
G1 E10 F100
G1 Z0.2
G4 P2000
G1 E10 F100
G1 X100 Y-45 Z0.2 F4000
G1 X100 Y-35 Z0.2 F4000
G1 X105 Y-40 Z0.2 F4000
G1 X110 Y-40 Z0.2 F4000
#*#
#*# DO NOT EDIT THIS BLOCK OR BELOW. The contents are auto-generated.
#*#
#*# [printer]
#*# delta_radius = 133.277155
#*#
#*# [stepper_a]
#*# angle = 210.546801
#*# arm_length = 266.700000
#*# position_endstop = 291.281523
#*#
#*# [stepper_b]
#*# angle = 329.589935
#*# arm_length = 266.700000
#*# position_endstop = 291.132459
#*#
#*# [stepper_c]
#*# angle = 90.000000
#*# arm_length = 266.700000
#*# position_endstop = 289.566831
#*#
#*# [delta_calibrate]
#*# height0 = 16.35
#*# height0_pos = 21943.333,21943.333,21943.333
#*# height1 = 16.35
#*# height1_pos = 26987.000,26987.000,19124.000
#*# height2 = 16.35
#*# height2_pos = 21386.333,30171.667,21386.333
#*# height3 = 16.35
#*# height3_pos = 19342.000,26218.000,26218.000
#*# height4 = 16.35
#*# height4_pos = 21243.667,21243.667,27444.333
#*# height5 = 16.35
#*# height5_pos = 25434.000,19477.000,25434.000
#*# height6 = 16.35
#*# height6_pos = 28664.333,21267.333,21267.333
You have the same config I used.
There is an extra servo pin that you can use.
Have a look at this picture:
https://user-images.githubusercontent.com/3864712/76686181-ecb93e00-6619-11ea-8255-a60dd31f4e53.png
And try to use the last servo port.
Table 1 shows you (D – Digital) ports.
After that…
Take a look at ATMEGA pinout for the correct syntax:
https://user-images.githubusercontent.com/33714214/54934776-5a5aee80-4f1f-11e9-91bc-ac32eb10c5de.png
For example:
D4 from servo port is PG5…
If i understood this correctly. I took the wire from the Extruder 2209 disconnected from D12, Put it on D11. In the config Changed PB6 to PB5. Saved and Rebooted. I Homed all, that worked. Extruder does nothing and no error. in Terminal View Shows Gcode M105 and then recv: ok. I made sure wires are good etc.. I also Tried Putting the Wire on D50 Pin in the (ISP) and Changed the syntax to PB3. Did not work either. wasn’t sure how to disable SD Support though. If i understood this correctly. I took the wire from the Extruder 2209 disconnected from D12, Put it on D11. In the config Changed PB6 to PB5. Saved and Rebooted. I Homed all, that worked. Extruder does nothing. I made sure wires are good etc.. I also Tried Putting the Wire on D50 Pin in the (ISP) and Changed the syntax to PB3. Did not work either. wasn’t sure how to disable SD Support though. Should I start over and Re-flash the Firmrware with Putty? or something else. did this board go bad because I tried to install fluid and then back to OctoPrint? should i get another board? if so what one? then id need help putting firmware on it also.
Since I cant figure out how to fix this. I have a Duet WiFi board and screen I purchased several years ago. Still new in the packaging Filastruder sent me. I will Try and get it wired in and go from there.
trying again as i see you have an updated config file. i will let you know if i have any other issues.
Lukas,
I followed your Klipper Guides a few years ago and installed Octoklipper on my Anycubic Kossel Linear Plus with the Trigorilla and TMC2209 with UART. I moved and its been a while, Just set it up to start making some prints. was looking threw your guides and seen you recommended fluid. I followed that guid and had fluid on the Rasberry Pi but the screen on the printer did not boot anymore. Couldn’t figure it out so I put OctoPrint/OctoKlipper back on the Pi. Same thing printer does not boot or load up. when I select Connect i get an error Option ‘rotation_distance’ in section ‘stepper_a’ must be specified I am using your printer.cfg file
04:43:12
Klipper: Standby
04:43:29
Klipper: Connecting …
04:43:30
Klipper: Connected to host
04:43:30
Connected to host via /tmp/printer @0bps
04:43:30
Option ‘rotation_distance’ in section ‘stepper_a’ must be specified
04:43:30
Option ‘rotation_distance’ in section ‘stepper_a’ must be specified
Once the underlying issue is corrected, use the “RESTART”
command to reload the config and restart the host software.
Printer is halted
04:43:30
Option ‘rotation_distance’ in section ‘stepper_a’ must be specified
04:43:30
Klipper: Disconnected from host
I hope you can help me with this as i am exhausted trying to figure this out. probably went threw all these steps 4 times.
Hi sir,
After doing the tutorial, which by the way all the others went smoothly this one I have a problem because when I Flash the printer goes blank.
Greetings and thanks in advance
Hi Eric,
This is the first time I hear about this kind of issue.
Is the screen blank?
Are you able to connect to the printer with your browser?
Hi Lukas,
After running the command “make flash FLASH_DEVICE=/dev/serial/by-id/usb-Silicon_Labs_CP2102_USB_to_UART_Bridge_Controller_0001-if00-port0” it does everything right in the console, in theory once the firware loading is done it should reboot but it doesn’t, I wait a while and reboot the printer manually and that’s when the screen goes blank. It becomes inaccessible.
I have to install Marlin again to get it to work.
The electronics of the printer is original the only thing I have changed has been the bed and Dual Drive Extruder.
Everything else is original.
It takes about 10-20s to boot.
You must reboot both printer and raspberry.
Hi Lukas,
All solved, after doing everything again from reinstalling Octoprint there is the installation of Klipper in your tutorial did not work, the problem was the configuration file.
After checking the log files of klipper
It gives this error:
Error: Pin ‘analog14’ is not a valid pin name on mcu ‘mcu’.
Pin ‘analog14’ is not a valid pin name on mcu ‘mcu’
In heater_bed you have to change to sensor_pin: PK6
And you are done
I hope it helps someone.
I’m getting are error when trying to do the make flash command:
make flash FLASH_DEVICE=/dev/serial/by-id/usb-Silicon_Labs_CP2102_USB_to_UART_Bridge_Controller_0001-if00-port0
RESULT:
Compiling out/src/i2ccmds.o
src/i2ccmds.c:14:23: error: field ‘i2c_config’ has incomplete type
struct i2c_config i2c_config;
^
src/i2ccmds.c: In function ‘command_config_i2c’:
src/i2ccmds.c:23:23: warning: implicit declaration of function ‘i2c_setup’ [-Wimplicit-function-declaration]
i2c->i2c_config = i2c_setup(args[1], args[2], addr);
^
src/i2ccmds.c: In function ‘command_i2c_write’:
src/i2ccmds.c:35:5: warning: implicit declaration of function ‘i2c_write’ [-Wimplicit-function-declaration]
i2c_write(i2c->i2c_config, data_len, data);
^
src/i2ccmds.c: In function ‘command_i2c_read’:
src/i2ccmds.c:48:5: warning: implicit declaration of function ‘i2c_read’ [-Wimplicit-function-declaration]
i2c_read(i2c->i2c_config, reg_len, reg, data_len, data);
Any idea?
Disregard this post. I redid everything and got past this error.
I am glad to hear that.
How does it work now?
Hi Lukas, im runnung a skr 1.3 board with TMC2209.
after entering “ls /dev/serial/by-id/*” i get “/dev/serial/by-id/usb-Klipper_lpc1768_0160001247104AAFF2FE645DC72000F5-if00”
it seems that the usb port is not recognized.
do you have any idea what the problem could be?
thanks
Hi.
There is an easy answer for that.
SKR boards must be flashed via micro SD card.
Co create a file for flash in Klipper and copy it from Rpi to another micro SD card, insert into SKR and you are good to go.
https://3dprintbeginner.com/install-klipper-on-skr-1-3-speed-up-your-prints/
Cheers, I got it to run
You’re an absolute legend!
Hi, thank you!
That is what this page is about.
Btw new Klipper guide will follow this year….
Installed Octoprint and Klipper on my Kossel Linear Plus…
OMG!!!
The print quality is awesome also with the stock hot-end and no reinforcement and so on.
Thank you very much for your guides
You are welcome!
Happy printing.
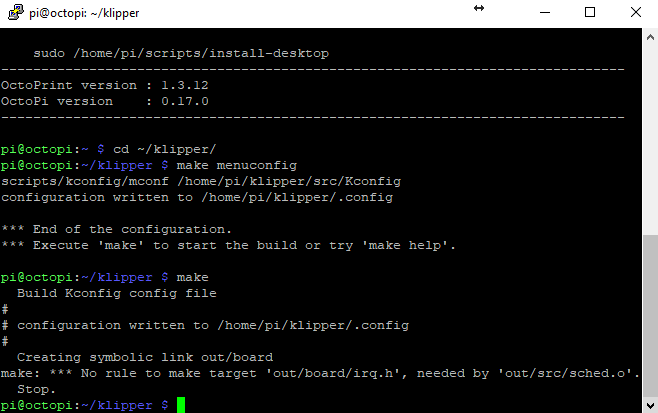
When I run “make” I got an error and run “make clean” and run “make” again but got different lines than the ones you are showing.
Then when running “make flash..” it’s timing out .
I tried multiple time without success
I have the Trigorilla stock board and downloaded your printer.cfg for it.
Thanks
Send a screenshot of those different lines and errors.
If running
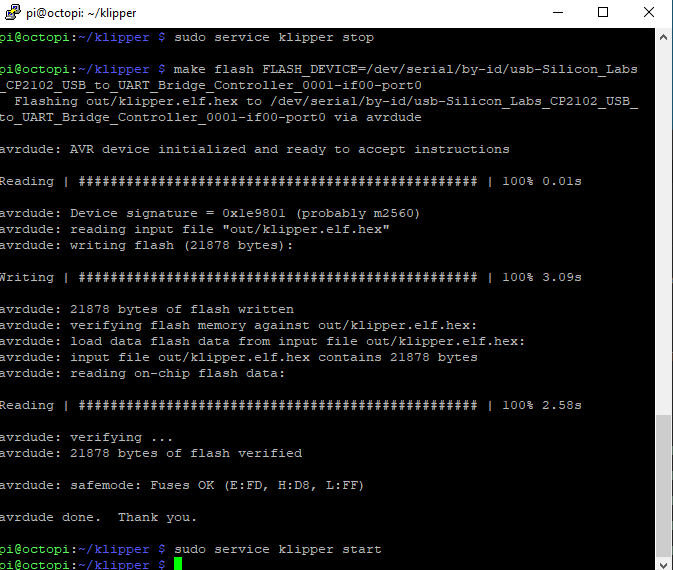
make flash FLASH_DEVICE=/dev/serial/by-id/usb-Silicon_Labs_CP2102_USB_to_UART_Bridge_Controller_0001-if00-port0
fails, try running it a second time! It failed for me the first time with timeouts.
If you get
make
Compiling out/src/i2ccmds.o
src/i2ccmds.c:14:23: error: field ‘i2c_config’ has incomplete type
struct i2c_config i2c_config;
run make clean, and then make again.
Thank you for your great tutorial(s). They have been a great help.
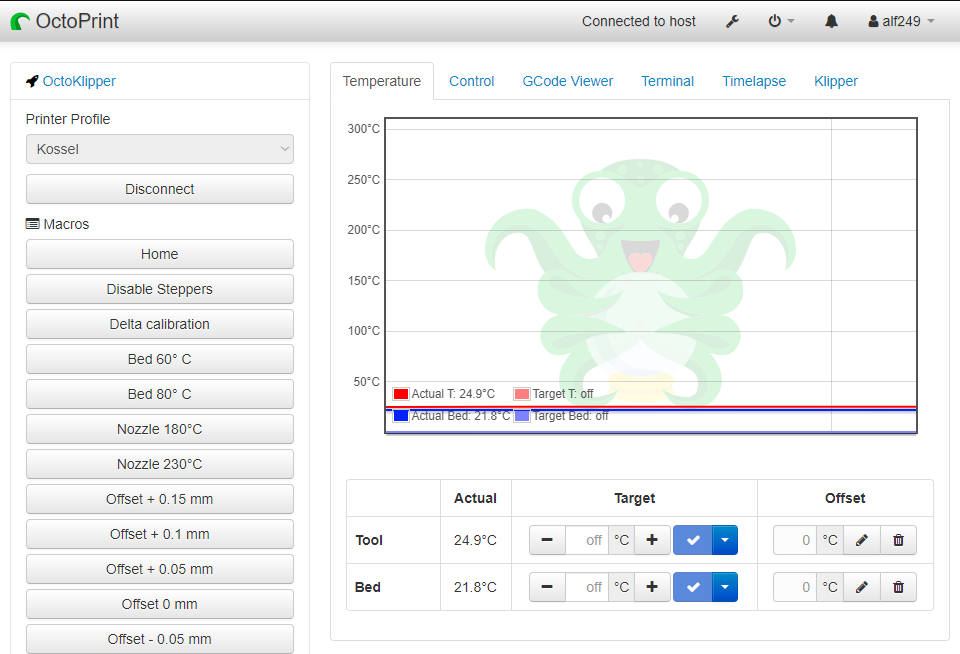
Maybe you could add some information about the settings in octoprint -after- a done the klipper firmware update. My printer was unreachable and i fixed it with the right [MCU] value in my config.
Take a look here:
https://www.klipper3d.org/Installation.html —> “Configuring OctoPrint to use Klipper”; “Configuring Klipper”
Hi, thank you for your feedback, I really appriciate it.
I have installed a long time ago, but you are right, this should be also mentioned, I will add 🙂
i cant connect my raspi(octoprint/klipper) to trigorilla board… it’s say connection timeout.. how to fixit?
Some more info?
Is the Trigorilla on, is the PSU on?
How did you connect it… in which step did his happen?
More info…
This build and updates has been a great learning tool for me. I’ve done some mods and upgrades to other printers but this one has taught me the most methods versus the just get it done style. I appreciate you.
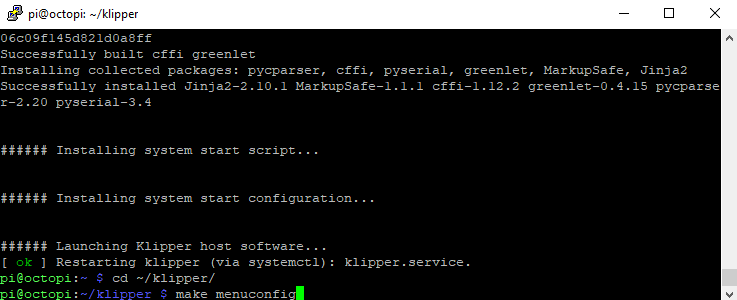
I do have one question that keeps holding me on what I think is the next step. On the klipper config – the part where you say “A weird looking window will appear.
Now it is the time to select your board.”
The first option, do I TICK(x) that option, this gives me the board speeds and baud I believe, if I do not tick that option, I no longer get a configuration SAVE option. I can tick (select it) or then remove to get the save option but i just wanted to be clear. I also get options to use GPIO etc in that area.
Thanks
Dobrý den, po pokusu o instalaci klipperu se octoprint nedokaže připojit k tiskárně. Tiskárna zamrzla a zobrazuje jen bílé bloky, nejde ani připojit k pc. proste naprosto zamrzla. Nevím si rady s nápravou. Prosím tedy o pomoc.
You have probably choosen incorrect usb port.
Does it connect via Octoprint?
Did you try to reboot Raspberry and Kossel at the same time?
Yes, all this I did. In the end I managed everything else on FW goods. I will study everything and try again. In the last phase before I lost my nerves, I got so far that octoprint only voted the wrong probe configuration (9.9). Just starting out so not everything is clear to me. but thanks to your site.
I will have to do some modification on that SKR file.
You just need to modify probe count from 9 to 5 and it should be OK.
Does this clount as well for the Raspberry?
Sorry, but I do not understand you.
What “this” means?